Sunday, July 31, 2011

Tomato Patch: Learning by Picking at "Breaker Stage"

"Breaker Stage" tomatoes when picked
My “breaker stage” tomato-picking experiment is progressing nicely and I’m learning as I go. I picked four less-than-ripe tomatoes last Monday (July 25) just before arrival of showers that I thought might cause the fruit to split. I took the tomatoes inside and let them continue ripening on our kitchen counter until Friday (July 29).

Photo 1 shows the four tomatoes when I picked them on July 25. Back row: Brandywine Red, Brandywine (Sudduth’s Strain), and Virginia Sweets. Front row: Big Mama and a common cherry tomato, Sungold. I added the Sungold to give an idea of the comparative sizes of the fruit. The Sungold within a day disappeared in a sudden gnashing of my teeth, and the Big Mama surrendered peacefully to a slicing knife on Thursday evening when Ellen and I were making sandwiches.

"Breakers" four days later
The three biggest tomatoes slowly ripened for four days on our kitchen counter, where the temperature was approximately 78°F. Photo 2 shows them just before we sliced them for lunch on Friday (July 28), and Photo 3 shows slices just a few minutes later.

How did they taste? Did they have the exciting flavor of vine-ripened tomatoes—as my earlier posting suggested would be the case? Or were they “off flavor” or even as tasteless as the tomatoes we’re accustomed to bringing home from the supermarket?

I was particularly interested in seeing how the Brandywine (Sudduth’s Strain) and the Virginia Sweets, both heirlooms varieties, ripened inside. Over the years I’ve “lost” many of that pink Brandywine because I stubbornly let them hang on their vines while I waited for their color to intensify. I wanted a deep pink, I suppose—but the fruit often cracked and rotted before I decided to pick it. Conventional wisdom says heirloom tomatoes ripen internally before they appear ripe externally.

The Virginia Sweets is a new variety for me this year, and I didn’t really know what it would look like when ripe. Its seed packet describes mature fruit as “gold-red bicolors” and “golden yellow beefsteaks … colored with red stripes that turn into a ruby blush.” Just what would that look like out in the garden?

Sliced "breakers"
So cut and sample we did. All three tasted great. I’ve frequently grown Brandywine (Sudduth’s Strain), and Ellen and I both thought it was as mouth watering as one ripened on the vine. The Brandywine Red tasted nearly as good as the Sudduth’s Stain, but was “juicier” and not as solid as the Sudduth’s. The meat of the Virginia Sweets was mostly yellow, but it tasted more like a red tomato than a bland “low-acid” yellow.

However, I’ve learned a few things during this experiment.

First, I’ll pick tomatoes even earlier—when they’re just beginning to add color and before they are “nearly ripe” or show any signs of cracking or other problems. The Brandywine Red was almost too ripe by the time I sliced it. The Sudduth’s Brandywine had begun to crack on the vine, and the crack widened as it ripened in the kitchen, so I had to dispose of more of the “meat” that I wanted to eat.

Second, I will start slicing heirlooms, such as the Brandywines, before they look absolutely ripe on the outside. I’ve accepted the conventional wisdom that they are ripe inside before they look ripe.

When I was preparing to take a picture of the tomatoes, I happened to think that I’ve never weighed tomatoes. I grow them to eat, and eat them we do. But just to see how much they weighed, I got out a simple kitchen scale. Here are their approximate weights:

Sungold, not large enough to accurately weigh.

Big Mama, 5 ounces (140 g). (This is a small Big Mama according to the Burpee catalog description.)

Brandywine Red, 15 ounces (425 g).

Brandywine (Sudduth’s Strain), 1 lb 1 oz (480 g).

Virginia Sweets, 1 lb 9 oz (800 g). Yes, that is one large tomato, impressive even while hanging on the vine.

Have you picked tomatoes before they were fully ripe? If you have, please post a Comment about how picking at breaker stage works for you and how you think the ripened fruit tastes. Does it taste as good as vine-ripened fruit? And if you grow heirlooms, share a tip about how you tell when they’re ripe?

Grow it. Experiment. Eat it. Comment.

P.S. If you didn’t read my earlier posting about picking tomatoes at breaker stage and want more information, CLICK HERE.

Thursday, July 28, 2011

Higgins: Beware of the Garden Police

 Have you read about the mother who was arrested for planting a veggie garden?

Well, the veggie garden was in her front yard, and a local ordinance in a ritzy Detroit suburb required front yards to be of “grass, ground cover, shrubbery or other suitable live plant material.” Apparently vegetables weren’t “suitable live plant material.”

Don’t get too upset because the case was dismissed. But such laws abound. And this week’s “Gardening” column by Adrian Higgins of the Washington Post takes a look at the controversial issue of front-yard gardens.

Please note that I disagree with one of Higgins’ statements, that homeowners associations are an “extension of local government.” He calls them the “ace guardian of landscape behavior,” which is “right on.” Homeowner associations enforce private covenants governing use of property within their jurisdiction, but they are private organizations, not extension of government. Perhaps you’ve read new stories about such associations trying to enforce covenants that prohibit homeowners from flying the flag, putting up crèches or Christmas lights, or painting front doors a prohibited color.

To read Higgins’ article, CLICK HERE.

Damrosch: Tricks to extend gardening into cold weather

Yes, the temperature was above 90°F Thursday afternoon, and the forecast for Friday is for the high 90’s plus heat index in the low 100’s. But we know “average” summertime temperatures are in slow decline now, and that frost will kill our tender vegetables in about 10 weeks.

Cooler weather is on its way, but Barbara Damrosch, the “A Cook’s Garden” columnist in the Washington Post, this week challenged gardeners to focus on the opponent—the coming winter—and tells what’s in her “bag of tricks” to keep things growing in her vegetable garden until the inevitable deep freeze.

So grumble a bit about the heat and humidity—and then read Damrosch’s article to see how you too might garden on as the temperatures slowly fall toward the deep freeze. CLICK HERE.

Wednesday, July 27, 2011

Tomato Patch: How to Save More Tomatoes

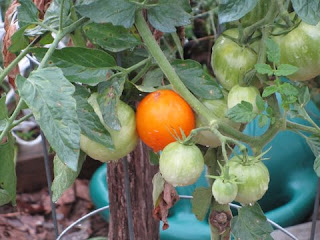
Should I pick this partially ripe Brandywine Red?
Do your heirloom tomatoes crack and get moldy before you think they’re ripe enough to pick? Do your cherry tomatoes all but split before your eyes the day after it rains? Do brown marmorated stink bugs and birds start eating your ripening tomatoes before you do?

Then read on to learn what I’ve just learned—and maybe your heirlooms will split and mold less, you’ll harvest your cherries before they split, and you’ll eat more of your tomatoes before the stink bugs do.
Here’s the story of what I learned last week that is changing the way I think about picking my tomatoes:

When I picked tomatoes for 10¢ a basket as a teenager in southern New Jersey, farmer Joe Uhland set the picking rules: the red fruit must be fully ripe and without major blemish or piece of stem—or the canning company would downgrade the load and Joe would be paid less. For nearly 60 years since Joe set the standard, I’ve been picking tomatoes when they’re fully ripe.

This bit of ancient wisdom, however, got a jolt last Thursday when I was researching on the Internet about the effect of extreme heat on tomatoes. I discovered a posting that directly challenged my belief that I should pick only fully ripe tomatoes. I laughed out loud when I read it. I was astounded—but it made sense.

This eureka moment came when I read a Kansas State University Research & Extension posting titled “Hot Weather Threatens Tomato Plants” and a sidebar caught my attention: “Harvested Tomatoes Can ‘Vine-Ripen.’” I’ll post a link below so you can read the posting if you wish, but here are the main points made by Chuck Marr, a Kansas State University horticulturist, now retired (with my additional comments in parentheses):

1. Tomatoes at full red-ripe stage have optimum nutrition, color, and flavor, but they don’t have to be on the vine to reach that point. (Let’s assume this applies to tomatoes of all colors.)

2. Tomatoes start producing ethylene gas internally when they reach full size and turn pale green from their earlier dark green. The ethylene regulates the ripening process. (Tomato growers in Florida, for example, gas their dark-green fruit with ethylene to turn them red in winter, so we can have beautiful red tomatoes that taste like green ones.)

3. When the tomatoes reach the “breaker stage”—about half green and half pink—“a layer of cells forms across their stem, sealing them off from the main vine. At this state, tomatoes can ripen on or off the vine with no loss of quality or flavor,” Marr explained. (If the variety produces a color of fruit other than red, determining “breaker stage” may be more challenging.)

4. Pick tomatoes at “breaker stage” and you can let them ripen slowly in a cool place—minimum of 50°F—or more quickly at higher temperatures—up to 85°F—( such as on your kitchen counter.) They will not ripen in your refrigerator (where the temperature is below 40°F).

Wow! After I got over the initial shock, I thought of several problems that “picking early” might solve:

1. In extreme hot weather, some red-tomato varieties stop making red pigments at about 95°F, so the fruit can be fully mature when it’s yellow-red. If you wait for the fruit to turn deep red, the fruit may begin to spoil before you decide to pick.

2. Some large-red varieties, including many heirlooms, tend to split when near ripe and often begin to mold or have other problems. If you pick them before they reach this problem stage, you will harvest better quality fruit. This has happened already this season in the Tomato Patch. A gnarled Brandywine Red split at its blossom end before it was fully ripe and began to mold. I tried to salvage some of the ripe fruit but had to discard most of it. Picking early may avoid the splits and the mold.

3. Many cherry tomato varieties are known to split—and begin a quick decline in quality—after it rains. One of my favorites, Sungold, does that regularly. It rained here Monday afternoon, and by Tuesday morning many of the ripening Sungolds already had split. Picking early may avoid such splits.

4. I admit I sometimes don’t know when the fruit of a particular variety is fully ripe. I grow Brandywine (Sudduth’s Strain) and often wonder how “pink” the fruit must be to be ripe. And how do I know when a Virginia Sweets is ripe? It’s described on its seed packet as a gold-red bicolor and a “golden yellow beefsteak … colored with red stripes that turn into a ruby blush.” Picking early may help me monitor the fruit as it ripens on our kitchen counter.

5. Think of all the critters that like to dine on tomatoes, from insects, such as the tomato-sipping brown marmorated stink bug, to traditional harvesters such as birds, squirrels, and the occasional box turtle. Picking early may mean I will enjoy my tomatoes more than they will.

Should I put so many tomatoes in one basket, so to speak, just because one posting by one horticulturist says I should pick earlier?

I did a quick Internet search about when to pick tomatoes. Many postings followed the traditional rule to pick only fully ripe fruit, but several others pointed out that wasn’t necessary. One, the Aggie Horticulture site of AgriLife Extension (Texas A&M University), gave this reply to a question about leaving fruit on plants until fully ripe: “Generally, yields will be increased by harvesting the fruit at first blush or pink instead of leaving them on the plant to ripen fully. A tomato picked at first sign of color and ripened at room temperature will be just as tasty as one left to fully mature on the vine.”

I’m “three score and 10 plus” years and still learning new things about picking and growing tomatoes, but perhaps that challenges of gardening what makes it so attractive, even to ancient gardeners.

I’m going to start experimenting by picking “breaker stage” tomatoes, and I think you should too. If you do, be sure to come back and Comment about how it works for you.

If you want to read the Kansas State University posting, “Harvested Tomatoes Can ‘Vine-Ripen,’” CLICK HERE.

Monday, July 25, 2011

Pulling the Devil's Hair

What's that--a piece of yellow string? 
Have you found any devil’s hair in your garden?

The devil has been primping in our garden. I know because I’ve found devil’s hair. Devil’s hair has other common names that indicate the fear it engenders wherever plants are grown, including devilgut, devil’s ringlet, hell bind, stranglevine, and strangleweed.

This plant isn’t a positive addition to any garden, except, perhaps, one where sulfur fumes waft from brimstone pits and temperatures are significantly higher than those of Mid-Atlantic Summer 2011. Devil’s hair is dodder (Cuscuta spp.), of which 10 of the world’s 150 varieties grow in Maryland, according to USDA maps online.

A tangle of devil's hair
“Grow” somehow doesn’t seem like the best verb to use with this parasitic plant—which has leaves that usually are more like scales, often nearly invisible. It has little or no chlorophyll so must attach itself to a host plant to suck nourishment within a few days of sprouting—or it dies.

“How did that yellow string get into our bed of moss phlox?” I thought when I first saw the parasite. I looked closer and found the string was tightly twined around phlox stems and was blooming, with small white flowers.

This string is not welcome in farm and garden country because its hosts include such food crops as asparagus, beet, carrot, eggplant, garlic, melon, onion, pepper, potato, sweet potato, tomato, plus a wide variety of other plants ranging from chrysanthemums and azaleas to alfalfa, clover, and legumes.

Moss phlox strangled by blooming dodder
Dodder can be a real hell bind in large agricultural settings, but in a relatively small home garden its control usually is relatively simple: hand pulling the devil’s hair before it goes to seed, pruning parts of hosts that it’s strangling, and treating this year’s dodder areas next spring with a pre-emergent herbicide to eliminate a new crop.

I’ve pulled every piece of the blond devil’s hair that I can find, but I suspect I haven’t got it all in the tangled mass of moss phlox. I’ve sprinkled some Preen, a pre-emergent herbicide, in the general area to prevent any remaining seeds from sprouting this year, and I’ll put down more Preen next spring.

I’ve been checking the moss phlox every few days and discovered that the dodder comes back quickly. I’ve learned that “pulling” the dodder doesn’t solve the problem if I leave remnants with roots embedded in the stems of the host plant. I’ve gone back twice with my pruners to cut off regrowth of the dodder an inch or so below where it has a stranglehold on the phlox.

This is the kind of problem that will take vigilance to solve, so whenever I walk by the moss phlox, I’ll pause to inspect to make sure there are no new strands or tangles of devil’s hair.

If you have a minute to look at some fantastic dodder photos, CLICK HERE to access the website of the dodder page of the Biology Department of Swarthmore College.

Sunday, July 24, 2011

Tomato Patch: How Tomatoes React to Extreme Heat

When the forecast predicts the temperature will approach 100° F, I water the Tomato Patch just after dawn and, usually, soaked to the skin with sweat, retreat to the shower and then breakfast with Ellen. Throughout the day I check our digital thermometer and wonder how my tomatoes are coping in the heat.
Extreme heat—such as the 106°F officially recorded at nearby BWI Thurgood Marshall Airport on Friday afternoon-- affects tomatoes in several ways.

One is that high temperatures can cause “tomato blossom drop.” In a posting of that title, about.com describes the problem as where tomato blossoms “dry up and fall off the plant before a fruit is formed.” The posting explains: “Tomatoes grow best if daytime temperatures range between 70 F / 21 C and 85 F / 29 C. While tomato plants can tolerate more extreme temperatures for short periods, several days or nights with temps outside the ideal range will cause the plant to abort fruit set and focus on survival. … High nighttime temps are even worse than high daytime temperatures because the tomato plant never gets to rest.”

Perhaps there’s not a specific temperature at which blossom drop begins. Online postings state general figures, like the about.com statement above, ranging from 85 to 95 degrees. The point is that high temperatures can interfere with tomato fruit production. Since our local temperature reached 106°F on Friday, I’ll mention that a University of Nevada website said a 104°F temperature for as little as four hours will cause blossom drop.

Yellow Plum tomato leaves respond to high temperatures
Another tomato response to extreme heat involves its leaves. Perhaps you’ve noticed that some tomato varieties respond to heat by curling their leaves. That’s a defensive mechanism that attempts to slow transpiration of water from plant to atmosphere.

But extreme heat can cause more than leaf curling. In a posting titled “Excessive heat on tomato plants,” ehow.com describes what can happen: “The damage done to a tomato plant in excessive heat can include wilting stems and leaves that become dried and brittle. Also, the tomatoes themselves can be damaged. Their growth can be halted with excessive heat. Even if they look ripe, tomatoes that have been exposed to intense heat can be red outside and green inside.” Other sites mention that tomatoes often stop making red pigments at high temperatures, so red varieties under extreme conditions may turn pink or orange-red, rather than red, when they ripen.

Despite the extreme heat and its adverse effects on the Tomato Patch, there are still reasons for hope. A horticulturist with the Kansas State University Research and Extension commented about blossom drop: “You can’t do anything to prevent it, although some varieties are more prone to blossom drop than others. If you can keep the plants alive and healthy, however, they’ll put out new flowers that produce fruit when cooler weather returns.”

So if your plants suffer blossom drop, don’t despair! Make sure your plants are well mulched and deep-watered, and when cooler weather returns, your plants will start flowering and setting fruit again, hopefully with enough time to produce ripe fruit before fall frost.

Ah, cooler weather—when is that coming?

I thought you’d never ask.

Cooler weather, on the average, begins today!

Let me explain. Several years ago, I found a tab at weather.com that allowed me to research and print out daily average temperatures for Dayton, Maryland, the nearest town for which statistics were available. I printed out the averages (since 1967 apparently) for both high and low temperatures for the entire year.

The highest average high temperature for this neighborhood is 88° from July 18 to 23. The average drops one degree, to 87°, on July 24, which is today. Our highest average low temperature is 64° from July 17 to 26, and our nighttime temperatures will drop one degree on Tuesday.

Now doesn’t the fact that, on average, cooler weather begins today make the recent extreme heat wave seem just a bit more tolerable?

Let’s hope—for the sake of our tomatoes and our electricity bills—that average temperatures soon return.

Thursday, July 21, 2011

Damrosch: Don’t Hoe Weeds—Eat Them

Why slave away weeding your garden when you can eat many of those weeds?

In her “A Cook’s Garden” column in today’s Washington Post, Barbara Damrosch lists common weeds that—with a little oil and some seasonings—make for good, tasty eating.

“Growing right under everyone’s noses, all over the world,” Damrosch writes, “are plants that are powerhouses of nutrients, often superior to the cultivated greens that farmers are paid to grow.”

To read Damrosch’s article, CLICK HERE.

Beautiful "Worms" on Our Dill

A beautiful "worm"


It’s time to start looking for big green, black, and gold “worms” chomping away on the flowers and leaves of your dill and other herbs and  vegetables.

No—your first thought of killing them doesn’t get thumbs-up here because the “worms” are more good than bad. They are bad in the sense they’ll eat some of your dill and parsley—and maybe some of the foliage of your carrots and celery too—but they are good because they are caterpillars or larvae of the black swallowtail butterfly (Papilio polyxenes). Parsley gives both the caterpillar and the adult their nicknames, “parsley worm” and “parsley swallowtail.”

Four larvae on one dill flowerhead
I found our first caterpillars on Tuesday—15 of them on our dill plants. When you find one, don’t bring out the heavy artillery. Share a little of your veggie leaves with the caterpillars. Share a minute with a “worm” as it munches on the foliage. By sharing your dill or parsley, you’re helping complete the life cycle of the beautiful black swallowtail.

And as the summer wears on, let some of your dill go to seed, so you’ll have volunteer plants next year to add both herbal essence and food for the black swallowtail caterpillars to your 2012 garden.

Take a second look at the “worm.”

Beautiful, isn’t it?

If you kill a "worm,"
you won't have one of these

Tuesday, July 19, 2011

Blue Cucumber Seeds?

Blue cucumber seeds


Surprise! When I tapped cucumber seeds into my hand from their packet, they were bright blue.

Hmm. Am I growing blue cucumbers this year? What’s going on here?

I took a closer look at the packet, which I had bought from Johnny’s Selected Seeds. This warning appears at the bottom of the packet front: CAUTION: SEED TREATED WITH THIRAM. DO NOT USE FOR FOOD, FEED OR OIL.

Later I checked Johnny’s catalog and noted that the Diva cucumber seeds were available “Treated” or “Untreated.” The “Glossary of Terms” in the catalog explains: “Treated—Seeds that have a coating of fungicides and/or insecticides intended to protect the seeds from rotting or insect damage in the soil before germination.”

A quick check on Wikipedia informed me that thiram is an organic, sulfur-based fungicide with many agricultural uses, including use as an animal repellent. The Wikipedia entry on the fungicide said thiram “is nearly immobile in clay [typical central Maryland soil] or in soils of rich organic matter [your garden]. It is not expected to contaminate groundwater because of its in-soil half life of 15 days and tendency to stick to soil particles.”

Why the packet warning? Wikipedia said thiram is “moderately toxic” if you eat it and “highly toxic” if you inhale it.

Why does a “white to yellow crystalline powder” end up as a blue coating on a cucumber seed? Perhaps it’s another warning that something is different and should be checked out. Would a more appropriate color be red?

If I reorder Diva cucumber seeds next year, I’ll have to consider whether I want to buy treated or untreated seeds. I suppose the amount of thiram on the seeds is so small that I should have no major concern, but, still, do I want to introduce another toxin—however beneficial—into my garden?

Note: I queried Johnny’s about thiram on July 3 and have not yet received a response.

Monday, July 18, 2011

Tomato Patch: The Killers Are Back

Male cicada killer "on guard"


I ducked involuntarily as a big “something” buzzed my head as I was weeding in the Tomato Patch.

An inquisitive hummingbird? A wren parent distracting me from a nearby fledgling? A pterodactyl?

No, it was just a killer—a large wasp known as the cicada killer.

Perhaps you’ve seen them—black-and-yellow wasps (Sphecius speciosus) that zoom with jet-like speed and dig nickel-size holes in the ground. They’re of a size—an inch and a half long--that causes insect haters to panic when one flashes by or rearranges hair on the top of your head as it hovers an inch above. They’re common throughout North America and often live on forest edges and city parks—plus in the Tomato Patch and flower gardens here at Meadow Glenn.

Nesting site in Tomato Patch
National Audubon Society Field Guide to Insects & Spiders (North America) indicates adults feed on nectar and larvae feed on cicadas, though from reactions I’ve observed when a killer buzzes a visitor, they may as well be vampires looking for a soft neck.

The male killers stake out breeding areas, sometimes called leks, from perches on plants, bricks, or stones, sort of like fighter jets sitting at the ready on an aircraft carrier. I’ve walked by them and been “buzzed” hundreds of times, but never stung. The reason is simple: The aggressive male guards don’t have stingers. Please don’t tell my friends that because they think I’m super brave as I nonchalantly walk by as the killers zip and zoom around me.

For two weeks now the male killers have been doing aerial combat as they stake out territories in and around our gardens and sidewalks.

Here’s how the Audubon guide describes what cicada killers are up to: “Several females work together to build nest of branching tunnels in light clay to sandy soil, making 2 or 3 cells at end. Front legs are used for digging, hind legs for kicking out dirt. Nest entrance is usually left open, while females hunt cicadas one at a time. Each victim is stung and carried back to nest. 1-2 cicadas are placed in each cell; 1 egg is laid on last one.”

Tunnel entrance with fresh "kickings"
I’ve already found two tunnel entrances in our Tomato Patch. One was behind a piece of slate that I had leaned against a terrace wall, and the other was angled through straw mulch and into the side of a hill I’d built up around plants. I’ve found five or six more entrances in other gardens—under lamb’s ear leaves, blanket flowers, blue star junipers, moss phlox, the watering hose, and sidewalks.

I’m a live-and-let-live sort of a guy, so I accept the presence of the cicada killers—except those in areas where they terrorize visitors or where I work daily and am in danger of seriously offending them. I’ve “puffed” some Sevin into the entrances of the tunnels in the Tomato Garden and several along our sidewalks.

When I was weeding in one of our veggie patches yesterday (Sunday), a female cicada killer landed about four feet from me with a paralyzed cicada under her. She became confused because, I suspect, I had just hoed shut the entrance to her tunnel. Then like a mighty helicopter lifting a huge truck, she flew the cicada to what she thought was the trunk of a nearby tree—apparently so she could look over the situation, locate her tunnel entrance, and let gravity help her fly her baby food into her nesting chamber.

The tree trunk, however, was the black leg of my denim work pants, and she started to drag the cicada up my left pants leg. When she got to my knee, I shook my pants leg and she fell off, dropping the paralyzed cicada. She flew around the cicada, grabbed it again, and tried to fly it to the “tree trunk” again.

She may have thought my denim pants leg
was a tree trunk
I backed away before she landed, and she crashed with her load on the sidewalk. I snapped a photo and she dragged her prize toward my shoe for the third time. I retreated and she turned course and dragged the huge bug up a nearby retaining wall and disappeared into a bed of lilies.

I am not surprised to report that I am alive and well. Though they can sting, female cicada killers seldom are aggressive, and this one was clearly preoccupied with carrying the paralyzed cicada to her nesting cell. I never felt in danger. In fact, after the encounter, I felt just a bit sad that I may have seriously disrupted her reproduction cycle.

Thursday, July 14, 2011

Tomato Patch: Brush Your Tomato Blossoms?

Would you really do this?


Did you brush your tomato blossoms today?

Patterson Clark’s “Urban Jungle” feature, “Plight of the bumblebee,” in the Washington Post this week reminded me of the continuing discussion about how tomato plants are pollinated.

Patterson’s first paragraph sets the stage: “That tomato ripening in your garden probably got its start after a visit from a bumblebee.” He calls bumblebees “buzz pollinators” that “will clinch a flower in its jaws and rapidly vibrate its wing muscles to give the blossom a good shake” to dislodge pollen that the bee collects. In the process, the tomato flower is pollinated and fruit formation begins.

That’s an important part of the tomato pollination story, but bumblebees aren’t the only “buzz pollinators” at work in the Tomato Patch. In fact, “sonication” is a more accurate word to describe the vibrating process that loosens the pollen in the male part of a tomato blossom and allows it to come into contact with, and fertilize, the female part of the same blossom.

Other than bees, other important sonicators—if there is such a word—are wind, animals, and humans.

You can easily imagine how spring and summer breezes—or a gusty thunderstorm-- vibrate or shake tomato plants so pollination takes place. Your golden retriever’s wagging tail might do the job too—or a neighborhood squirrel climbing a plant to rob you of a growing fruit.

And humans? When we work in the Tomato Patch, our hand-weeding, hoeing, and sucker pinching often vibrate or shake our plants. Hey, we’re “buzz pollinators”—aren’t you impressed?

But some growers go out of their way and intentionally assist the pollination process by gently tapping the stem of a blossom truss with a finger. I’ve read suggestions to carry a pencil to tap on the stems. One online recommendation urged three to five shakings a day.

Perhaps the human buzz extreme, the ultimate in intentional pollinating efforts, is to vibrate tomato blossoms with a battery-operated toothbrush. I suppose a gardener doing that would quietly hum the toothpaste jingle, “You’ll wonder where the pollen went, when you brush your blossoms with Pepsodent.”

What do I do?

I’ve never tapped tomato flowers with a pencil or vibrated them with a toothbrush. We don’t have a dog with a long wagging tail. Other than minor vibrations I cause when doing routine gardening chores in the Tomato Patch, I’ve always left the job of pollination to nature’s big-two tomato pollinators—the wind and the bumblebees and other insects.

But it’s confession time. Since I began thinking about writing this blog, I’ve paused a time or two to tap new blossom trusses with my right index finger—just to make sure, of course.

To read Patterson Clark’s feature, which sparked my thinking about tomato pollination, CLICK HERE.

Tuesday, July 12, 2011

How Barbara Grows Garlic

Barbara & her German White garlic in April


Have you ever thought you might try growing garlic? Now’s the time to think seriously about that possibility, because you have three months to read up on the subject, research suppliers, and order the seed bulbs of the variety you select.

Barbara Billek, who gardens at the Westside Community Garden site of Columbia Gardeners, Inc., has been growing garlic—German White, a “hardneck” variety—for five years.

“Most of the garlic you find in grocery stores is softneck garlic,” Barbara explained. “Softneck has multiple rows of cloves in a circle. The outer circle has large cloves, and the cloves get smaller toward the middle of the bulb.”

Barbara said hardneck garlic—like the German White she grows—has only one circle of cloves around a central stem. “Each plants sends up a scape, which would contain its flower and then seeds if I didn’t cut it off,” Barbara continued. “German White has large cloves, about eight around a central stem. They are easy to peel and have excellent flavor. You can tell how many cloves each plant will produce by counting the number of leaves the plant has during its growing cycle. Each leaf equals one clove—roughly.”

Barbara planted this year’s crop last November 1. “The University of Maryland Extension’s ‘Planting Dates’ guide for Central Maryland recommends planting garlic from October 15 to November 15, so I planted at the mid-point.” Some growers plant in the spring, between March 15 and April 15, but garlic planted then tends to produce smaller bulbs with smaller cloves.

An organic gardener, Barbara explained how she does it: “I first rake in one inch of compost—about 40 pounds per 10 square feet of my raised garden. I then incorporate about one pound of organic 10-10-10 fertilizer per 50 square feet of garden. I then set out the cloves, root side down, pointy side up, about an inch and a half deep and six inches apart in each direction. I then sprinkle some kelp along the rows and water them in.”

Barbara said that by late fall, after a few frosts, the young plants are about six inches high. “I then mulch them with about four inches of straw. In mid-March I remove the mulch and fertilize again with the 10-10-10 and kelp. I add some cottonseed meal in early April and again two weeks later.”

Scapes curl like pigs' tails
Barbara said the scapes emerge about the end of May. “Scapes curl as they grow and ultimately straighten and grow little seed-like bulbils, but its best to remove them so the plants will use their energy to form bulbs rather than seeds. It’s best to harvest scapes when they’re curled like pigs’ tails, before they straighten, cutting them off about an inch above where they emerge from the plants.”

Barbara stops watering June 1 because garlic doesn’t like much water during its last month of growing.  She harvests her garlic when half of the leaves on each plant have turned brown, sometime in July in Zone 7.

“Don’t pull the plants with your hands,” she advised. “Use a fork or small shovel to left the plants. Brush off most of the soil and then let the plants dry in a well ventilated and dry area. I lay them out on a table in our basement. When all the leaves have turned brown—in about two to three weeks—they are cured and will keep for months. I then cut off the roots and the stalk near the head of the bulb.

“By the way,” Barbara added, you don’t have to wait for the garlic to cure before you use it. Curing is necessary only if you want to store it.”

Harvest began June 30 this year
What does she do with the scapes that she cuts off in the spring?

“I use scapes in recipes instead of spring onions,” Barbara said. “I use just the part of the scape from where it emerges from the plant up to the bulbil. I discard the rest. I use it in stir fries, on pizza and pasta, and in soups and scrambled eggs. I’ve found good scape recipes at the Mariquita Farms (California) website.

Where does Barbara get the cloves she plants each fall?

“Like most garlic growers, I use the cloves from the biggest, best bulbs from the previous growing year as sets for the next crop. That means I don’t buy new seed bulbs to plant each year.”

Would she buy seed bulbs from the same company if you had to start with new sets?

“I bought originally from Cayuga Farms in New York State,” Barbara said, “but the smallest order they accept now is for 50 pounds. I could never grow and use that much garlic. I think I might be tempted to buy from the Two Sisters Garlic website.”

I asked Howard County Master Gardeners who grow garlic where they buy their seed bulbs. Here are their answers, starting with the supplier with the most varieties: Jerry B., Territorial Seed Co. (35 varieties); Paul K., Burpee (24 varieties); Barbara W., Southern Exposure Seed Exchange (21 varieties); Jane H. and Jerry B., Seed Savers Exchange (13 varieties); Mary S., Seeds of Change (9 varieties); Jerry B., Johnny’s Selected Seeds (3 varieties); and Deborah P., Le Jardin du Gourmet Seeds (2 varieties).

Most seed companies ship garlic bulbs in September or October for fall planting, so if you’re interested in growing garlic, you have plenty of time to read up on the subject, check out seed suppliers, and order.

Finally, to read the University of Maryland Extension’s “Vegetable Profile” on garlic—which contains additional information about how to grow garlic, CLICK HERE.

Sunday, July 10, 2011

Deer Country: Where Are the Deer?

Grazing just outside the woods


Several neighbors and friends living in Deer Country over the last two months have commented, “Where are the deer? I haven’t seen any for weeks.”

Don’t get your hopes up if you’ve been thinking that too. Those of us who live in Deer Country are used to seeing herds of deer in the fall and winter months. Suddenly in spring and summer, we see few. The reason is that in spring the herds split up as does stake out secluded birthing territories and give birth and bucks get used to a new set of antlers.

As their new fawns grow, the does and later the fawns begin grazing farther and farther afield, agarden, and alandscape, and we start seeing them more. About three weeks ago we started seeing individual does. Last week we started seeing twos and threes. About dawn on the Fourth I saw a buck with velveted antlers crossing Triadelphia Mill Road about a half-mile from Meadow Glenn. The next morning we saw a group of five in our front yard when we returned home from the Glenwood Community Center. Yesterday a young, velveted buck grazed just a few feet from our garage doors.

Young, velveted buck visited yesterday
During that same period, the bambits suddenly began browsing in our front yard perennial gardens at night. I recently posted about a love-lies-bleeding amaranth that deer heavily browsed about a foot from our front porch.

Deer may be browsing individually or in groups of three or five now. Soon they will start to herd—and by fall the groups will be 10, 15, 20, or more.

What does this mean for gardeners?

First, with the increased browsing pressure, you should redouble your efforts to protect your plants. If you are a sprayer, spray periodically as directed by the manufacturer of the spray you use—or as experience has taught you if you use a homemade concoction. If you’ve been thinking about using netting or wire to protect your plants, it’s time to install.

Browsed & rubbed crape myrtle
Second, you have two months or so to protect young trees and shrubs from rubbing, the danger that sometimes is worse than browsing. Rubbing occurs in early to mid-fall, when the bucks use shrubs and trees to rub the velvet off their antlers and to polish them for jousting purposes and to impress the ladies, I suppose.

Here’s how author Neil Soderstrom describes the “velvet period” in his Deer-Resistant Landscaping: Proven Advice and Strategies for Outwitting Deer and 20 Other Pesky Mammals” (Rodale 2008), my all-time favorite book on deer management:

“The antlers grow beneath a layer of soft, hairy skin known as velvet because it feels velvety to the touch. In spring, velvet antlers grow slowly, but during the summer, growth rates may accelerate to nearly half an inch per day.

“Like whiskers, the hair of velvet serves as sensory receptors, helping bucks feel branches that could damage the underlying maze of nerves and blood vessels. In fact, accidental whacks against wooden branches can cause profuse bleeding. Highly aware of their sensitive and fast-growing velvety antlers, bucks are reclusive in spring and summer. During this ‘velvet’ period, bucks may seem to disappear from the landscape.

“By late summer, the velvet begins drying up and losing sensitivity, except for feeling itchy to the buck as it eventually begins to slough off on its own. But bucks rub off most of the velvet on woody branches….”

Every fall bucks damage shrubs and young trees at Meadow Glenn as they rub the dead velvet off their antlers. I’ve seen “rubbed” cedar trees four-inches in diameter at the edge of our woods. More commonly bucks concentrate on small trees and shrubs, perhaps because the “spring” in one- to two-inch trunks and branches helps the bucks remove velvet more efficiently.

Favorites for rubbing here at Meadow Glenn include crape myrtle, dogwood, and butterfly bush. Their all-time favorite is sumac. Bucks here have been so eager to rub sumacs that they have destroyed small wire cages and bent iron posts to get to the plants. Sometimes the bucks rub the plants with so much pressure that the trunks snap—usually about a foot from the ground.

Remains of rubbed sumac
Rubbing can be disastrous for the plants. If rubbing removes the bark completely around the trunk, the tree likely will either die or have to grow again from its roots. A partially damaged trunk may heal over time, but sometimes I wonder how that weak spot in the trunk of a tree will react to pressures of a windy summer or winter storm in 20 or 30 years.

How can you protect your shrubs and trees from rubbing?

Here’s how I do it. I don’t worry about shrubs. I cut butterfly bushes to near-ground level every spring, so if a buck tears off a few branches in the fall, I won’t have to prune them in the spring. I’ve admitted defeat on three crape myrtles that bambits repeatedly deleafed and then broke apart by rubbing. For trees, I’ve used several kinds of trunk protectors over the years, but my standard is 24-inch hardware cloth that I cut in lengths that will surround young trees loosely and allow for several years of growth and permit occasional weeding. Many plastic varieties are available commercially.

It’s time to pay special attention to protecting your plants as summer turns into fall and deer increasingly visit your garden or landscape to browse or rub.

For an earlier, more detailed posting about how I protect trees and shrubs with fencing, CLICK HERE.

Thursday, July 7, 2011

Tomato Patch: Tips for Tieing

Jute, a biodegradable tie


If your tomato plants are becoming unruly, it’s time to discipline them a bit—tieing* them, in other words.

I began tieing my plants the other day. I knew it was time because they were all but screaming, “Tie me!” and were beginning to droop out of their cages toward the ground. If you tie them promptly where you want them, all should be well. But if you don’t reposition them and their growing stems harden, you probably will have a difficult, if not impossible, time trying to do so later.

Actually, tieing has been minimal this year in the Tomato Patch. The reason is that I’ve pinched suckers regularly, so I have reduced tieing needs by 50% or more. The suckers I removed never had a chance to grow long enough to need tieing.

What do I use for tieing?

Stretchable plastic tie
This year I’m using jute gardening twine that I bought at a neighborhood Ace Hardware store. In the past I’ve used strips of an old sheet that I tore into half-inch strips about a foot long, as well as rolls of half-inch, slightly stretchable green plastic tieing tape available at most good nurseries. I’ve also used tops of pantyhose cut into narrow strips. Don’t laugh—pantyhose was the top response several years ago when I queried Howard County Master Gardeners about what they use to tie their tomatoes.

My tips for tieing tomato plants are simple:

(1) Tie before a stem begins hardening so you can reposition it without breaking it. Once you tie the stem where you want it, it will gradually harden as it grows and will need less support from the tie.

Strips of pantyhose tops,
the near perfect tie?
(2) Use a tie that is strong enough to last the season but soft enough not to cut into the tomato stem when summer storms blow though. That’s why I’m using jute gardening twine, which is soft but strong enough, and not nylon string, which is very strong but may cut the stems. Pantyhose is both strong and soft.

(3) Tie the stem loosely to the cage or stake, leaving enough slack in the tie for the growing stem to expand. In addition to its strength and relative softness, pantyhose strips have enough “give” in them for stems to expand as they grow.

(4) Consider fall clean-up when you choose the kind of tie you use. At the end of the season, I can just cut the jute ties with scissors or a knife and let them drop. Over time they will decompose and become part of the garden soil. By contrast, I’ll have to pick up and throw away nylon string, plastic tape, or pantyhose. If your back is about as old as mine, think of the benefits of not having to bend and pick up scores of non-biodegradable ties.

Since I had been pinching suckers and had relatively little tieing to do, the job took about a half hour—and that included pausing here and there to pinch new suckers—and a few that I had missed during earlier pinchings.

To keep your Tomato Patch from becoming an unruly jungle, tie your plants and continue to pinch suckers.

*Explanation to etymologists: I had the choice of using “tying” or “tieing.” I voted for “tying,” the traditional form, and Ellen, chief proofreader, voted for “tieing,” the more modern form. When the votes were counted, the choice was clear: “tieing.”

Wednesday, July 6, 2011

Bean-Savoring Fourth!

Bean-savoring Fourth


What a great Fourth of July—love of country and fireworks. I hung our red, white, and blue from his holder on the split-rail fence between our Tomato Patch and a perennial bed. But for the big celebration, I’m at the age when the best view of the fireworks is right at home on television after watching PBS and the “Capitol Fourth” extravaganza on the National Mall.

But earlier in the day—before the heat and humidity wilted me—I stooped to pick three bowls of Tenderpod snap beans from a four-foot row in one of our small vegetable gardens.

Snap beans: You know what they are. That’s what the seed packet from Burpee calls them, though in its catalog they’re called “bush snap beans.” Ellen says that’s what my mother called “snap beans, and I’m sure she snapped tens of thousands of them to can and freeze over her long lifetime. In the freezer case at the grocery store they’re usually called “green beans.”

And when I was a kid, I think I called them “string beans,”  I suppose that name died when plant breeders got rid of the strings. I thought then that “string beans” were green and “wax beans” yellow. Maybe the Seed Savers Exchange has a reasonable solution: “Beans.”

But in 2011 I generally call them “green beans.” Green they are, and beans they are, no question. And what a treat to pick a green bean and eat it raw—with its nutty fresh taste. I wouldn’t do that with a limp, discolored bean I typically find in a grocery-store bin.

And then, within an hour or two, I cooked a few handfuls—with just a sprinkle of salt—just five or six minutes at most, so they’re still beans, tender, yes, but not mushy.

Easy now. Put aside your fork and pick up a perfectly straight and cooked green bean by an end, put it into your mouth, and savor the flavor and texture.

Oh, my, that’s really celebrating the Fourth! Veggie fireworks!

But other days, let’s just say, “Grow It Eat It.”

Tuesday, July 5, 2011

Tomato Patch: Stan Picks before the Fourth

Stan's a man of his word


In late May I posted about whether plant protectors give tomato plants a head start in cool, spring weather. In that posting I interviewed Stan Purwin, who has a plot at West Side Community Gardens, a part of Columbia Gardeners, Inc. Stan showed how his Walls ‘O Water work and said, “I’ll be picking tomatoes by the Fourth of July. Come back on the Fourth, and you’ll see.”


Stan's ripe Green Zebra
Well, guess what I did July 3, at 7 a.m.—a day before the holiday? I met Stan at his garden to see whether he had started picking tomatoes.


The photos tell the story. Stan’s plants have given him two Better Boy and one Green Zebra tomatoes. The three picked tomatoes are from the two plants shown in their Walls ‘O Water protectors in the May posting. To read that posting, CLICK HERE.

Stan's Better Boy, ready for picking July 3

Monday, July 4, 2011

Time to Plant Veggie Seeds


Now’s a great time to plant vegetable seeds.

What? Didn’t we do that in March, April, and May?

Well, yes, our spring seed-sowing frenzy made us feel great, and we’re eating the veggies we sowed then. Our little cool-weather veggie patch has given us carrots, beets, chard, three varieties of lettuce, and a handful of green beans.

But the sizzling weather of July and August will rapidly take its toll on cool-weather vegetables planted in the spring. Now that we’ve passed the summer solstice and days are beginning to shorten, it’s time to start thinking of the cooler nights that will come in August and the great veggie-growing days of September, October, and November.

I’ll confess that I think fall veggies are the most flavorful of the year. Many veggies that struggle and then go to seed in summer heat grow vigorously as the days gradually cool into fall.

If you haven’t planted fall vegetables in the past, I suggest you check the University of Maryland Extension’s free flier, “Planting Dates for Vegetable Crops in Maryland.” I’ll add a link at the end of this posting so you can read it or save or print a copy.

The “Planting Dates” publication lists more than 50 vegetables and their spring and fall planting dates for Central Maryland.  Note that many can be planted through August and some even into September.  A footnote explains that you should “advance or delay planting dates … for other areas of the state.”

I planted seeds for six veggies last Wednesday: Goldtender summer squash (Burpee), Plato hybrid zucchini (Johnny’s), Diva cucumber (Johnny’s), Cylindra beet (Burpee), Short ‘n Sweet carrot (Burpee), and Tenderpod green beans (Burpee).

This was my first planting of the two squash varieties. I usually wait until late June to plant squash seeds so I don’t have to worry about squash borers killing the plants. The borers are the larvae of a moth that ends its major breeding cycle in early to mid-June. My squash seeds can now sprout and grow without great danger that the borers will attack.

The “Planting Dates” flier gives these dates for the other veggies I planted: snap beans, July 1 to August 5; beets, June 20 to August 1; carrots, June 15 to Aug. 1, cucumbers, June 15 to July 10; and summer squash, June 1 to July 15.

I was two days early for the beans and right on schedule for the rest. And if space frees up, I can plant a third crop later in July or early August for some of the vegetables. In fact I’ll wait until late July or August to plant late crops that will grow well into the frosty weather of late October and November—lettuces, chard, carrots, and beets.

The Fourth of July holiday weekend was hot and humid. But think beyond the heat of summer to the increasingly cool days of late-summer and fall when the vegetables you plant during the next six weeks will thrive.

To see the University of Maryland Extension’s “Planting Dates” list, CLICK HERE.

Sunday, July 3, 2011

Deer Country: Love Lies Bleeding

Deer-browsed love-lies-bleeding


Our love-lies-bleeding by the front sidewalk lies bleeding this morning. Deer chowed down on it during the night.


I bought the seeds for the love-lies-bleeding (Amaranthus caudatus) from Johnny’s Selected Seeds last winter after reading the catalog description: “Ropes of deep red, trailing chenille-like blooms. A reminder of things Victorian and a graceful accent in arrangements.” I planted seeds in yoghurt cups under lights, gave most away, and planted one love-lies-bleeding in Deer Country, our front yard, and one in our fence-protected backyard, as an experiment to see if the flower is deer resistant.


Fence-protected love-lies-bleeding (center)
“What happened to the flower by the front porch,” Ellen asked this morning. From the tone of her voice, I didn’t think I even needed to look at the sorry sight.


The love-lies-bleeding by our front sidewalk is now history, obviously. But other plants live on. The deer didn’t dine on two of their nearby favorites—deer candy—a heuchera and three variegated hostas. They are part of my experiment using Deer Out, a mint-based deer-resistant spray.


Heuchera sprayed with Deer Out
The heuchera is just three feet from the devastated love-lies-bleeding. The hostas are about 25 feet away. The heuchera (also called coral bells and alumroot) has never been larger and the hostas never taller than they are today. I’ve always had doubts about deer sprays and the like—I’ve used several through the years—but Deer Out so far has kept the deer away from the plants I’ve sprayed.


I haven’t sprayed the test plants for about a month. The does and their fawns are coming out of the woods more to graze and browse now, so I’ve got to spray the test plants again in a week or two—just to be on the safe side.


Hostas sprayed with Deer Out
If you want to read the first posting about my experiment with Deer Out, CLICK HERE.