Showing posts with label TomatoPatch. Show all posts

Wednesday, June 4, 2014

Tomato Patch surprise: Going against the grain


My Cape Cod weeder, tool of choice
to uproot wheat seedlings
I took a shortcut when I mulched my tomatoes with straw this year.  I didn’t put sheets of newspaper under the mulch.  And this week I’ve had to uproot hundreds of bright-green wheat seedlings that were poking up through the beige straw.

Taking care of the seedlings was relatively easy.  I used my Cape Cod weeder (see photo).  Wherever I saw a wheat seedling, I just pushed and pulled the weeder’s angled blade at the soil line under the mulch.  The young wheat plants easily yielded their grip of the garden soil.  As I finished weeding around a tomato plant, I fluffed up the mulch—leaving the Tomato Patch looking “like new.”

Time:  Less than two hours.  I probably would have spent that much time easily if I had put down sheets of newspaper before I put down the straw—so I’ll call time for both approaches a draw.  My only second thought was that putting down paper probably makes for a nicer looking bed and prevents growth of lots of nuisance weeds.  Lesson learned: I think I’ll put down paper again next spring.

A wheat plant growing in the Tomato Patch is a weed, to my way of thinking.  Any plant growing where someone doesn’t want it is, well, a “weed.”  I want white clover to grow in most of our yard—so it’s a welcome ingredient of our turf.  Someone else who wants a “perfect” fescue lawn, of course, would consider white clover—you got it—a “weed.”

But with all the wheat weeds, I’ve been wondering why so many wheat seeds were in the beautiful bales of straw I bought at a local farm.  Was the combine not operating perfectly?  Were the seed heads a day or two too “green” to yield all of their seeds to the machine?  Or was this “not that unusual harvest byproduct”?

I don’t know the answer, but my spring surprise in the Tomato Patch is over.  The uprooted wheat plants shriveled when the sun dried their roots and became part of the mulch protecting my tomato plants from rain-splashed garden soil that may carry a variety of tomato-disease organisms.

Thursday, May 22, 2014

Oh, hail!

"All hail broke loose!"


What a beautiful late-spring day—sunny, temperature reaching into the upper 80s by mid-afternoon, with a touch of humidity reminding us that summer will soon arrive at Meadow Glenn here in Central Maryland.

About 3 p.m., the sky clouded over.  By 3:30 hail—big pieces of hail—started dropping here and there as the temperature plummeted within minutes to 70.  Soon our gardens became a war zone—with pellets the size of dimes punching through rhubarb leaves, blenderizing young Red Sails lettuce plants, and ripping leaves off tomato plants. 
Blenderized Red Sails lettuce plants

One of our garage doors was open, and nickel-size hailstones bounced the full length of the garage and stopped at the kitchen door.  What if our cars had been outside?

By 4:20 the sun was shining brightly again.  The hail was rapidly melting as the thermometer crept into the high 70s and thunder faded as the storm clouds headed east.  I checked releases by the National Weather Service, and they reported hail the size of “quarters” and “gold balls.”  I’m glad the storm exited here before the hail became the size of “bricks.”

It’s time to wait and see what happens with our damaged garden plants.  I hope our tomato plants—and our lettuce too—will recover.  I think the tomatoes will recover nicely—but the lettuce plants are so damaged they may have to releaf from their roots.

Damaged Sungold tomato plant

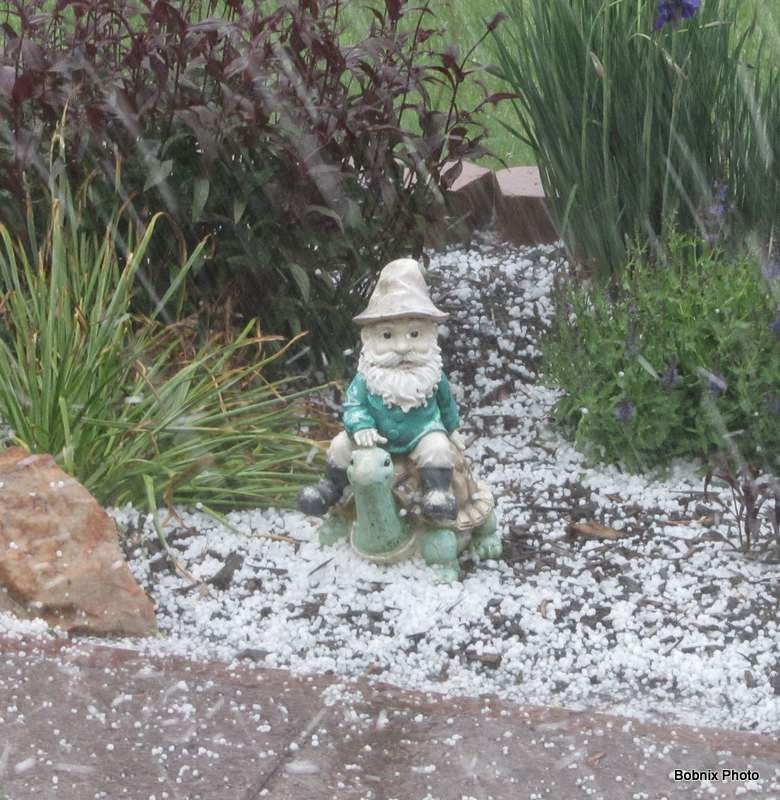
In our gardens I could find only one survivor of the storm—a Garden Gnome riding a tortoise that some suspect is Testudo, the official mascot of the University of Maryland.   I posed a question to the unhappy Garden Gnome:  “What was it like out in the storm?”

The Gnome simply replied, “All hail broke loose!”

Tuesday, November 26, 2013

Tomato Patch: Grandpa Henry’s paste tomato

Grandpa Henry's heirloom tomatoes


One of the most unusual paste tomatoes I’ve “trialed” in years is Grandpa Henry’s, the seeds of which were a gift late last winter from Henry Lysy, a Carroll County Master Gardener.


The Grandpa Henry’s I’ve grown this summer averaged just over 10 ounces.  They were long, narrow, with pointed ends, reminding me of a few other paste tomatoes I’ve seen in catalogs—such as Jersey Devil and San Marzano Redorta.  When visitors saw them, they often thought they were hot peppers, not tomatoes. 

Henry said his dad received the original seeds from an Italian immigrant neighbor in Rhode Island and passed seeds on to Henry, who’s been growing them at least 30 years.  For Henry’s family and his many gardening friends, Grandpa Henry’s paste tomato is truly an heirloom variety.  Thank you, Henry, for carrying on a grand gardening tradition—and for sharing seeds with me and many others.
'Solid, little juice...just perfect for making sauce'
“I’ve really seen nothing like them,” Henry said when he gave me the seeds.  “I gladly share seeds and just ask that they call them Grandpa Henry’s. They’re prolific producers and are solid with little juice—just perfect for making sauce.”

Though many of Grandpa Henry’s sported green shoulders when I picked them to avoid damage by brown marmorated stink bugs, they were mostly deep red inside.  The green shoulders turned red in four or five days on a counter in our garage.  I made several batches of sauce in late summer, and this open-pollinated family heirloom has been a welcome ingredient, along with my other trial paste tomato, Burpee SuperSauce, which I blogged about a few days ago.

Thank you, Henry Lysy for sharing a family treasure.  Maybe you’ve just proved again that some of the best things in life are free.

If you've grown Grandpa Henry's, please post a Comment about how this heirloom performed in your Tomato Patch.

Sunday, November 24, 2013

Tomato Patch: Delizia, a French import

Delizia Hybrid tomatoes


Howard County Master Gardener Kent Phillips and I swapped plants of our “trial” varieties last spring, and in the transaction I got a transplant of Delizia Hybrid, seed of which Kent got from Cook’s Garden.

The Cook’s Garden catalog describes Delizia, a “customer favorite,” this way: “Tomato connoisseurs rave about the marmande variety's meaty flesh and sweet deliciousness. This hybrid brings a new level of disease resistance to this flavorful classic French beefsteak. 'Delizia' is exceptionally vigorous, producing heavy yields of large, succulent, pumpkin-shaped 1 lb. fruits. A standout tomato in our 2010 and 2011 summer trials.”

I’ve grown tomatoes, it seems to me, longer than they’ve been invented, but I had to look up the meaning of “marmande” variety.  “Marmande” is the French term for tomatoes that the English call “beef” and Americans call “beefsteak.” If I were alert and not dreaming about tomatoes, I should have figured out the meaning from the catalog description.

Does Delizia rate a “rave” notice?

I may not be a “connoisseur,” but I’ve tasted scores of tomato varieties, and Delizia’s flavor is, well, delicious.  Ok, I give it a “rave.”  It also has been disease resistant with heavy yields.  The fruits are shaped something like small, squat pumpkins with modest ribs, but the ones on my plant averaged about the 7 or 8 oz. given in the second catalog description, not the one-pounders of the first catalog description.

This yummy variety has one downside.  It’s so squat—most less than two inches tall—that core removal takes away a significant part of the fruit, leaving relatively little flesh left for eating.  With so much of the tomato going into the recycle bucket rather than onto a plate or into a sandwich, I think I’ll have to call Delizia a great “chunker” but not a good “slicer.”

Will I grow Delizia next year?  I will if Kent gives me another plant.  Hey, Kent….

Friday, November 22, 2013

Tomato Patch: Three grafted Burpee varieties

Burpee grafted Brandywine Pink tomatoes


In March I wrote about my purchase of three grafted tomato plants (Brandywine Pink, Mortgage Lifter, and Rutgers) from Burpee. 

They were expensive—more than $10 each, including shipping—but how could I resist trying the tomato fad of 2013—grafted plants with heirloom tops and disease-resistant roots that reportedly could give superior yields.

The three transplants arrived nicely and securely in a plastic clamshell package in the week I had requested for delivery.  I planted them according to directions—on pain of death, don’t plant the graft joint below soil level—and watched the three plants grow and produce.

Have I been I impressed?  Not really.

If you grew grafted tomatoes this last summer—Burpee or other brand—please post a Comment about your experience.

Were they each worth the better part of $11?  No. The plants grew well, but their production was ordinary or less.

Burpee grafted Rutgers tomatoes
Brandywine Pink produced only six tomatoes of medium to small size—fewer and smaller than Brandywines I’ve been growing for years from seed—but they were mouthwatering delicious as a Brandywine should be.

Rutgers produced a dozen or so mostly baseball-sized fruit with good flavor.  I haven’t grown any of the Rutgers varieties, so I cannot compare to past crops.

The best of the three was Mortgage Lifter, which yielded about 10 medium to large fruit with outstanding “true, old-time tomato flavor,” better tasting than even Brandywine Pink, at least to my tastebuds.

For me the grafts were an interesting “trial” but the results were disappointing.  I feel I could have grown equivalent fruit from seed, or even from plants bought at a local nursery, at a fraction of the cost.

Grafts again next year?  I think I’ll stick with seed packets, thank you.

If you grew grafted tomatoes this past summer—Burpee or another brand—please post a Comment about your experience.

Burpee grafted Mortgage Lifter tomatoes


Monday, November 18, 2013

Tomato Patch: Buckets of SuperSauce

Large SuperSauce tomatoes are eye-catching
I was skeptical but intrigued by Burpee’s 2013 description of a new paste tomato called SuperSauce:
“It’s SuperSauce! The new tomato superhero. A whole lot bigger, a whole lot better, a Roma with aroma. Weighing in at 2-lbs., a whopping 5.5” tall x 5” wide, SuperSauce produces gallons of luscious, seedless sauce from a single plant harvest—one tomato fills an entire sauce jar.”

The description continued: “Very few people in the gardening world consider a paste tomato for anything other than to make paste or sauce. SuperSauce is extraordinarily delicious and versatile as a salad tomato, as well as having a distinctive quality in that its large segments of fruit often make a shape that is perfect for a meaty and tasty hamburger slice, quite different from the horizontal slice commonly used from a large round tomato. Easy-to-grow, indeterminate, disease-free plants yield a summerlong supply of the exquisitely-flavored marinara, tomato gravy or meat sauce plus plenty for slicing and salads.”

How could I resist ordering a packet of seeds to try, even at a pricey $6.50 plus shipping?

SuperSauce is solid, as a paste tomato should be
My first impression of SuperSauce was negative.  When the seeds sprouted and the plants began to grow, they were what you might call “leggy,” “scraggly,” or “spindly.” Their leaves seemed odd shaped, healthy but somewhat droopy or turned down.  I wasn’t expecting much from SuperSauce, but I transplanted them into the Tomato Patch at four weeks, and SuperSauce grew, blossomed, fruited.

What do I think of SuperSauce now?  I like it—I like it a lot.  SuperSauce is a SuperPasteTomato.

How does the fruit coming out of my garden compare to Burpee’s advertising hyperbole?

“Two pounds and 5.5” long and 5” wide”?  Mine averaged 5” long, about 2 1/2” wide.  From four SuperSauce plants I picked several bucketsful during just two weeks in August.  Fruit of an early picking averaged about 11 oz. and of two later pickings averaged 14.5 oz. and 18.75 oz.  In mid-season, one SuperSauce weighted 1 lb. 13 oz.  Fruit production peaked in August, but I picked numerous smaller fruit into October.

One SuperSauce almost filled a quart container
“Gallons of luscious, seedless sauce from a single plant harvest—one tomato fills an entire sauce jar”?  I originally thought that Burpee ad writers need to get out of the office and into a kitchen, but by mid-season I thought that one SuperSauce plant might, over a season, produce enough fruit to make up to one gallon of sauce.  One average SuperSauce tomato may pretty much fill a sauce container, as you can see in the photo of one fruit in a 4-cup container, but one large tomato does not yield, by far, a “jar” of sauce, at least any jar a respectable sauce maker would use at home.  Compared to the Amish Paste variety I’ve preferred in recent years, the average SuperSauce weighs about the same but has less waste from cracks and blossom end rot when processing for sauce making.  It also may be a few shades lighter red than many paste varieties.

“Delicious and versatile”?  Reasonably tasty, yes, more so than some paste tomatoes, and flavorful enough to pass as a slicer or salad tomato, especially tomato gourmands who find the flavor of supermarket varieties such as Compari acceptable.  Solid and meaty, a slice or two of SuperSauce on a sandwich doesn’t send juice racing down the eater’s arms to drip off elbows—a definite plus.

“Easy-to-grow, indeterminate, disease-free plants yield a summerlong supply”?  Yes, yes, yes.  And the size and number of the growing fruit gives even a tomato fanatic cause to pause and admire.

Enough, already.  I plan to plant SuperSauce hybrids again next year.  It has replaced Amish Paste as my top choice of paste tomatoes.

Friday, November 15, 2013

Tomato Patch: Cherokee by another name is Chocolate

Typical Cherokee Chocolate tomato


When I received my seed order from Tomato Growers Supply Co. last winter, it contained a complimentary packet of Cherokee Chocolate tomato seeds.  Hey, chocolate, I thought—what is there not to salivate over?

Here’s how Tomato Growers describes Cherokee Chocolate:  “A stabilized version of Cherokee Purple, this 10 to 16 oz. mahogany-colored variety has excellent flavor and beautiful large fruit.  Very productive plants are vigorous and yield a large harvest of these chocolate-colored tomatoes with the ample size and wonderful flavor associated with Cherokee Purple.”

I’m not sure I know what “stabilized” means in a tomato variety, but my Cherokee Chocolate plants produced more fruit per plant than the Cherokee Purples I’ve grown.  Fruits are larger, mine averaging just under 16 oz., though Chocolate seem more irregular in shape than the global Purple, and slightly more juicy and less “smoky” in flavor, as some catalogs describe the Purple.  I found it more convenient to cut the irregular-shaped fruit in half and then to slice or chunk the two halves.

Will I grow them again next year?  I have left-over seeds stored in the fridge from this year’s complimentary packet, so why not?  But I probably wouldn’t buy another packet unless I really wanted to grow a Cherokee that produces more and larger fruit than Purple.

Cherokee Chocolate tomatoes
sometimes challenge your slicing skills


Tuesday, November 12, 2013

Tomato Patch: A Solid Gold investment


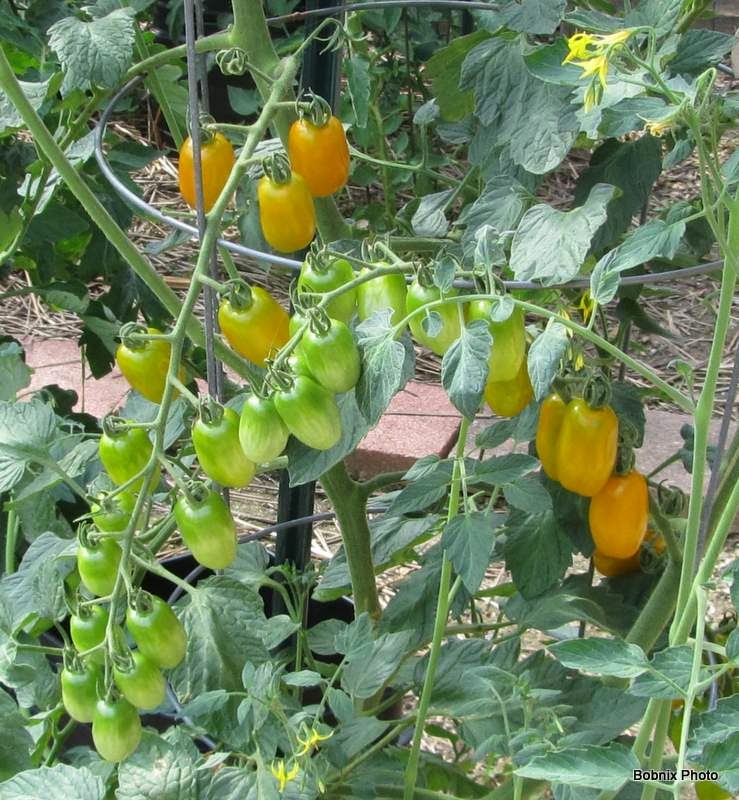
Solid Gold tomatoes hang in long clusters
The price of gold may have been less than solid on the commodities markets in recent months, but my purchase of a packet of Solid Gold Hybrid seeds from Tomato Growers Supply Co. turned out to be an excellent investment.

I was attracted to Solid Gold because I wanted both a change of pace from the Sweet 100 and Sungold cherry varieties I’d grown in recent years and also a variety that wouldn’t crack after every shower or rain, as Sweet 100 and Sungold usually do.

The Tomato Growers Supply Co. catalog description of Solid Gold seemed just what I was searching for: “Clusters of one-inch long, golden yellow grape tomatoes appear in great numbers through an impressively long-growing season.  This plant just seems never to give up!  In our trials, it was the first tomato to ripen and the last one to stop producing.  The tomatoes are very crack-resistant and once harvested have a long shelf life while retaining their delicious, sweet taste.”

That description turned into reality in the Tomato Patch.  I’ve been amazed at the many cascading clusters—most with 16 to 22 tomatoes—growing from the vigorous plants.  The first tomato I picked this season was a Solid Gold, and they joined Juliets in the last colander of small tomatoes I picked before frost ended Tomato Patch 2013.  Solid Gold did not crack early in season, but about 50% of the fruit did in the last month or so.  Shelf-life seems eternal—well, almost—with Solid Gold fruits sitting on our kitchen counter for days sometimes without wrinkling or showing any signs of collapse.  When fully ripe, Solid Gold is both sweet and tomatoey, but not candy-sweet like the smaller Sweet 100 and Sungold cherry varieties.

Bottom line:  Solid Gold is a fine variety definitely worth a repeat next summer.  It is my current favorite “snacker.”  For Tomato Patch 2014 I’ll have to decide whether to plant Solid Gold again or return to the super-sweet Sungold.

Solid Gold: Solid and semi-sweet snacker

Tuesday, October 22, 2013

Tomato Patch 2013: The end—and a look back

Hint, hint: Frost on lamb's ear
 
I finished taking down Tomato Patch 2013 yesterday.  Maybe I could have waited another few days, but the weather was perfect for outdoor work—sunny and in the low 60s—and the light frost on our roof and the leaves of our Lamb’s ear plants Monday morning hinted it was time to pick a last few tomatoes, cut back the vines, and take down the cages.

The frost wasn’t a “killer.”  Our most frost-sensitive plants—tomatoes, peppers, and basil—were growing in our garden and not on our roof and escaped damage.  Forecasts for later in the week, however, call for nighttime temperatures in the mid- to low 30s, so I decided to take down Tomato Patch.

Last pickings
First I picked about 10 Celebrity and Better Boy fruits and about a half colander of smaller varieties—a few Solid Gold but mostly Juliet—with a bit of color and deposited them on newspaper in our garage, where they should finish ripening over the next week or so. Then I cut back, pulled out, and carted the plants to a compost pile at the edge of our woods and stacked the drip irrigation buckets, cages, and iron posts for closer attention later. 

As I dismantled Tomato Patch 2013, I thought back over the growing season and made some mental notes:

1.  Tomato Patch 2013 was the best I’ve had in years—perhaps the best ever.  I don’t know why.  Perfectly timed cool and hot weather through spring and summer?  Lots of gentle rain both in spring and early summer and again late in the season?  Garden gnomes that guarded my 25 plants 24/7?  Other Maryland Master Gardeners have told me horror stories.  A Master Gardener in Harford County told me brown marmorated stink bugs ruined most of her crops.  A Master Gardener here in Howard County said overall his tomato crop was disappointing.  It must have been the gnomes.

2. Though brown marmorated stink bugs were a big problem for the Master Gardener in Harford County, they were a minor irritant here—not the disgusting plague of 2010 and 2011.  Yes, I saw a few stink bugs, but I sprayed with a commercially available bifentrin (a synthetic pyrethroid) when I found them—perhaps three or four weekly sprays in June and July, and then no more.  I had near zero tomato damage—but near 100% damage to the pods on my two Crimson Select sweet pepper plants—though I sprayed them too.

3.  Once again I planted too many tomatoes this year—25 plants. I’ve been trying to cut back a bit each year.  I used to plant 30 to 35 plants.  I was planning on just 22 plants this year—but Burpee advertisements for grafted plants captured my imagination—so I ended up with 25 plants.  (I’ll post blogs later on my experience with the grafted plants and other varieties that I grew for the first time.)  We ended up with buckets and buckets of tomatoes—and with nearly 30 containers of sauce in our freezer.

4.  My goal for next year is to plant just 20 tomato plants—about equal numbers of slicers, paste, and grape.  Oops—20 doesn’t divide by 3 when you’re thinking plants, so will I plant 21—or 18?   I’ve got until spring 2014 to answer that question.

Tomato Patch 2013 was a great one here at Meadow Glenn.

How was Tomato Patch 2013 at your place?

Good Bye, Tomato Patch 2013

Thursday, June 14, 2012

Tomato Patch: Help Solve My Mulch Problem

My mulched tomatoes, May 31
I have a new problem—living mulch—in the Tomato Patch, and I hope you will tell me how you think I can solve the problem.

I mulched most of my rows of tomato transplants in my usual way—sheets of newspaper covered with a thin layer of straw.  About a third of my plants are mulched just with straw because I ran out of newspaper.

Most years I discover one or two volunteer wheat plants—or maybe they’re barley—in late June or July—from seeds that hitch-hiked in with the straw.  I’ve always pulled those few volunteers without a thought.

'Living mulch,' June 14
This year, however, I have hundreds—no, thousands—of volunteer grain plants—weeds, if you will.  Tomato Patch looks like a newly seeded lawn sprouting in the springtime.  I think some farmer must have harvested his grain before it was fully ripe and much of the grain ended up in bales of straw for sale at a local farm-supply store instead of in a bag of flour or chicken feed.

What should I do?  I can easily hoe the volunteers at the edges of the rows, but how should I attack the living mulch in my rows of tomato plants?  It’s growing on top of the newspaper in places and directly in the garden soil where I hadn’t used newspaper.

Help!  If you have a suggestion, please post a Comment—soon.

I’ll let you know later how I solve this baleful problem—if I do indeed.

Thursday, May 17, 2012

Tomato Patch: Exposing Seedlings to Reality

Sungolds and Juliets--growing fast now


This was “toughening up week” at the Tomato Patch.  Late Sunday afternoon I moved my three-week old tomato plants from their warm growing racks under fluorescent lights in our utility room to semi-protected containers on the east side of our house, so they would get increasing amounts of sunlight and be exposed to breezes that would help stiffen their stems.

This toughening up is called “hardening off,” which the Maryland Master Gardener Handbook defines as “the process of gradually acclimatizing a plant that has been raised indoors or in a greenhouse to harsh environmental conditions in the garden” (Chapter 17, “Vegetables,” p. 411).

I would be happy to transplant my tomato seedlings directly from utility room into the garden, but the risks would be high.  If subsequent days were warm with intense sunshine, the tender plants could sunburn—just as I would if I went to Ocean City and lay the whole first day in the sun without sunblock lotion.  Also, a sudden spring thunderstorm with wind and a downpour could twist and bend the tender stems and smash the plants to the ground.

So that’s why gardeners who start spring vegetables from seed indoors “harden them off”—“gradually acclimatizing” them to the cool, sunny, breezy world, though I hesitate to call our garden a place of “harsh environmental conditions.”

"Gradually acclimatizing"
“Gradually acclimatizing” for my plants meant this: (1) I put them in open plastic storage bins that protected all but the tops of the tallest plants from wind gusts.  (2) I took them out late Sunday afternoon for their first direct-sun exposure, and the afternoon shadow of the house shaded them after about two hours.  (3) Since it rained Monday and Tuesday, I kept the plants under the roof but on the edge of the porch, so they got bright light but weren’t battered by downpours.  (4) When the rain clouds exited and the sun shone brightly, I moved the plants a foot farther from the house each day so they’d get ever-increasing direct sunlight.

I planted the seeds in cups on April 19.  The shortest plants (Celebrity) were four inches tall by Wednesday and the tallest varieties (Juliet, Sungold, and Amish Paste) were more than six inches and growing at least one inch a day.  I was beginning to think they were clones of Jack’s fast-growing magical beanstalk.

The rains earlier this week were important to the Tomato Patch.  Early spring 2012 was especially dry.  Year-to-date rainfall before this week was about six inches below average.  Lack of moisture can be a factor contributing to blossom-end rot in early tomatoes when garden soil has insufficient moisture for the plants to move calcium from the soil to the developing fruit, so I’m hoping I’ll not have the significant losses that I had last year from that disease.

I’ve already written in my Garden Notes that I should start my tomato seeds a week later in 2013, around April 25, so they’ll be ready to transplant around May 25.  Tomatoes are a tropical plant and really thrive best in well-warmed soil, which means the opportune time to set them out here in Central Maryland is near the end of May or even early June—though that may seem like heresy to gardeners who set out their tomato transplants in late April or early May.

Wednesday, March 14, 2012

Tomato Patch: Soil Secrets Revealed!

Soil test kit mailer and instructions


Do you know what your blood pressure is—and what the calcium level of your garden soil is?

Most of us have a good idea about our basic body statistics—but quite a few of us haven’t the slightest idea about the state of our garden soil.  Shame, shame, gardeners—and that included me until four weeks ago.

If you’ve read my earlier postings, you know that I’ve had a problem in my Tomato Patch with blossom-end rot.  Last summer the disease, which stunts the fruit and makes most of it inedible, severely affected my paste-type tomato plants, including Super Marzano and Big Mama varieties.

Blossom-end rot essentially is a calcium problem—either an insufficient supply of calcium in the soil or not enough moisture for the calcium to go from soil to plant to fruit.  When I planted my tomatoes last May, I mixed a tablespoon or two of pulverized lime, a good source of calcium, into each planting hole, added some water to start dissolving the lime, and then drip-irritated the plants over the growing season.

My theory: Tomato plants plus calcium plus water equals perfect fruit.  My reality: Blossom-end rot affected nearly every paste tomato.

I’m not a screamer, but blossom-end rot frustrates me, and my nature is to solve a problem.  That’s why I decided to go back to square one of good gardening practice and test our garden soil so I know what I’ve got to work with and how I might make changes that result in even better crops.

I started my quest for a soil test by reading the University of Maryland Extension’s short brochure, “Selecting and Using a Soil Testing Laboratory,” which explains the value of soil tests and at the end lists six soil-testing laboratories and their offerings.  To see the Extension’s brochure, CLICK HERE.
When I saw that a basic test would identify the calcium level in the soil, I almost shouted “Yes!”—but I’m not a shouter either—because that result would answer a basic question I had about my blossom-end rot problem—is our soil calcium deficient?

I reviewed the offerings of the six laboratories and chose the University of Delaware Soil Testing Laboratory, though the labs all offer comparative services.  I went online and used a credit card to order two of their testing kits—because we have a series of small garden plots wrapping around the crest of our hill, and I wanted to separately test two separate areas to see if they differed significantly.  Each test was $10. 

In a few days a small box arrived with the two testing kits and directions for taking the soil samples.  I followed directions and mailed the samples.  In just over two weeks, I received the two “Soil Test Reports.”

One of our "Soil Test Reports"
Drum roll!  Calcium deficiency—yes or no?

I scanned down the list to “Ca” and saw that the calcium level in both areas of the garden is—I was surprised—excessive!

“Excessive” in this case doesn’t mean the calcium level is a problem.  It means I shouldn’t add more.  The two tests also show pH levels are “Optimum.” Phosphorus (P), potassium (K), and magnesium (Mg) levels also are more than sufficient.  Overall, the two tests show the soil in the two garden areas vary little.  Enclosed brochures explained the various results.

At the bottom of each report is a “Suggested Fertilizer Program” based on test results: Apply one pound of a nitrogen-only (no phosphorus or potassium, because we already have plenty) fertilizer per 1000 square feet of garden area.  Two examples are given: 3 pounds of ammonium nitrate (34-0-0) or 2.5 pounds of urea (46-0-0).

Is my blossom-end rot problem solved?  Probably not, but I’m smarter now.  I know the soil doesn’t have a calcium deficiency problem.  If I water properly, there should be no moisture problem.  But there’s still another possible tweak: Can I find a paste-type tomato variety that is blossom-end rot resistant?

I’ve been searching the internet and asking other gardeners for recommendations and haven’t found a list, though I’ve read several reports that the small Juliet hybrid is highly resistant—but its small size isn’t popular with kitchen canners.  I’ve also read the standard-size Amish Paste variety has some resistance, and I’ve already purchased a packet of Amish Paste seeds to try this summer.

The challenges of vegetable gardening keep me researching and learning—something good, I think, for the gray matter of this Ancient Gardener.

I’ll let you know as the summer unfolds and my Amish Paste tomatoes grow, bloom, and fruit whether I’ve solved this annoying problem.

What do you know about your garden soil?  Isn’t it time to have it tested?

Monday, January 30, 2012

Stink Bugs: New Research Findings

Stink bugs devastating two of our tomatoes


What have scientists learned during the last year in studies of the brown marmorated stink bug, the East Asian invader that is threatening many of our garden and field crops?

Last week I found on the Internet two new research papers, “Summary of Brown Marmorated Stink Bug Infestations of Maryland Crops” and “2011 Insecticide Trails to Evaluate Control of Brown Marmorated Stink Bug,” by three University of Maryland researchers, Galen Dively, Cerruti Hooks, and Terry Patton.

I’m going to tell you several of the research findings that I find fascinating, but I do not claim to be a scientist, so this posting is merely one gardener’s report about what he read in the two papers.  I assume the two reports will be two of many building blocks on which experts will build future research projects and from which they will draft, hopefully, recommendations for both commercial food growers and backyard gardeners for the 2012 growing season.

The first paper covers the impact of the brown marmorated stink bug (BMSB) on a variety of crops: small grains; field corn; soybeans; apples, grapes, and peaches; raspberries; pumpkins; tomatoes; peppers; summer squash; sweet corn; green beans; eggplant; okra; spring/fall cabbage, spring/fall broccoli, kale, bok choi, onion, beets, cantaloupe, cucumber, watermelon, sweet potato, and white potato.   Since most readers of this blog are backyard gardeners, I’ll focus on typical garden vegetables.  The second paper covers the effect of various insecticides on BMSBs.

Here are highpoints plus an occasional comment, which I will label as such:

Stink bugs on our young raspberries
Research methodology: “Field studies to investigate BMSB population dynamics and feeding injury in selected crops were conducted in 2011 at three UM research farms … where significant infestations were present.  Key field, fruit and vegetable crops were grown according to recommended commercial practices and not treated with insecticides, unless otherwise indicated.  All crops were in close proximity with each other and close to woodlots.  Whole fields, orchard blocks, or small plots, depending on the crop, were sampled weekly to assess population densities of BMSB adults, egg masses, and nymphs….  Vegetable crops were also harvested to measure and characterize cumulative fruit injury over the crop cycle.  To monitor BMSB activity, pheromone and blacklight traps were operated at five research farms from May to late September and serviced either daily or three times a week.”

Number of stink bugs:  Numbers were significantly less than in 2010 at the western Maryland site but 2.5 to 3 times more at other locations.  Comment: This confirms anecdotal reports from other gardeners, that there seemed to be “fewer stink bugs overall” in 2011, but perhaps just as many or more in our gardens.

Peak population:  “Peak captures at Beltsville and Upper Marlboro exceeded 400 per night during the 3rd week of July,” but peaks on some crops came in August.   Comment: Early July was when I surrendered and began using a pyrethroid spray in our vegetable and fruit gardens.

Pheromone traps:  “Both types of pheromone traps failed to capture stink bugs during the peak period.  Only a few adults and nymphs were captured later in the summer.”

Stink bugs on our lilac
Host plants:  “Clearly, this introduced tree [Paulownia], along with the Tree of Heaven, is a major reproductive host….”  Comment: Brown marmorated stink bugs are natives of China and other East Asia countries, as are Paulownia and Tree of Heaven.  Stink bugs probably are attracted by plants from “back home,” so to speak.  I suppose I shouldn’t have been surprised to see hundreds of stink bugs on our lilacs, another East Asia native.

Proximity to woods and buildings:  Scattered through the papers are indications that stink bug numbers are higher on crops near woods or buildings and on crops at the edges of fields.  Comment: Backyard gardeners may have the worst exposure to stink bug damage because gardens often are close to buildings, trees, and shrubs.  Also, gardens often are not large enough to have “edges” and “centers” sufficiently distant to affect the level of stink bug damage.

Apples, grapes, and peaches: “Infestations were relatively low compared to the two previous years because these crops were treated with combinations of insecticides plus Surround on a 10-day schedule.”

Raspberries: “Adults colonized plants during mid-June and sustained high populations to early September….  Feeding caused severe fruit damage, rendering the crop unmarketable.  Raspberries were undoubtedly a favorable food source for adult BMSB, but relatively few nymphs were present….”

Pumpkins:  “No adults or nymphs were present.”  Another casual inspection “revealed no evidence of feeding injury or nymphal development.”

Tomatoes:  Stink bug activity seemed to begin when fruit began to ripen, though relatively few adults and nymphs were found.  “It is possible that stinkbug adults move in and out of tomatoes following a diurnal pattern, since numbers detected did not account for the fruit injury which ranged from 32 to 48% of the total number of fruit harvested.”

Peppers: Tests include a variety of peppers, including bell, banana, and hot jalapenos.  Depending on variety, damage ranged up to 86% of the crop.  “Two hot types … were less susceptible to fruit injury, and, unexpectedly, a black bell variety … showed no evidence over the entire crop cycle.”  Comment: The paper names all varieties tested.

Summer squash: “If more attractive crops are available, squash will likely not be a preferred host plant.”  Comment: Stink bugs destroyed all young fruit of my zucchini plants.

Sweet corn: On the Eastern Shore, stink bug populations haven’t reached damaging levels.  However, at other locations, significant “kernel injury (average range of 4 to 26 collapsed kernels per ear), and incomplete kernel fill were recorded on 95 to 100% of the mature ears….”

Green beans: “Green beans harbored the second highest population density of BMSB per unit area….  Later plantings of green beans and lima beans that developed pods in September and October experienced less BMSB activity and no pod damage.  Like late-planted sweet corn, these plantings possibly avoided injury because of the more attractive soybeans grown nearby.”

Eggplant: “Eggplant harbored the third highest population density of BMSB per unit area.”  “BMSB may have a minor impact on eggplant quality; however, feeding on stems and fruiting bodies could cause abnormal abortion of buds and young fruit, thus reducing yields.”

Okra: “BMSB seasonal activity and infestation levels were similar to that of eggplant.”

Cabbage, broccoli, kale, bok choi, onion, beets, cantaloupe, cucumber, watermelon, sweet potato, and white potato:  “Intensive sampling for other insect pests and periodic inspections produced no evidence of BMSB activity and feeding injury.  However, these crops may be more attractive and susceptible to stink bug feeding if isolated and not grown close to more preferred host plants.”

Here’s a typical conclusion from the second paper’s bell pepper section on the effectiveness of several insecticides on stink bugs: “All 12 insecticide treatments provided significant reductions (61-96%) of stink bug numbers,” though only some insecticides reduced the level of fruit injury significantly.  There were some suggestions of “the possibility that some adults may have recovered after certain treatments.”  Comment: Though insecticides are named in the paper, they should not be used until they have been approved by appropriate government review agencies. 

I’m happy to read that researchers are making progress in their stink-bug studies, and I look forward to future application of research findings from these researchers and others that will benefit those of us who grow crops, whether by hundreds of acres or in our backyard gardens.

If you want to review the research papers, CLICK HERE.  The two papers appear together at that link.  The first paper includes photos of damaged vegetables.  The second includes charts detailing effectiveness of insecticides used in the studies.

Friday, December 9, 2011

Tomato Patch: Tomato Plants for Holiday Decorating

Ready for your mantle?
Veggie growers will have to admit the University of New Hampshire has come up with a brilliant idea: Tomato plants as holiday decorations and gifts.

This tomato grower is smiling from ear to ear, and beyond, after reading today’s Associated Press story about the university’s experiment with dwarf tomato plants—deep green leaves and bright red fruit—for Christmas decorating and gift giving.

The idea has gotten rave reviews from people who’ve checked out the plants.

What fun!  Just walk over to the holiday plant on the mantle, pluck a juicy fruit, and munch away.  Can’t do that with the decorations on a Christmas tree!

Or a pot of this?
What next—pots of rhubarb chard?

Hoe, hoe, hoe.

Smile.

To read more—including the names of tomato varieties used in the experiment—CLICK HERE.

Tuesday, October 18, 2011

Tomato Patch: Time for Green Manure?

Green manure--or something else?
I’ve bought many bags of composted manure over the years, and when I opened them in our garden, the manure was dark brown.  When I buy a pickup load of composted horse manure and shredded leaves at the Howard County Recycling Center, the compost is, well, dark brown.

So what’s with “green manure”?

“Green manure” is the name often given to plants that overwinter on tilled fields and then are turned under the next spring.  Another term is “cover crop.”  Whichever term you prefer, it has two basic purposes, to enrich the soil and protect it from erosion by winter weather.

The University of Maryland Master Gardener Handbook explains “cover crops” this way in its “Vegetables” chapter:  “Cover crops are mostly small-grain species, like oats, rye, and wheat, and legumes, like clover and vetch. …  These crops are typically planted as early as August 1, but no later than October 10.  They should make some growth before the first hard frost.  Some are killed by cold winter temperature, but most go dormant and resume growth in the spring.  Cover crop roots grow deeply into the soil pulling up nutrients that might otherwise leach out of the soil.  The crops are turned into the soil before going to seed, usually sometime from mid-April to early May.”

A Handbook table lists these typical cover crops with directions about when to plant seed and when to turn the plants under in the spring:  alfalfa, barley, buckwheat, crimson clover, forage radish, spring oats, winter rye, hairy vetch, and winter wheat.

I began thinking about “cover crop” when I tore out the dying vines of Tomato Patch 2011.  Should I plant a cover crop?  Are there alternatives—especially for small, hillside plots that this gardener tills—a youth-challenged gardener, by the way, who is prone to “aching back”?

Thinking I might experiment with a cover crop, I hopped into my Tacoma and drove up to the Southern States farm supply store in Ellicott City, the one place in Howard County that I thought would stock cover-crop seed.

“Do you have seed for any cover crop?”

“Sorry, not today, but next week we’ll be getting in a mixture of rye and wheat.”

“Will it be in bulk?  I only need a few ounces for my garden.”

“The smallest size will be three pounds.”

Straw mulch will work
So much for my Green Manure Experiment.  Back home, I looked at the vineless Tomato Patch and decided on an alternative to a cover crop.  I had mulched our tomato plants in the spring with straw which now was starting to disintegrate and become part of the garden soil, but it is still recognizable as straw.  If I don’t turn it under to hasten decomposition until late winter, it can serve as a “cover crop” to protect garden soil from the ravages of winter storms.

So this winter Tomato Patch is sporting a straw “cover crop” that died in 2010 or earlier and in color is definitely beige, not green.  Will this crop improve the soil?  Little, if any, I suppose, but I think it will do a reasonable job of protecting the soil from the elements.

And as I rearranged the straw to cover as much of the soil as possible, I thought of a very positive outcome of my choice:  the straw will continue to decompose over winter and I’ll have a relatively easy time “turning it under” with my garden shovel in late winter.  Manually turning under a cover crop can be an “ache in the back,” to say nothing of muscle pain.  Score one for the Ancient Gardener.

What else could I have used?

Grass clippings or shredded leaves will do too
Since I don’t have enough straw to spread on all my small hillside garden plots, I protect the soil—and enrich it to some degree—with whatever I have at hand.  I’ve already spread grass clippings on two or three plots—sort of a wimpy “green manure” approach, wouldn’t you say?  When leaves begin to fall, I’ll bag some with our lawn mower and spread the semi-shredded leaves like a brown blanket on other plots, where they’ll also both protect and decompose over winter.

Disappointed that I couldn’t buy a small amount of cover-crop seed locally, I checked availability on the Internet.  Territorial Seed Company has a paragraph explaining cover crops with several links you may enjoy investigating, including one showing varieties of available fall-sown seed.  Johnny’s Selected Seeds also lists a variety of seeds under “green manures.” 

There is one green-manure cover crop I don’t want to grow—winter weeds.  Alas, winter weeds are sprouting everywhere these days and growing rapidly in this extra-warm October.  Today’s chickweed seedlings might protect the soil over winter, but by early spring they will have become thick mats and will have sown thousands of seeds for future crops.

To read the University of Maryland Extension's one-page fact sheet on cover crops, CLICK HERE.
If you’re a new reader, check out my earlier postings about Barbara Billek, who uses hairy vetch as a cover crop in her raised vegetable beds, and Susan Levy-Goerlich, who uses shredded leaves to protect her garlic crop over winter.

Monday, October 10, 2011

Tomato Patch: Last Pickings & Pulling Up the Plants

Plants tell me the end is near


The diseased leaves and vines of Tomato Patch 2011 told me it was time to pick the last of this year’s tomatoes and tear out the nearly dead plants—three or four weeks before I usually do this sad job.

I describe the job as a sad one because I just plain hate to see the tomato season end.  When we cut the last red fruit that we’ve harvested from the Tomato Patch, we get that nearly hopeless feeling that we’re left with those red “things” we will not be even tempted to buy at the super market until our memories of our mouth-watering home-grown tomatoes fades with our memories of this year’s autumn leaves.

I tore out the dying vines over three days, a couple of hours here, a couple of hours there.  The first day I picked about 20 big-reds, mostly at breaker stage or beyond, that I thought had a reasonable chance to ripen in our garage, and I took down the cages that had supported the vines.  The second day I picked a half colander of little-reds and then removed their cages too.

Big reds: Last picking
On the third day I pulled out all the plants and wheel-barrowed them to a “compost” pile near the edge of our woods.  Since the vines were diseased, I had no thought other than to remove them completely from our vegetable garden.  Next year I will plant tomatoes in a totally different area of our garden in order to minimize disease carry-over from this year.

My experience with ripening end-of-season tomatoes is that those with cracks around the stem are much more likely to spoil before fully ripening, so most of the fruit I moved into the garage were small Brandywines and the other varieties with few cracks—Celebrities and Juliets.

A week after moving the last tomatoes into the garage, I can report that the extra-warm temperatures of the second week of October 2011 are causing them to ripen rapidly, and I have to check them every day to make sure we eat them before they spoil.  

Little reds: Last picking
Even though I picked the last of this year’s tomatoes and pulled up the vines, I’m not ready to write “The End” to Tomato Patch 2011.  I have a few chores yet to do, and in future postings I’ll show you what I do.

Tuesday, September 20, 2011

Tomato Patch: Beginning of an Early End

Tomato Patch 2011: An Early End?


Sometimes the Tomato Patch gets too much of a good thing—rain.

Early in the season I searched the sky for signs of rain clouds as I filed my drip-irrigation buckets.  In the last month we’ve had abundant rain, and then some, from Hurricane Irene and Tropical Storm Lee.   Weather data for nearby BWI Marshall Airport reports seven inches of precipitation above normal to date for September and more than 12 inches above normal for the year.

The effects of all the extra moisture are evident in the Tomato Patch.  Many of the plants are dying from early blight and from a variety of leaf-spot diseases.  Such plant dieback is pretty much an annual event—but one that usually concerns me in October, not September.

Now chilling out in our freezer
Realizing that Tomato Patch 2011 is ending early, I picked about 20 Celebrity tomatoes at breaker stage on Sunday and took them into the garage to fully ripen and picked nearly two colanders of paste-type tomatoes—Super Marzano, Big Mama, and Juliet—and then made 16 cups of sauce, which are now in our freezer.  Tuesday, as a heavy drizzle began what the forecast calls another damp week, I removed the 10 drip-irrigation buckets from the Tomato Patch and hosed them clean inside and out.

What’s left in the Tomato Patch?  Not much—a few Celebrities that I’ll pick and move into the garage when they show a bit of color—and a handful or two, perhaps, of smaller varieties—Sungolds and Juliets.

And I’ve had a strange thought for September—that I should start thinking about shutting down the Tomato Patch.  Some of my tomato-growing friends have told me they’ve already done that.  But somehow shutting down the Tomato Patch and pulling up the spent vines is something I should do in October, not September.

Maybe I’ll think about that drastic step for 10 days.

Friday, September 16, 2011

Tomato Patch: Is It “Mealy, Mushy” Time?

Celebrity tomatoes (and a stink bug)
this morningm when the temperature was in the 40s


The thermometer got me to thinking this morning.  It was 43.7°F just before sunrise, the lowest temperature in the Tomato Patch since I set out the plants in May.

Most veggie gardeners know tomatoes are “warm weather” plants, not “cool weather” plants such as chard, turnips, broccoli, and cauliflower.  Many articles about tomatoes warn not to put them into your refrigerator because the 40°F temperature there will turn them “mealy” or “mushy.”

That was my concern this morning I read the outdoor temperature on our digital thermometer.  Will my “big reds” turn mealy at that temperature?  I vaguely remembered a Washington Post article I had read on the subject years ago, and after some searching on the Internet I found it.

The article is “Chilling Thoughts,” by Robert L. Wolke, professor emeritus of chemistry at the University of Pittsburgh when he wrote this article at the beginning of the tomato season in 2005.  Here’s the question he addressed:  “Why is it that people say it ruins a tomato to put it in the refrigerator?  How can this be?”

I’ll skip his comment about flavor chemicals, which he says do not decompose at cold temperatures.  He then addresses “texture,” which gets us to “mealy” or “mushy.”  Here’s the key part of Wolke’s answer:  “Tomatoes can suffer … ‘chilling injury’ if held at temperatures below about 50 degrees….  The nature and extent of the injury—which mostly involves changes in the tomato’s texture rather than its flavor—depends not only on the temperature and duration of chilling but also on the fruit’s ripeness.  That’s why no simple generalization can be made about the effect of refrigeration on tomatoes.”

The important factors: temperature + duration + ripeness.  Temperature factor is any temperature below 50°.  For duration, long-term chilling is worse than short-term.  On ripeness, Wolke explains that chilling tomatoes not fully ripe stops the ripening process and prevents development of full flavor and color.

How do I apply Wolke’s refrigerator principles to what’s happening in the Tomato Patch? Nighttime temperatures are starting to dip below 50°.  A few dips probably won’t do much damage to taste or texture, especially to fully ripe fruit, but as the weeks pass and low temperatures increase in length, damage potential increases, especially on tomatoes not fully ripe—the kind still growing in the Tomato Patch.

I plan to keep an eye on my tomatoes—the ones the stink bugs didn’t pinprick beyond edibility or the rains of Hurricane Irene and Tropical Storm Lee didn’t split—and at some point start picking and moving the best looking ones into the garage as protection both from late-season stink bugs and frigid nighttime temperatures.

I don’t plan to start moving them this week.  I’ll monitor local weather forecasts and the condition of remaining tomatoes.  If we have especially cold nights in late September or early October, perhaps I’ll some top-quality breaker-stage tomatoes into the garage.  If the nights stay relatively warm, perhaps I’ll move none.

Alas, fall is coming.  A killing frost will visit many of our gardens within the next month or so.  The end of Tomato Patch 2011 is a sad thought, but then in a few weeks seed catalogs will start arriving to jump start our fantasies about Tomato Patch 2012.

If you’re a genuine tomato freak and wish to read Wolke’s Post column, CLICK HERE.

Monday, September 5, 2011

Tomato Patch: Ginny's Thick & Quick Tomato Sauce

Ready to make sauce
My tomato sauces for years were, well, unremarkable.  To be honest, sometimes I thought they were more like tomato juice than sauce.  I read magazine and newspaper articles and answers to Frequently Asked Questions in my quest for recipes and how-to-do-it tips that would give me a reasonable amount of thick sauce in a reasonable amount of time.

I blanched and peeled and cooked.  I put raw tomatoes in the blender and then tried to separate thick from thin.  I cooked tomatoes and put them through our food mill and then cooked them some more.  The result usually was a sauce so thin that it barely stained the pasta through which it ran to the plate.  Saucy friends winked and told us how to resolve this dilemma: add a can of store-bought tomato paste to thicken the thin when we used it.

This year, I vowed to “get it right.”  I cooked, milled, cooked, and simmered two batches for more than three hours last month.  One batch yielded three cups and the other four of thin sauce.  I shook my head and said to myself, “They’re still too juicy.  I should have simmered them another hour or two.”

Prepared tomato pieces ready to start simmering
Enough of this culinary futility, I thought.  Five hours of work that yields four cups of thin sauce isn’t reasonable.   The greater bargains in time, effort, and thickness seemed to sit in bottles on shelves of the pasta aisle of our local Giant Food store.

So I surrendered, and when friends visited last weekend, I gave a whole bucket plus a plastic grocery-store bag of paste tomatoes to Ginny B., who said she wanted to make sauce.  A day or so later she called to thank me for the tomatoes.

“How many cups did you get?”  I asked, thinking she might have gotten ten or twelve.

“Twenty-nine,” she replied, “and they’re all in the freezer.”

“Twenty-nine?” I couldn’t believe it.  “Were they juicy like the sauce I make?”

“No, it was thick.”

“What’s your secret?”

This made the difference
Ginny told me how she makes her thick and quick tomato sauce, and I’ve now made three batches.  I have to admit that I’m back in the tomato sauce business again.  I worked on the third batch on Labor Day morning.  Here’s how I did it:

I started with about a half bucket of large paste tomatoes—Big Mamas and Super Marzanos—and a quarter colander of Juliets, a small paste- or Roma-type tomato usually used for snacking.  I washed them, cored them, gouged out the gel and seeds with my thumb, cut off any damaged or otherwise objectionable parts, cut the good stuff into chunks, and filled a six-quart pan nearly to the top.  I brought the tomatoes to slow boil and then simmered them for about 50 minutes.  Then I used a measuring cup to put two-cup batches into our blender and pressed “blend” to break down all the remaining tomato parts.  The measuring cup helped keep things fairly neat and gave me an idea of how much sauce I’d made.

While I was blending the tomatoes, I sautéed an onion and four or five garlic cloves in olive oil in another large pan.  As I finished blending each small batch of tomatoes, I added them to the simmering onion-garlic mix.  When I had all the tomatoes in the second pot, I added some salt and simmered the sauce for another 20 minutes.  Just three or four minutes from the end of the cooking time, I added a handful of thinly sliced basil from our garden.

Beautiful, thick, delicious
The sauce was beautiful, thick, and delicious.  It filled three three-cup freezer containers.  I spent about an hour preparing the tomatoes and another hour for the cooking.  Bottom line: I had doubled the amount of thick sauce in less than half the time. 

All things considered, I think I’ll call this sauce recipe “Ginny’s Thick & Quick Tomato Sauce.”  Thank you, Ginny.  I’ve adapted the procedure from Ginny’s explanation, and if you try to make sauce this way, adapt my outline to your taste and the way you think you want your sauce to taste.

Ginny, for example, doesn’t remove all the seeds from the tomatoes.  She sautés onion and garlic at the beginning and then adds the fresh tomatoes for cooking.  She adds leaves from a couple of sprigs of thyme for additional herbal kick.  She adds fresh basil at the very end, just as she removes turns off the heat.

What tips do you suggest to make this thick-and-quick tomato sauce even better?

Grow It.  Eat It.