Tuesday, May 31, 2011

Tomato Patch: Do Plant Protectors Work?

Wall O' Water and Better Boy tomato plant


You’ve seen the ads in gardening magazines, seed catalogs, and online—ads for plant protectors called Wall O’ Water, which claim they can speed up tomato growth and fruiting by several weeks.

I’ve read those ads for years: Fill the protector with water. Sun warms water which warms soil. Add small plant 6 to 8 weeks earlier that you normally would. Harvest longer. Easy to use. Reusable, three to five years. Great for tomato, squash, pepper, pea, and other veggie plants down to 16° F.

Actually I have two three-packs of Wall O’ Water protectors in our garage—packages I’ve bought over the years but never used. Why? I don’t really know. I actually took them off the shelf and planned to use them this year—but didn’t.

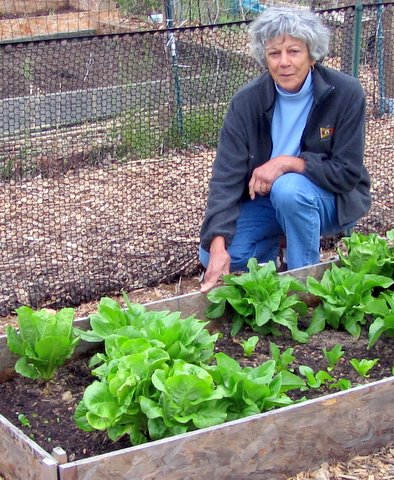
When I was walking through Westside Community Gardens of Columbia Gardeners, Inc., I saw a gardener planting tomatoes. Behind him were taller tomato plants growing in Walls O’ Water.

“Do they work?” I asked Stan Purwin, who’s gardened at Westside for eight of his 35 gardening years.

“Yes,” he replied, inviting me into his fenced plot of raised beds. “I have two Better Boy tomato plants that I planted side by side on May 9. They were the same size. I put a Wall O’ Water around one and not the other. After less than three weeks, the one with Wall O’ Water is several inches taller now than the unprotected one.”

Stan Purwin and his two Better Boy tomato plants
Sure enough, the two Better Boys, side by side, were different heights. I wrapped some yellow marking tape around their cages to mark the top leaves in each. Stan measured them. The one in the Wall O’ Water was eight inches taller.

“I notice your Walls O’ Water don’t have any water in them,” I said.

“The water wasn’t turned on yet here at Westside Garden Plots when I transplanted in early May, and actually the Walls O’ Water aren’t easy to fill with water, so I just circle the plants with the empty protectors. If I filled the protectors with water, I’m sure my plants would be even taller, by another inch or two.”

Walls O’ Water—maybe in this case we should call them Walls O’ Waterless—work for Stan’s tomatoes. I’m convinced that they work too, now that I’ve seen his Better Boys side by side.

Stan said he buys some of his tomato plants and starts some from seed too. This year, in addition to Better Boy, he’s raising these varieties: Pruden's Purple, Big Mama, Green Zebra, Early Girl, Box Car Willie, Brandywine, San Marzano, Porterhouse, Sweet 100, Whopper, Sugary, Defiant, Wickline, Roma, Aunt Ruby Green, Juliet, Mountain Magic, Celebrity, Big Beef, Rutgers, Aunt Ginny Red Beefsteak, Red Plum, Sugary, Valencia, Sungold, and Virginia Sweets.

Whoa, 27 varieties?

“Yes,” Stan affirmed, “about 54 plants.”

I must have just stumbled into Tomato Heaven—or maybe Tomato Haven.

Why so many?

“I tend to get carried away, and I usually try to plant at least two of each variety in case one fails.”

What does Stan do with all the fruit?

“We eat some. I give some to neighbors and friends and other gardeners here at Westside if their plants haven’t been successful. I give the rest to Grassroots, a nearby local crisis intervention center for individuals and families.”

Will Stan's Green Zebra tomatoes
be ripe on July 4?
“I’ll be picking tomatoes by the Fourth of July,” Stan said. “Come back on the Fourth, and you’ll see.”

I’ll be picking my first tomatoes two or three weeks after that. Really, next spring I must start some of my tomatoes a month earlier than I usually do and set them out in late April or early May in Walls O’ Water.

And I’ve got to get back to Westside around the Fourth to see what Stan’s picking—real-life tomatoes, many of which I’ve only salivated over as I looked at their photos in seed catalogs.

Monday, May 30, 2011

Memorial Day: Take a Break and Remember


You were out and about at dawn this morning. You watered your growing veggies and weeded a lily bed. But now the sun’s getting hot—really hot. The forecast calls for 92° F. It’s time to take a break—and celebrate Memorial Day.

When was the last time you watched the changing of the guard ceremony at the Tomb of the Unknowns at Arlington National Cemetery? When you were on your high school senior trip—or relatives were visiting?

What were you thinking as you watched? Why do the soldiers do what they do? How do they do everything exactly the same?

Your questions are about to be answered—and many more questions, such as how a guard gets his or her shoes to shine so perfectly? And why do old soldiers go there in wheelchairs, “pushing down on their armrests, trying with all their trembling might to stand”?

Washington Post reporter Sarah Kaufman goes behind the scenes and in a holiday feature article tells a story you’ll long remember. The title in Saturday’s print edition was “Dance of the sentinels.” The online posting contains a short video, which is good, but the article is so much better. If you want to read the article without all the obnoxious ads, click on the print icon, and you’ll see just the text.

After you’ve read, pause to remember those who serve and have served our nation—and your loved ones too.

It’s time to celebrate, to remember. CLICK HERE.

Friday, May 27, 2011

Tomato Patch: Drip Irrigation and Mulch

Drip-irrigation buckets strategically placed


I must be a glutton for punishment. Wednesday I transplanted 23 tomato seedlings into our garden. After I looked at the 3-day forecast, I installed drip-irrigation buckets in the Tomato Patch and mulched most of the plants yesterday (Thursday) morning.

My drip irrigation system wasn’t expensive. In fact, it was free. I use recycled plastic buckets. I’ve drilled four half-inch holes in the bottom of each bucket. I set the buckets three to four inches deep in my Tomato Patch, strategically placed in the rows between plants so each bucket will serve two, three, or four plants and so I can easily hose water into the buckets.

My tomato mulching system is also is simple. I use a small garden rake, newspaper, water, a trowel, and straw. Mulch benefits my Tomato Patch in several ways. It keeps my patch weed free most of the summer. No weeds mean less work for me in the hot, summer sun. Mulching also conserves moisture, which means I will seldom have to water. More water in the soil helps the calcium intake of my tomato plants, which helps prevent blossom-end rot. Also, over time mulch decomposes, enriching the soil.

Tearing a hole that will fit around a tomato stem
After I install the drip-irrigation buckets, I use my small rake to level the soil around the buckets and the plants, so the newspaper I’ll use as the base of the mulch will make good contact with the soil. Then I place newspaper two sheets thick around each plant. I use full pages on each side of the plant, with a hole torn in the middle of one edge of each page. The sheets overlap down the middle, with the torn hole surrounding the tomato stem. I used to use three or four sheets but observed they often didn’t decompose over winter, so now I use only double sheets. The photos will give you an idea of how I use the paper.

After I position the two sheets of double-thick paper around a plant, I use my hand or a trowel to pull soil over the edges of the paper to help keep it in place.

Newspaper, overlapping, pieced around  tomato
That worked well yesterday for about an hour until a breeze started to rearrange some of sheets that I had positioned around plants. That’s where water helps. I turned on a nearby hose and began spraying the sheets as soon as I put them down. Wet newspaper doesn’t blow easily. A watering can would work just as well.

When the breeze came up, I decided to put the straw on top of the paper as soon as I had paper positioned around a plant because sunshine dries even wet newspaper in a few minutes. I use straw because it is clean, relatively inexpensive, and decomposes well. A bale lasts me two or three years. You can use almost any kind of mulch, including grass clippings, but don’t use grass clippings if you’ve recently applied a broad-leaf herbicide to your lawn. Tomato plants are sensitive to such herbicides.

I shake straw in and around the plants and position it by hand. How much do I use? If I can read headlines through the straw, I add a little more straw. If I can see a glimpse of paper here and there but can’t read headlines, or see no newspaper, that’s OK.
  
The finished job
After I add the straw, I hose it gently to settle it. I’ll wet it another time or two over the next few days, but it usually settles well and seldom blows away, even in summer thunderstorms.

Do I have to somehow pick up all that paper in the fall or next spring? Not if the sheets are just double. Once they are moist and in contact with the soil, natural decomposing of the paper—which is made of wood fiber-- begins. Summer showers and rains encourage the process. If I notice large pieces of paper in the fall, I chop them with a shovel. I seldom find paper the next spring.

I installed eight drip-irrigation buckets and mulched 19 of my 23 tomatoes in about three hours. By then I was dead tired and glad I had to stop mulching because I had run out of newspaper. Why not save some fun for tomorrow--right?

The temperature was nearing 90°F. and I was soaked with sweat. As I all but stumbled up the sidewalk to return my tools to storage, I thought, “Why am I growing 23 tomato plants—for two people?”

Why, indeed?

Well, I enjoy doing it, despite minor aches and pains. The tomatoes will be delicious. Friends love the extras. And gardening keeps me tuned in to the cycle of life, lets me participate from seed sowing to harvest, an experience most people don’t have today. My badge of honor: dirt under my fingernails.

But then an ache—or was it a pain?—reminded me that my bones and joints are ageing. Perhaps I should cut back on the number of tomato plants next year.

Yes, I should cut back, just a bit, mind you, next year.

I’ll try to remember that … next year.

Thursday, May 26, 2011

Tomato Patch: Setting Out the Plants

Ready to transplant


Surprise: I set out my tomato plants last evening. The plants were growing so fast I had to transplant them into our garden five days before I originally planned.

In earlier Tomato Patch postings, I explained that I had planted the seeds indoors on April 25 and planned to transplant them into the garden on Memorial Day, exactly five weeks after I dropped the seeds into the cups in which they grew under fluorescent lights in our basement utility room.

On May 20, I moved the plants outside to harden off—to get used to life outdoors—gradually increasing their daily dose of direct sunlight. But the last week has been extra warm—both days and nights—and the plants grew about an inch a day. By Tuesday it was obvious I had to transplant them soon. By Memorial Day the plants would be “leggy” or “spindly” and would take extra care in planting.

Because our garden actually consists of many small squares and rectangles, most semi-terraced, near the top of a hill, I use simple hand tools for my gardening work. The first photo shows what I used for this job. I worked in the evening to spare the young plants a double shock—the transplanting itself plus a whole day in today’s sunshine with a predicted temperature of 90°.

My most important transplanting tool is a warren hoe, which has a triangular blade. (Look for its bluish blade in the right corner of the photo.) I use that hoe as a plow to loosen up the soil where I plant my veggies, to make a deep furrow for the plants, and then to hill the soil back up around the plants. Power for the warren hoe comes primarily from my arms. Experience has taught me that using the hoe to till is easier on my old back than digging and turning the soil with a shovel, spade, or garden fork.

I also use an old mop handle to space the transplants. The wooden handle just happened to be 48” long, and I nicked it with a saw every 12”, and I use it to space the plants every 2½ or 3 feet in the first row of a planting area. Over the years I’ve left several metal tape measurers outside to rust in the dew or rain, but it’s pretty hard to overlook a yellow measuring stick.

It took me about two hours to plant 23 tomato transplants. Here’s my basic procedure and why I do what I do:

Cutting off lower leaves
I use scissors to cut off lower leaves of each plant so I cover the lower 2 or 3 inches of the stems with the garden soil. The seedlings will put out roots where soil covers the stems and will help the plants grow and fruit vigorously over the next few months.

I use the warren hoe to plow the row areas. I no longer turn over every inch of the garden—just the areas where the plants will grow. If I plow and don’t plant, something will grow in the tilled but unused areas—things called weeds.

After I through the basic plowing, I use the warren hoe to make furrows about 8” deep. I sprinkle pelletized dolomitic lime and fertilizer into the furrows and mix them lightly into the soil with the hoe. Then I place plants 2½ or 3 feet apart, using the mop handle for spacing plants in the first row. Then I use the warren hoe to pull just a little soil around the root balls of the transplants, to stabilize them while I use the hose to dribble water around the root ball of each plant.

Why the water at this point? I add the water to make sure the lime that I sprinkled in the planting trench is damp and can begin to dissolve. Lack of calcium causes blossom-end rot in tomatoes. I try to minimize that problem by making sure my young plants have an available calcium source—the lime—as they begin to grow in the garden.

And note that I “dribble” water around the plants. Lots of pathogens are endemic in garden soils just waiting to splash onto tomato leaves and begin the process that can eventually kill the plants. I’ll watch the weather forecasts closely so I mulch the young plants before we get an afternoon downpour that coats the lower leaves with garden soil—and pathogens.

The fertilizer I use is a typical 10-10-10 formula that I bought in a bag at a big-box store. I use just a sprinkle, as I added compost to the garden in late winter. I’ll add another sprinkle along the rows just before I mulch, and that will be it as far as fertilizer is concerned.

Cutworm preventers
After I wet the plants, I use the warren hoe to complete the initial hilling process, and then I use pieces of toilet-paper rolls or coffee-cup insulators to wrap around each of the stems, installing the tubes so they’re roughly an inch below and above ground. This is a simple precaution that prevents cutworms (larva of a moth) from wrapping around the stems just below soil level and cutting off the young plants, sometimes as efficiently as a chainsaw would do the job. And then I dribble water around each plant a second time.

Job done. Put tools away. Two hours. 23 plants: 2 Defiant, 2 Virginia Sweets, 1 Wow!, 3 Sungold, 2 Juliet, 1 Big Mama, 3 Super San Marzano, 3 Brandywine (Sudduth’s), 3 Brandywine Red, and 3 Yellow Plum. I’ll tell you more about the different varieties as the season progresses. As I was transplanting, I realized I forgot to start seeds of one of my favorite variety, Celebrity. Oh, well, there’s always next year.

Ready, set ... grow!
And what happened to all the other plants that I started? I gave most of them away to other tomato growers. And I have five left as potential replacements if disaster strikes during the next week or 10 days.

And, oh, yes, this morning I planted one of the extras in an unfenced perennial flower bed—and sprayed it with Deer Out, the repellent I’m experimenting with this year. Gardeners in Deer Country know that bambits love tomato plants, and just about every other veggie you can think of.

Wednesday, May 25, 2011

Poison Ivy: Bye, Bye

Leaves of three, let it be!


Birdie, birdie, in the sky,
Dropped a poison-ivy seed in my garden….


For some reason I never memorized epic poetry. But apparently a bird ate a poison ivy seed and deposited it in our garden. I found the new plant growing closely to the trunk of a butterfly bush when I was mulching, but I find them even in my veggie garden at times.


Leaves of three, let it be! Yes, the old folk saying is right on target. Up to 80% of people develop a rash when they come in contact with urushiol, the irritating oil in poison ivy. When I was a kid, I often ran through patches of the noxious weed that grew near Alloway Creek, “down back” from our home on West Main Street in Alloway, N.J. I didn’t get a rash then, but in the last several years I’ve become fairly sensitive and get rashes if I’m exposed.


So the poison ivy had to go—quickly, while it was young and relatively shallow rooted.


Spray it with 2,4-D or glyphosate? No, that would be overkill—and drifting spray might do major damage to nearby plants. I’ll pull it out—which should be relatively easy because the plant is small and mostly free standing.


But I’m super-sensitive, right?


Ok, here’s how I do it.


Put pulling hand in solid plastic bag
I take the narrow plastic bag off the morning’s Washington Post. I put my hand and lower part of my arm into the bag. With the bag between the poison ivy and my hand, I run my hand down the poison ivy, grab its main stem at soil level, and firmly pull the plant straight up and out of its garden bed.


Poison ivy pulled by hand in protective bag
The plant then is in my bag-gloved hand. I next pull the open top of the bag carefully back down my arm and over the poison ivy so the bag ends up inside out with the poison ivy inside the bag. I knot the bag and put it into the trash—not my compost pile or anywhere else where it might re-root.


Poison ivy, bye, bye!
Poison ivy: gone. Bob: no danger of rash. Newspaper bag: recycled in a good cause.


Note: Don’t use a vented plastic bag, such as some veggies and fruit come in. The small vent holes may allow poison ivy’s irritating sap to come into contact with your hand or arm. And if your poison ivy has been growing in place for some time, it may not pull easily, so you may want to consider nuking it with an herbicide labeled to kill poison ivy.


Leaves of three?


Bye, bye.

Tuesday, May 24, 2011

Floppy Peonies: Start Again?

'Should I axe them?'


What can we do about our peonies, which flop when rain soaks their blooms, sometimes even before?

“The first wise decision,” writes Adrian Higgins in his Washington Post “Gardening” column, “might be to dig up that beloved old floppy peony and place it by the curb: ‘Free to Bad Home.’”

Oh, come on, Adrian. Get a grip. We love our peonies, even if they flop. Our parents and great-grandparents raised them. They cut long-stemmed blooms and took them as remembrances to lay by the tombstones of loved ones.

But Adrian, as usual, has a point to make. There are now peonies varieties that don’t flop.

To read his column, titled “Smart choices can prevent a floppy peony” in the Post print edition, CLICK HERE.

Monday, May 23, 2011

Deer Country: Mid-May Beauty

Peony


Mid-May in this cool, wet spring is a beautiful time, even in Deer Country, as perennial flowers, shrubs, and trees almost demand that we stop to admire their blooms, to take a photograph or two, to savor the occasional fragrance.


Here are photos of plants that have been blooming at Meadow Glenn during the last four days, along with a short comment about each and their “deer resistance.”

Peony: Every home that I can remember living in has had a garden with peonies. My dad used to cut them in New Jersey to take as remembrances to the graves of his and my mother’s parents. Peonies (Paeonia spp.) are deer resistant.

Dianthus (front) and orchid (back)
Dianthus and Hardy Ground Orchid: When I sit and read the Post on the glider on the front porch, the fragrance of the dianthus (Dianthus ‘Firewitch’) fills the morning air. Our pink orchids (Bletilla striata) are growing much more vigorously than the white ones. Both dianthus and hardy orchids are deer-resistant.


'Double Knock Out'
Rose: I love roses, but most take a lot of care and nearly all are “deer candy.” But I insist on having one, a red Knock Out that takes little care and which, as you can see in the photo, blooms wonderfully in its cage of welded wire. Eat your hearts out, deer—but not my Knock Out. This specimen is Rosa arbustiva ‘Double Knock Out.’


Chives
Chives: I’ll confess that I grow chives (Allium schoenoprasum) more for their lavender blooms than their flavor. A member of the allium family, as are onions and garlic, they’re deer resistant. Perhaps deer don’t like bad breath. Their black seeds will mean new plants will spring up this fall or next year.

Bleeding heart
Bleeding Heart: Bleeding hearts (Dicentra spp.) have been blooming for several weeks, but their flowers are now in decline. Still, they’re beautiful in the morning dew. They’re deer-resistant.


'Blue hill' salvia
Salvia: I love this deer-resistant perennial that looks great, takes little care, and adds to the beauty of our garden year after year. Salvia pratensis ‘Blue Hill” sometimes flops in mid-summer wind gusts, but then it puts up a new crop of stems from its crown and reblooms.


Bearded iris (front) and
Siberian iris (back)
Iris: Last week was peak bloom for our yellow bearded (Iris spp.) and our blue Siberian iris (Iris sibirica), both gifts from Cindy S., a fellow Master Gardener. I like the Siberian iris because it’s carefree. The flowers of the bearded iris are stunning, but the plant attracts insect pests which sometimes cause whole parts of the plant to collapse. I’m a low-care gardener, so I think the Siberian iris will be a part of our landscape long after the bearded iris has died out. Deer occasionally nip the top of a new leaf or two of the bearded iris in early spring, but they never browse the Siberian iris just a foot away.


Pansy
Pansy: Ellen picked out a market pack of pansies (Viola tricolor) when we visited a local nursery in March. I remember when we first moved to Meadow Glenn and planted our first pansies. We were amazed at how vigorously they grew along our front sidewalk, until one morning we discovered they had all disappeared—eaten to the ground by deer. Our pansies now are growing in the shade of a redbud tree in our backyard and are protected from the deer by a fence—hopefully. Pansies often are called “deer candy.”


Arrowwood viburnum
Viburnum: Deer browse lightly on new growth of our doublefile viburnum (Viburnum tomentosum) but seriously chow down on leaves of our arrowwood viburnum (Viburnum dentatum), a native shrub. Arrowwood is one of the plants I’m spraying with “Deer Out” as an experiment this year, as I mentioned in an earlier posting.


Kousa dogwood
Dogwood: Deer browse heavily on the leaves of our native dogwood (Cornus florida) but only lightly on its Asian cousin, Cornus kousa. We were amazed to discover, however, that deer will even spar over the ripened drupes (large, fleshy seeds) of the kousa in the fall. While vacuuming the drupes, the deer often pause to sample leaves. Over the last two years, I’ve pruned low, leaf-bearing branches, so deer now ignore our kousa’s foliage.


'Wolf Eyes" kousa dogwood
Just 50 feet away from our large Cornus kousa is a quite different kousa cultivar, Wolf Eyes, with variegated leaves and hardly noticeable blooms that are more light-green than they are white. Even though Wolf Eyes is small and bushy with lots of leaves deer could browse easily, deer have only nibbled a leaf or two since I planted it four years ago. I often wonder whether deer ignore the tree because of its variegated leaves, but I think not because they heavily browse the variegated hostas just six feet away. Let’s call Wolf Eyes’s deer resistance a happy mystery.


Bottom line: ten of the 13 flowering plants shown in photos in this posting are deer resistant and grow in Deer Country without sprays or cages. The other three, however, are deer candy—and must be protected in some way.


That’s life in Deer Country, where plants sometimes are caged and deer always run free.

Sunday, May 22, 2011

Stinkbug update: News from the Battlefront


What’s the latest news about the battle against the brown marmorated stink bug (BMSB)?

Finding the answer was one of my goals when I attended two 90-minute sessions in which entomologists addressed the BMSB issue at the Annual Training Day for Master Gardeners at the University of Maryland, College Park, last Tuesday.

The news is both positive and discouraging. Research at numerous universities is almost on a “war footing” basis, but overall the news is not good for the 2011 crop year.

I’ll make no attempt to repeat technical information or quote specific presenters but will make a list of general statements that I believe accurately summarize what I heard:

1. The BMSB may be the worst pest in 40 years. The mid-Atlantic states are the current epicenter, but the bug is a good hitch-hiker and has been found in more than 30 states, where BMSB populations are expected to increase each year. BMSB’s probably have two generations per year in the mid-Atlantic states but may have up to five generations per year in states with milder climates.

2. Fifty scientists in several states are studying various aspects of the problem. Pesticide trials begin in about two weeks. Scientists will meet next month to report research findings.

3. Crops affected include apple, pear, peach, tomato, pepper, eggplant, corn, soybean, berries, cucumber, and cotton. Flowers include chrysanthemum, snapdragon, sunflower, and zinnia. Woody plants include maple, gum, and nandina.

4. Organic growers are at greatest risk, and some, especially fruit growers, this year may be faced with near-total crop failures.

5. Biological controls in the form of small, Asian wasps (“stingless” for humans) that prey on the BMSB may be the best solution. The USDA is experimenting with several species, but they may be released in 2013 at the earliest, and only if they do not negative impact on native species. Potential North American insect predators have not yet affected BMSB populations in significant amounts.

6. Most pesticides are not labeled for BMSB control. Current, less risky pesticides may be less effective than older, high-risk pesticides. Pesticide risk often is also high to beneficial insects. Insecticidal soap causes high mortality of BMSB nymphs, but not of adults.

7. Companies may begin selling traps originally designed to attract BMSB’s for study. These yellow traps will be studied to see if they, as adapted for sale, are effective controls. At this point the pheromone used in the trap as a lure is that of a BMSB relative, not of the BMSB.

8. Here’s a link to the latest fact sheet (March 2011) for garden centers from the University of Maryland Extension about BMSB. It contains color photographs and information on the following subjects: life cycle, feeding habits, protecting indoor plants, dealing with BMSB in houses, outdoor control options, and a report on research involving parasitic wasps. CLICK HERE.

9. Here’s a link to the University of Maryland Extension Home and Garden Information Center’s publication on the BMSB. CLICK HERE.

Additional information: Here’s a link to a recent (May 20) University of Maryland Extension’s Grow It Eat It blog posting describing a “low tunnel” made of PVC pipe, rebar, floating row cover, clothesline, twine, stakes, duct tape, and bricks (as anchors) to protect “short” veggies from the BMSB. CLICK HERE.

Friday, May 20, 2011

Tomato Patch: Hello, Cool, Breezy World

Starting to "harden off'


My tomato seedlings are growing well, thank you. If you recall from earlier Tomato Patch postings, I planted my tomato seeds in cups on April 25 and the first sprouts appeared four days later. Two weeks later, on May 9, I planted seeds in the cups where the April 25 seeds failed to germinate. From April 25 until today, all the cups have been under shop lights with cool-white fluorescent bulbs in our utility room, where the temperature is about 73°F.

Today—May 20—three and a half weeks after I planted the seeds and three weeks after the first tomato plants began reaching toward cool, white light, I introduced all the plants—even those that grew from the more recent sowing—to real life in the cool, breezy world with its warmer days and cooler nights.

Life was near ideal in our utility room for the young plants. The temperature was uniform. No spring downpours pounded the seedlings to the ground. No thunderstorm whirlwinds bent them at 90° angles over the edges of their cups. No frigid nights gave them the shivers. No crows played pranks and pulled them up to die of root exposure.

Today I moved all the cups from the trays in which they sat for three weeks into three plastic storage bins—minus tops, of course. I watered all the cups well with my squeeze bottle, to which I had added a quarter teaspoon or so of Miracle-Gro, a water-soluble fertilizer, and then arranged the cups in the bins and set them on our front porch, which faces due east.

Seedlings at 3.5 weeks
Welcome, to the real world, young tomato plants. Don’t be alarmed at that force pushing on you slightly from the northwest. That’s our prevailing breeze—gentle compared to the gusts that have blown through during the last week—and it will help you develop sturdy central stems. And, yes, that light is bright. It’s the sun. It peeks over the pines about seven each morning. It will help you grow robustly over the next two weeks. Just after noon, however, the shade of the house will keep you from getting sunburned while you’re getting used to the sunshine.

Putting young plants that have been grown inside under lights outside for increasing hours over a week or two before they’re set out in the garden is called “hardening off.” It’s my way of avoiding rubbing sun block on all those tiny leaves. (Yes, that last sentence is attempted humor.) Every two days I’ll move the bins another six inches or so farther from the house, so they’ll get a little more direct sunshine.

In addition to watering the plants every morning, I’ll keep an eye on forecasts while my plants are hardening off. If a springtime thunderstorm threatens with gusts that could upset the bins, I’ll give them some protection by moving them up against the wall of the house, or into the house if severe weather threatens. If I were still working and weren’t here to move them, I would put a brick or two into each bin to thwart the wind.

If temperatures soar, as they may next week, I’ll check the plants during the early afternoon to make sure they don’t dry out, wilt, and die. If I were still away at work during the day, I’d add water to each bin so the level goes about a quarter-inch up the sides of the cups—just to make sure the plants don’t dry out. Different brands of starting mixes have slightly different formulas, and some dry out faster than others. I’m using two different mixes this year, and I’ve noticed one dries out faster than the other, so I’ll be sure to check the cups morning, noon, and night.

You may wonder why I fertilized the plants. One of the starting mixes I’m using contains a small amount of fertilizer, but the other doesn’t. So I’m just being “sure” that all the young plants have enough. Really, though, the plants probably would do well even if I didn’t give them a shot of nitrogen.

I did some rearranging when I moved the cups into the larger bins. After just three weeks of growing, seedlings of some of the varieties are several inches taller than those of other varieties. Also, the later-planted seeds were much shorter. Since I had coded each cup with a permanent marker when I planted the seeds, I don’t have to worry about identifying the plants when I go to plant them or give them away. Every “J” is a Juliet, and every “ByR” is a Brandywine Red.

In another 10 days to two weeks, when I’m fairly certain the temperatures won’t dip below 50°, I’ll transplant my growing tomato plants into our garden. Yes, some gardeners have already set out their tomato plants, but when the warm days and warm nights come, all tomato plants will grow quickly, and by mid-July it will be hard to distinguish those set out on May 15 from those set out May 30, or even later.

Thursday, May 19, 2011

Tomato Patch: Listen to Our Official Anthem

Home-grown tomatoes


A vegetable garden without tomatoes? Impossible! Tomatoes are the most garden-grown vegetable in the world. Seed catalogs feature huge tomatoes on their covers. The mere thought of a fresh-cut tomato, just picked in your kitchen garden, starts your saliva flowing.

Isn’t it time for tomato growers to recognize the world’s number-one veggie by adopting an official anthem or song? Anthems of great nations demand the attention and respect of their citizens. We stand in silence as we endure their renditions in solemn times, such as at the beginning of baseball, football, and basketball games.

By contrast, the official anthem of the Tomato Patch demands an entirely different approach. It’s one that tempts you to sing along, smile, chuckle, tap your foot, snap your fingers, and move your hips and shoulders. It’s a song you won’t forget once the game begins. It’s a song you will sing all day long as you lovingly weed your growing tomato plants, pick their ripening fruit, or make a fresh tomato sandwich. It’s a song you’ll listen to again and again, a song of contentment and happiness.

If you’re ready to enjoy the Official Anthem of the Tomato Patch—“Home Grown Tomatoes,” with Jay Unger and Molly Manor—CLICK BELOW.


Wednesday, May 18, 2011

Barbara's Secret to Early Lettuce

Barbara & one of her lettuce beds


Barbara Billek, who gardens at the Columbia Gardeners, Inc., Westside Garden Plots, has been harvesting Buttercrunch, Deer Tongue, and Parris Island Cos lettuce for several weeks now, while most of us gardeners in Central Maryland have been struggling to plant our lettuce seeds in rain-saturated soil.

What’s her secret for jump-starting her spring garden?

“I planted my lettuce seeds on September 26,” she explained. “September is a great month for gardening, with its sunny days and temperatures in the 50’s and 60’s. Compare that with the cold, wet days of March or April, when many gardeners start thinking of planting their spring vegetables.”

How did Barbara’s lettuce survive the freezes and snows of Winter 2010-2011?

“I cover it with a floating row cover,” she explained. “I’ve been doing it for six years. I use a light-weight cover--.6 ounces per square yard—that I buy from Gardens Alive. The label says it provides light frost protection and also is a good insect barrier.”

Does Barbara use hoops or some sort of a structure to support the cover?

“No, I just cover the seedlings sometime in November, when the weather turns cold. I use large plastic clothes pins to attach the cover to the sides of my raised beds so it won’t blow away. Some gardeners use plastic or wire row-cover pins, bricks or stones, or even the soil itself to anchor the cover in place.”

When does she take off the cover?

Barbara sowed the taller lettuce on September 26
and the shorter lettuce on March 13
“This year I took it off March 2,” she said. “You can see the difference the row cover makes.” She pointed out three sowings of the same lettuces. After two months, seeds she sowed on March 13 are plants about an inch and a half tall. After nearly a month, seeds she sowed April 17 are plants about a half inch tall. Seeds she sowed September 26 are now plants about 10 inches tall.

“We’ve been eating lettuce salads for dinner every evening,” Barbara explained. “We give some away, and still we have too much lettuce.”

Barbara sowed this chard on September 4
and covered it over winter
“With vinegarette?” I asked.

“Yes, ” Barbara replied. “I make my own. It’s three parts grapeseed oil and one part high-grade balsamic vinegar, both of which I get at Trader Joe’s.”

Do row covers get other veggies through the winter?

“Yes,” Barbara said. “I do the same with chard, kale, and spinach. They do well too.”

Thank you, Barbara, for the lettuce sampler
Thank you, Barbara, for this gardening tip—and for the gift bag of lettuce. Ellen and I have already enjoyed a mixed salad for dinner and put some of the deep-red leaves on our Gardenburgers at lunch. The lettuce is delicious.

Additional Information: To see photos and read more facts about row covers, CLICK HERE to link to the University of Maryland Extension’s information sheet GE 004, “Floating Row Cover.”

Tuesday, May 17, 2011

Have You Killed a Bird Today?

Can I fly through your diningroom?


Thud!

We cringe at that sound, which we occasionally hear at Meadow Glenn. We know exactly what it means: a bird has crashed into one of our windows.

I rush to add that we usually—but not always—discover that the bird is momentarily stunned but in a few minutes regains its senses and flies away. Years of observation have taught us that the most frequent causes of the crashes is that birds at our feeders have been panicked by an approaching hawk.

We might take a simplistic approach and try to figure out “the one cause” of such an accident. I might blame the hawk because if there were no hawk, there wouldn’t have been a panicked flight into the window pane. The victim might blame the house—or the bird feeder. If there were no house, there would be no window to crash into. And if there were no feeder, the victim wouldn’t have been near the window when the hawk came hunting.

The last two “causes,” of course, are related to human activity, which researchers have linked to billions of bird deaths each year in the United States. In his “Urban Jungle” column in the Washington Post, Patterson Clark recently listed six human-related categories and the number of bird deaths associated with each.

Here are the six categories in alphabetical order: Automobiles, Buildings, Cats, Communication Towers, Pesticides, and Power Lines.

How would you rank them?

I’ll make the quiz easier for you. Which one of the six do you think causes the most bird deaths per year?

You’ll find the answer in the bird mortality chart in the “Urban Jungle” column. CLICK HERE.

Monday, May 16, 2011

How Can I Turn Off the Alarm?

Our new alarm


Monday: 5:16 a.m. Tuesday: 5:25 a.m. Wednesday: 4:58 a.m. I wish my alarm would be a little more consistent—and maybe a bit later too, say 6:00 a.m.

But there’s not much I can do about the alarm. It’s not one that I can set or turn off. It’s our newest, early-rising neighbor, a Gray Catbird (Dumetella carolinensis).

I’ve seen a pair of catbirds in our trees, shrubs, and garden for a few weeks. More recently we’ve seen them often near a 10-foot high Crape Myrtle shrub just below our bedroom windows. This week the male began greeting the dawn’s early light from a perch on the roof just above our bedroom windows.

Why do I say the male is the songster?

One of my favorite websites, the Cornell Lab of Ornithology, says the whole song of a male can last several minutes and consists of a “long, halting series of short notes…. Sounds include whistles, squeaks, gurgles, whines, and nasal tones. The notes often are imitations of other birds as well as of frogs and mechanical sounds…. Females sing infrequently, and when they do, theirs songs are sung more quietly.”

There’s nothing that can remotely be described as “more quietly” when our songster greets the new day.

The “other birds” phrase in the Cornell Lab’s description of the song makes me smile. The other day Ellen and I were walking in our back yard and heard the songster singing away on his favorite mid-day perch in a nearby maple tree. Suddenly his song included an imitation of a Whip-poor-will. It was an excellent imitation—except it was an octave or two too high. I wonder where in his travels he heard a Whip-poor-will, since I’ve never heard one in this neighborhood.

Are you ready to listen to a Gray Catbird’s song on the Cornell Lab’s website? CLICK HERE and then scroll down a couple of inches and click on the second “Song.”

Sunday, May 15, 2011

Deer Country: Yes, You Can!


Yes, you can have a good looking landscape in Deer Country. Look at the three photos with this posting. I took them Thursday (May 12). Most of the plants you see are those I’ve mentioned in previous “Deer Country” postings. Most are totally unprotected from our local deer, which number in the mid-20s. The exceptions are the azalea and rose at the left, both of which are caged.

If you’ve read “Deer Country” from my first posting, you know what I’m talking about. If you haven’t, click on the “DeerCountry” label after the end of this posting. You’ll get a list of earlier postings. I suggest you begin reading with the oldest, “Deer Country 1.” They’ll make more sense that way.

Friday, May 13, 2011

What Terrible Language!

Motionless she sat


I had just sat down at the edge of our blackberry patch to begin rooting out mugwort when I heard the most terrible language—letting me know I was persona non grata.

I was surprised by the noise—which was coming from a purple-leaf plum tree about 40 feet away. I couldn’t see the fowl-beaked speaker, who must have been hidden inside the plum tree. But I knew from his sound that he was an American Robin, and he wanted me to move on—pronto.

But I was 40 feet away. Why was he yelling at me?

Suddenly I thought I knew why. I slowly turned to my left and looked up into the variegated holly that grows at the southeast corner of our house, about five feet from where I sat. My eyes focused up and into tree. About three feet above the ground, near the trunk, behind a prickly fortress of leaves, was a nest on which a second robin sat motionless.

I smiled, and went to retrieve my camera from inside the house. When I returned, I moved slowly toward the tree. The robin on the nest didn’t move a feather, even when I was just two feet away.

I fiddled with my camera for a second or two and when I focused on the nest I noticed that the robin has turned, bill now pointing east, not west. How did she do that in an instant, without my seeing?

I took several photos and returned to rooting out mugwort and slowly worked my way down the blackberry bed and away from the nesting robin.

And I thought about the bird on the nest—and the one in the plum tree: devotion, maternal and paternal instinct, courage in view of what might be a monstrous danger.

What chance is there that the eggs in the nest will hatch, grow, and fledge? Squirrels or blue jays might brunch on the eggs. A crow, feral cat, raccoon, or an opossum might dine on the hatchlings.

I recalled the “Urban Jungle” column by Patterson Clark in the Washington Post that indicated that there is only a 55% probability that one hatchling will survive and fledge from the open nest.

The robins might sense I’m the biggest threat to their nest, but I am now a protector. When I hear the jays screaming or the crows cawing in the morning, I step outside and make my presence known. They quickly move on.

But I cannot be on guard 24/7.

So I wonder. How many will live long enough to leave the nest?

To read Patterson Clark’s “Urban Jungle” column, “Success in the City,” CLICK HERE.

Thursday, May 12, 2011

Finally, I’ve Planted ‘Early’ Veggies

Short 'n Sweet carrots


I had every good intention of planting seeds of my cool-weather veggies in early April, but, as I mentioned in an earlier blog, it rained and showered in the whole month of April and the first week of May—enough to keep our veggie garden saturated and unworkable for nearly five weeks.

But the weather cleared last week. Soil became workable, so I planted my spring veggie seeds in our garden. Here’s my planting list. Maybe you’ll find a veggie you’ll want to try:

Carrot (Daucus carota): I’ve planted Short ‘n Sweet (W. Atlee Burpee & Co.) for several years now because its four-inch roots grow well in our heavy Maryland soil and because its bright-orange roots are sweet in reality and not just in the catalog description. Days to maturity: 68.

Green bean (Phaseolus vulgaris): Tenderpod (W. Atlee Burpee & Co.) has been my favorite “snap” bean for so long that I cannot remember when I began planting it. Burpee describes it as “tender, stringless & meaty.” I call it “One good string bean—without the string, of course.” The round, green pods average about 5½-inches long. We could freeze them—if we didn’t eat them all. Days to maturity: 50.

Ruby Red chard
Chard (Beta vulgaris): Ruby Red (W. Atlee Burpee & Co.) has deep-red stalks and medium to large leaves. Small leaves look great in springtime salads. Later, larger leaves and stalks make for savory cooked greens. 55 days. Visitors often exclaim, “Oh, you grow rhubarb.”

Beet (Beta vulgaris): Cylindra (W. Atlee Burpee & Co.) is my choice for spring planting. The reason is simple: I have seeds, which I stored over winter in our fridge, left from 2010. I like the cylindrical red roots, which are perfect for slicing. Days to maturity: 60.

Simpsons Curled lettuce
Lettuce (Lactuca sativa): Simpsons Curled (Bentley Seeds, Inc.), Red Sails (Botanical Interests, Inc.), and Coastal Star (Johnny’s Selected Seeds, Inc.) are the same three that I posted about starting inside in yoghurt cups three weeks ago. Simpsons Curled is a bright-green leaf lettuce that matures in 45 days. Red Sails, according to Botanical Interests, is a “fancy buttery lettuce with ruffled burgundy-tinged leaves … a salad lover’s dream” that also matures in 45 days, so I’m already dreaming of a mixed salad of Red Sails and Simpsons Curled. Coastal Star is a green romaine/cos that Johnny’s calls “heat tolerant,” a characteristic that I hope will stretch our spring lettuce season well into summer. Coastal Star matures in 57 days.

My warren hoe
I prepared the soil with my warren hoe, which I use as a plow instead of digging with a shovel, spade, or garden fork. I also made short, 4-foot hills on our terraced veggie beds with the hoe. I then used the end of the hoe’s handle to make shallow furrows in which I dropped the seeds. I used a small garden rake to cover the seeds and to tamp and flatten the soil. I marked the ends of the rows with forsythia twigs that had dried over winter in a bucket in our garage.

Since the rows are so short, I’ll have to plant additional rows in a couple of weeks to extend our harvest. Gardening on top of a hill has its challenges, but the short rows in our terraced gardens yield just about the right amount of veggies for the two of us.

The seeds should be sprouting over the next week or 10 days. I just hope the thunderstorms forecast for the weekend pass us by—or don’t deliver downpours that wash away my sprouting seeds.

To read my earlier blog about starting lettuce inside, CLICK HERE.

Wednesday, May 11, 2011

Mugging the Mugwort

Mugwort plants in blackberry patch


Some weeds are just misplaced flowers, and some are just plain impossible.

One of the impossible weeds at Meadow Glenn is mugwort (Artemisa vulgaris).

Some of mugwort’s common names range from the descriptive to truthful. 

“Chrysanthemum weed” is descriptive. Mugwort’s leaf shape and aroma somewhat resemble those of garden chrysanthemums. “Felon weed,” however, tells the real story. What this weed does to gardens is nothing short of criminal because once it’s established in a garden, it is next to impossible to remove or kill completely.

Mugwort was well established at the south end of our house when we moved here 14 years ago. Knowing nothing about the weed, I cut, hoed, dug, and pulled mugwort during the spring and summer months for several years. In an additional fit of ignorance, I planted a blackberry bed where I had just dug out mugwort. Now, years later I still fight mugwort in our blackberry bed every spring and summer. It’s the weed that just keeps growing.

Mugwort's 'persistent' underground stems
Weeds of the Northeast (1997 edition), the handy reference work by Uva, Neal, and DiTomaso, hints why my past battle plans have failed: “Rhizome fragments [underground stems] can be transported by cultivation or with infested balled and burlapped nursery stock, topsoil, or composted organic matter. … Its persistent rhizomes make mugwort difficult to control in perennial crops. It is also well adapted to mowing and cultivation and is relatively tolerant of most herbicides.”

In the past, every time I tried to dig or hoe mugwort, I broke up the weed’s underground stems or rhizomes. If a plant had four rhizomes and I broke each into three pieces, I likely ended up with 12 new plants.

That’s why a premium crop of mugwort grows in our blackberry patch. But enough is enough, and I’ve decided to get serious about eradicating this plant pest. Mugwort often survives selective, broadleaf herbicides such as 2,4-D. It’s time to use the ultimate weapon, glyphosate, a non-selective herbicide that kills most plants.

The University of Maryland Master Gardener Handbook explains that glyphosate “stops growth by interfering with amino acid synthesis. Growing plants slowly turn yellow and stop growing, and the entire plant eventually turns brown and dies. Glyphosate is quickly bound to organic matter and has no residual activity in the soil….”

Yes, I’m going to use glyphosate on the mugwort, but I’m not going to spray with abandon. One reason is that I don’t want to risk having the herbicide drift onto my blackberry plants. Another is that I try to use a minimal amount of pesticides of any sort.

Weeded bed awaits new mugwort sprouts
On Monday I took my Cape Cod weeder and uprooted all the mugwort I could in our blackberry patch. On the surface, the bed’s looking good now. But as I weeded, I could hear underground stems snapping, so I know that in a week or two, new mugwort plants will be sprouting from each of those fragments. I plan once a week to check for mugwort sprouts and then spray the emerging leaves with glyphosate.

After all these years of battling mugwort, will I finally win the battle in 2011?

That’s my plan.