 |
| Seed planting essentials--ready to go |
Birthdays. Anniversaries. New Year’s and Christmas, and holidays between. And T-Day.
You haven’t heard about T-Day?
That’s the day I start my tomato seeds. This year it was Monday, April 24, but the date varies.
Why so late? Because I like tomato plants to be about eight inches high, sturdy, ready to blast off when the hot weather tells these tropical plants to grow, flower, and fruit. And I’ve learned over the years that it takes my plants four weeks, plus or minus a few days, to grow that tall in individual cups under fluorescent lights in our basement utility room.
Here’s how I do it:
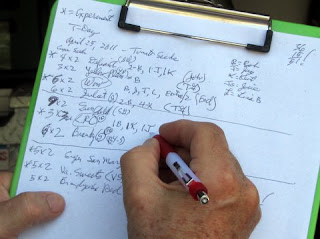
Step 1, Getting Ready: I open the tailgate of my Tacoma pickup—the perfect height for this job—and gather the essentials: seed packets, sterile starting mix, watering bottle, cups, a Phillips screwdriver, trays, ballpoint pen/sheet of paper/clipboard, a marking pen, a sharp knife, and a tablespoon.
Step 2, Preparing Cups: I use wide-top, six-ounce yoghurt cups or small (a.k.a. “tall” at Starbucks) paper or plastic coffee cups. Why buy when you can recycle so easily and for free? I stack two or three cups together and with the Phillips screwdriver punch two drainage holes in the bottoms. Then I place the cups into the trays. I find it best if all the cups in each tray are the same height, which makes it easy to adjust the fluorescent lights under which they will be growing. I end up with 18 yoghurt cups in one tray, 15 coffee cups in the second, and 16 yoghurt cups plus two coffee cups in the third. I use the knife to cut the two coffee cups down to the height of the yoghurt cups.
Step 3, Adding the Mix: I use one of the yoghurt cups to measure starting mix into the cups. I fill each about three-quarters, shaking each cup to level the mix. I fill each cup over the open bag so spills fall into the bag, and I don’t have to clean up later. One eight dry-quart bag of mix is enough for at least 40 starting cups.
Step 4, Dropping the Seeds: I drop two seeds into each cup. That sounds simple, but first I have to figure out how many cups I want to start of each of the 10 tomato varieties I’m growing this year. I’m starting 51 cups, each of which ultimately will hold one plant. Wouldn’t four or five plants be enough for Ellen and me? Well, yes, if I weren’t a tomato freak who wants to grow both old favorites and new varieties—and have both plants and fruit to give away too.
 |
| Notes are better than memory--at least for me |
 |
| I'll know this plant is a Sungold |
Step 7, Watering: After seeds are in their cups, I water them gently with a home-made plastic watering bottle—a water or soda bottle works well—that has a small hole in its cap. I make the hole by heating the tip of an awl on our electric stove and pressing it through the plastic cap. I gently squeeze the bottle to regulate the water flow just the way I want it. This year I used Miracle-Gro Seed Starting Mix, which is slightly moist to the touch, so I didn’t have to add much water—just enough to help the seeds sprout. Some mixes are dry and must be wetted down first—a messy pain in the bucket to my way of thinking.
Step 8, Covering Seeds: I use the tablespoon to cover the seeds with starting mix. Trial and error led me to the tablespoon. A rounded spoonful of mix covers the seeds in each cup “just right,” about a quarter of an inch.
 |
| Home-made watering bottle |
Step 10, To the Utility Room: At first opportunity I move the trays of cups to our utility room, where I place them on a growing stand that friends recycled to me. The temperature there is about 73, just a degree or two below optimum temperature for tomato seeds to sprout. I’ll check the cups daily, and when the seeds sprout in five to seven days, I’ll turn on the lights.
T-Day: I’ve planted my tomato seeds. From time to time I’ll post about what’s happening in my TomatoPatch.
You've got quite a process going there...hope the stink bugs don't do havoc on those time consuming tomatoes...happy eating!
ReplyDelete