Showing posts with label FrugalGardener. Show all posts

Friday, June 6, 2014

Strawberries, strawberries, strawberries

Allstar strawberries ... pan after pan after pan


When it rains, you raise your umbrella.  When your strawberries ripen, you pick and pick and pick.

I had feared the “Polar Vortex” inspired deep freeze of winter 2013-2014 had damaged our strawberry patch, but the Allstar plant variety I planted two years is producing well this spring, and Ellen and I this week have picked more berries than we can possibly eat.

Wednesday morning, for example, in about 15 minutes we filled our aluminum garden pan with the bright red fruit.  Curious, I got out our kitchen scale and the needle pointed to just under four pounds (1.8 kg).  We had picked almost that many Tuesday.  And Friday morning I picked even more—heaping the garden pan and a smaller plastic container.

We’ve been eating fresh strawberries on our cereal every morning for more than a week.  Our daughter has volunteered to eat some—and did some picking herself one evening.  I’ve recycled tomato clamshell packages to gift two neighbors with prime berries.  Our resident catbird couple has been enjoying some of the sweet fruit too.

And still we have too many strawberries.  Wednesday night we got panicky and baked some shortcake on which we heaped berries, berries, and more berries.  Love that panic!  And we enjoyed leftover shortcake with strawberries again Thursday evening.  And every morning we heap berries on our morning cereal.  What next—freezer jam?

Panic supper for Ancient and Mrs. Gardener
I figure our strawberry harvest is peaking this week and that we’ve picked more than 15 pounds of berries.  Say we pick another eight pounds.  That would be 23 pounds of fruit from the original 25 plants of 2012 and their offspring, called “daughters” in berry ads.  A local farm charges U-pickers $2.75 a pound. A pound clamshell of berries at our local Giant Foods supermarket recently have averaged $2.99, so our $26.50 investment in the plants in 2012 this year yielded fruit worth nearly $60.00  Not bad—or more appropriately—how sweet.  This Frugal Gardener wishes our bank paid interest at that rate.

I followed directions that came with the plants from the Indiana Berry & Plant Co. and kept my two small beds narrow to maximize yield.  In addition to producing beautiful fruit, the two narrow strawberries beds serve as borders of two small vegetable gardens.

This Ancient Gardener sees only one downside to growing strawberries.  It seems that over the years strawberry plants are growing shorter.  Or maybe my legs are growing longer and my arms are getting shorter.  Oh, my Aching Back.  I need to start working in the price of a bottle of acetaminophen tablets into my strawberry cost analysis.  But certainly the harvest is worth a few aches and pains.

In about five years, when it’s time to plant a new bed of strawberries and I’ll be zeroing in on 80 (age, not miles per hour), perhaps I’ll have to start planting only “tall” varieties of our favorite fruits and vegetables, ones that don’t require me to stoop and stand and stoop and stand.  Or maybe by then some genius will have invented a portable garden elevator so I can just hop on, push “up,” and won’t have to struggle to stand upright after berry picking.

Life is good in the gardens at Meadow Glenn.  And that’s the real lowdown.  Really.

Strawberry shortcake--again?
Yes!

Thursday, May 22, 2014

My old wheelbarrow: free flat or flat free?

Flat wheel off, no-flat wheel on


I never cease marveling at our unknown ancestor who invented wheels.  Without wheels civilization as we know it would grind to a halt—which is what happened when I grabbed the handles of my wheelbarrow recently and discovered its tire was flat—absolutely and irreparably flat.

I had put a small bale of straw into my barrow to move it to what would be Tomato Patch 2014.  What does a small bale of straw weigh—25 pounds or so?  Whatever it weighed, it was too much for the wheelbarrow tire, which in a few seconds went from apparently OK to absolutely flat under the weight of the bale.

I was surprised by the flat because a year ago I had gotten tired of pumping up the tubeless tire because it constantly leaked at a rate roughly equivalent with the load being carried.  So I invested in a tube and installed it myself—not an easy task because I had to remove the wheel assembly from the wheelbarrow, loosen the tire from the rim, insert the tube, position the stem through the rim, and pump up the repaired tire.

I learned from that experience why we don’t repair our own tubeless tires.  It’s tough work without the proper equipment and tools.  A mechanic or helper at a tire store or auto service shop can do the job in a few minutes.  It probably took me more than an hour, and the result wasn’t something to brag about because the new stem made a weird angle where it exited through the rim.

And that weird angle probably was what caused the flatter-than-a-pancake flat.  An extra heavy load of four bags of LeafGro probably made the tube and stem rub against the metal edge of the rim, slicing the stem as cleanly as if I had used a penknife or razor blade.

So after years of minor frustration over having to pump up the leaking tubeless tire and then finding the irreparable damage to the tube I had inserted to solve the problem, I surrendered—absolutely.   I got out my socket set and removed the four bolts holding the flat tire to the wheelbarrow handles and removed the complete tire/wheel assembly.  I wrote down tire size (4.00-6), diameter of the axle and of the assembled wheel and tire and went to our computer to do some window shopping.

I searched “4.00-6 solid wheelbarrow tires” or something like that and after a few false starts found that two nearby Home Depot stores stocked a “universal” solid tire for wheelbarrows.  Before I knew it I was checking out at one of the stores with a solid tire in my shopping cart.  At home, I put the wheelbarrow on the back of my Tacoma’s bed and in short order installed the new tire.

Time:  Oh, maybe 40 minutes—probably four times what it would have taken an expert to do the job—but the service charge was “right.”

And the cost: $34.98 for the new wheel and tire assembly, only about 70% of the cost of a new wheelbarrow.

Was that an outlandish price for this ole Frugal Gardener to pay?  I don’t think so.  A new wheelbarrow would have a tubeless tire that doubtless would have started leaking annoyingly at some point.  A new barrow would probably have a plastic tray or bin that probably would crack or otherwise fail long before the steel bin of my old barrow will.  I also like the dents and scrapes in my old wheelbarrow.  They’re sort of “garden tool art” that we created together, one ding at a time as we happily carted who-knows-what from here to there in our gardens or to the compost piles.   In the fall I get a small degree of satisfaction as I hose out the bin and wipe down my work buddy with a light spray of WD40.

Finally, I smile just a bit because, really, I’ve recycled my old wheelbarrow and hopefully we’ll work together hands-around-handles for many more years.

Junk crusher at the Alpha Ridge Landfill recycling center, I’ve cheated you again.

Sunday, May 13, 2012

Frugal Gardener: Closing My Mini-Greenhouse

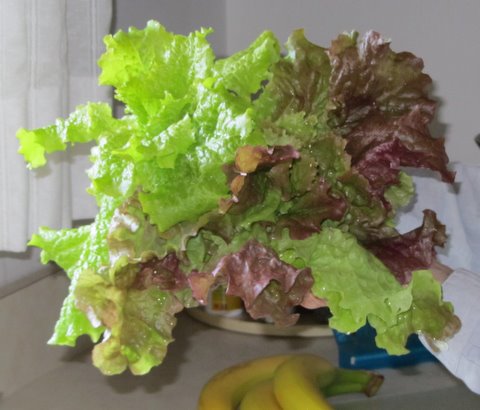
Last mini-greenhouse lettuce
I’ve closed my mini-greenhouse for the summer.  I grabbed the two handles and pulled straight up, moved the green-house aside, and looked at the three lettuce plants that still had been growing inside—two Green Ice and one Red Sails.

We’ll have to use those three heads soon because they show signs of getting ready to bolt.  Yes, I should have cut them a week ago, but I didn’t.  And after growing in the cozy greenhouse for several months, they may react adversely to the colder, windier life outside their plastic box. 

But lettuce life goes on. Nearby I transplanted eight lettuce seedlings that I started April 29 in yoghurt cups—two Red Velvet, two Cracoviensis, two Green Ice, and two Red Sails, so we’ll not be dashing off to a supermarket any time soon to buy lettuce.

New lettuce crop
I’ve declared the mini-greenhouse a success.  I grew lettuce overwinter and picked heads in January, February, March, April, and May.  Of course winter 2011 to 2012 was one of the warmest on record, with temperatures here in central Maryland only reaching lows of 18°F two or three times.  What if the temperature had dipped to 15° or 12° or 10°?  Would Red Sails and Green Ice have turned into Red and Green Slime?

When I hosed off the mini-greenhouse, I noticed several cracks that indicate it won’t last forever.  Three of the four upper corners—which were not reinforced when molded as were the bottom corners—had slight cracks.  I’ve already duct-taped the cracks in preparation for another winter’s crop of lettuce.

I could have bought a commercial greenhouse—for $150, $1,500, $5,000, or $25,000.  But $13.76 seemed like a perfectly reasonable price for a Frugal Gardener.  If I get another year of use out of the container—fine.  If I get two more years of use—excellent.  If I get three years, I’ll be tempted to trade in my bib overalls on a kilt.

Time for some cleanup
At the end of the day, I hosed off the mini-greenhouse.  It’s ready for growing lettuce again next winter.

If you want to see what the mini-greenhouse looked like when I created it, CLICK HERE.

Sunday, March 4, 2012

Frugal Gardener: Cutting Lettuce in March

Red Sails lettuce cut March 2


It was beautiful—the head of Red Sails lettuce I cut Friday when Ellen said we needed lettuce for our lunchtime sandwiches.

The head was the last of three I raised over winter in the mini-greenhouse I fashioned from an inexpensive plastic storage container I bought for a few dollars at Wal-Mart.  The storage container provided enough protection for the Red Sails lettuce—a cold-resistant variety—to grow through Winter 2011-2012. I started the seeds in yoghurt cups on October 31 and transplanted the seedlings into the mini-greenhouse on November 9.

This winter has been unusually warm with temperatures dropping below 20°F only five or six times and never below 18°.  To give the lettuce an even better chance of surviving, I set up the mini-greenhouse on the south side of a brick wall, where it would be both protected from cold wind and would benefit from the heat-absorbing bricks. 

After cutting beautiful heads of lettuce through the winter, I can only declare, “Success!”  The mini-greenhouse works.

Of course I should have two or three lettuce seedlings ready to transplant into the mini-greenhouse—but I don’t.  On Thursday I seeded two varieties—Red Sails and Green Ice—in a yoghurt cup that’s sitting on our kitchen windowsill, but they won’t be ready to transplant for another two weeks.  Do I hear a lecture coming on, “Use Your Head and Plan Ahead, Bob”?

During this experiment I’ve learned that something other than lettuce thrives over winter in my mini-greenhouse—slugs.  When I cut the last head of lettuce on Friday, I looked carefully between the bases of the leaves and found two half-inch black slugs and several so small they appeared more white than black.

I suppose an iron-stomached foodie might consider adding buttered slugs to his or her menu—but, thank you, I’ll take a pass.

I’ve got to add organic slug bait (iron phosphate), such as Slug Magic, Sluggo, or Escar-Go, to my garden shopping list because slugs are a fact of veggie gardening here at Meadow Glenn, where our 10 small, semi-terraced plots curve around the crest of a hill.  Supporting the plots are hundreds of concrete stacking block and even some river-stone mulch and some pavers that provide limitless living places for slugs.

If you want to get a head start on spring lettuce growing, why don’t you make a mini-greenhouse and start your lettuce today—and then reuse your greenhouse this fall to keep your fridge well stocked with lettuce into Winter 2012-2013?

If you want to see my posting about how I built my mini-greenhouse, CLICK HERE.
 

Tuesday, February 21, 2012

Deer Country: Freeing our trees

Buck rubbing tree with 24" protector
(galvanized hardware cloth)
I’ve been freeing many of our young trees when weather permits, which has been frequently this balmy winter.  Readers of this blog know that deer abound at Meadow Glenn and to grow trees requires that I cage them in their early years with metal stakes and welded wire.

I make the cages with two iron fence posts and a circle of 36”-wide welded wire that’s about two feet in diameter.

Many of the trees I’ve planted over the last six years were four- to five-feet tall, so most of their leaves were at a perfect height for deer browsing.  That’s why I began building cages—to separate leaves of young trees from mouths of hungry bambits.

As the trees have grown, I‘ve pruned their lower limbs so the lowest now are above the “browse line,” the imaginary line about five feet from the ground above which deer seldom browse.  It’s time to remove the cages, which, frankly, as landscape accents never will be featured in Fine Gardening magazine. 

Sumac that snapped
when buck rubbed it
Though browsing deer are no longer a major problem, rubbing deer are.  Rubbing deer are bucks in the fall—generally October or November—that wants to rub off the dead velvet that covered their growing antlers and then to polish their new racks.  Bucks prefer young, springy trees and shrubs for that purpose and generally rub vigorously about a foot or two from the ground.  Points of their antlers can damage the trees, even kill them if the rubbing severely damages the bark around the whole tree trunk.

Bucks here at Meadow Glenn seem to prefer to rub trunks up to two inches in diameter.  Local favorites are sumac, maple, and oak.  Small maples and oaks usually are tough enough to survive most damage, but sumacs often snap a few inches from the ground. 

Because of the rubbing problem, when I remove cages from our trees, I still must protect their trunks.  After trying a variety of trunk-protecting materials—including 24-inch galvanized hardware cloth and 36-inch welded wire (2”x3” grid)—I’ve settled on 36-inch plastic hardware cloth (1/2” grid).  The plastic hardware cloth is easier to cut with wire cutters and to handle, and bucks often adjusted to the 24-inch size by rubbing just above it.

Plastic hardware cloth
and bag of cable ties
I cut the 36-inch plastic hardware cloth in lengths that make a circle that’s between four and five inches in diameter, which leaves room for the trunks to grow for several years.  I secure each protector in place with two eight-inch cable ties, one about six inches from each end of the protector once I’ve wrapped it around a tree.

I haven’t found rigid trunk protectors locally, but several varieties are available on the Internet.  Search: “tree trunk protectors.”  Some are short to protect bark from string trimmers.  Others range up to four feet in height.

I checked prices today at Home Depot to see what the raw materials currently cost.  A 15-foot roll of 36-inch “Black Plastic Hardware Cloth” (1/2-inch mesh) sells for $16.44.  A bag of 100 eight-inch black cable ties costs $5.99.  A roll that long would make 13 protectors four inches in diameter.  Cost would be just over $1.30 for each protector and two ties.  That’s about a $5.00 saving on each from Internet prices (plus shipping) of comparable products. 

Do I hear a Frugal Gardener shouting, “Yes!  I can save a few bucks— some serious dough—if I make my own!”

Plastic protectors in place
in Deer Country
Deer Country puns aside, I’ve already removed cages from more than 20 young native trees that I’ve planted since 2006—red maples, tulip poplars, American dogwoods, American redbuds, and black gums.  Maybe in another five years I’ll be able to remove the trunk protectors too.

That’s all the excitement I can report from Meadow Glenn, where I cage the trees and the deer run free.

Sunday, February 5, 2012

Super Bowl Sacrifice

Red Sails lettuce in mini-greenhouse, Feb. 5


Ellen and I were assembling ingredients for our Super Bowl treat—a six-layer dip.

Guacamole—yes!

Refried beans—yes!

Shredded cheddar—yes!

Chopped tomatoes—yes!

Tzatziki—yes!

Lettuce—lettuce?

“Did you bring it in yet?” Ellen asked.

It was time for our Super Bowl Sacrifice.  It was time for me to cut one of the three Red Sails lettuce plants that have been growing in my cheap mini-greenhouse during the winter months.

The beautiful Super Bowl sacrifice
Well, when it’s time, it’s time.  I took my garden scissors off their hook in the garage by the kitchen door, and Ellen and I walked to the mini-greenhouse.  I wanted her to witness the sacrifice.

I unsnapped the fasteners and took off the lid.  The three Red Sails lettuces were beautiful.  I took my scissors, raised the lower leaves of the left Red Sails lettuce a bit, slid in the scissors, and … our Super Bowl Sacrifice was complete.

The head of lettuce was beautiful—despite the two small slugs that had managed to burrow their way into the bottomless mini-greenhouse in their quest for a lettuce meal.

Soon our six-layer dip was complete, and we nibbled away as the Giants took an early lead in Super Bowl XLVI, and then the Patriots tool the lead.

Good game, so far.  Good six-layer dip.  Good Red Sails lettuce fresh from meager winter garden.

Let the eating begin!
This is my round-about way of saying the mini-greenhouse is working well in this warm winter.
One Red Sails lettuce sacrificed.  Two Red Sails lettuces growing beautifully still.

If you missed my earlier postings about my mini-greenhouse experiment, CLICK HERE.

P.S. Final score: New England Patriots 17, New York Giants 21, Red Sails Lettuce 24.

Friday, January 27, 2012

Frugal Gardener: Seed Catalog(s) Revelation!

The puzzle pieces fit


Does the Frugal Gardener in you get irritated when you see five packets of seeds you want to buy in one catalog but the sixth packet you want is in another catalog—and you aren’t about to pay a second shipping and handling fee to get that one extra packet?

Over the last couple of weeks I’ve discovered that several seed catalogs come from the same source and that you can place one order from several catalogs and pay just one shipping and handling fee, provided, of course, that you wish to purchase from the cooperating catalogs.

When I was reviewing catalogs earlier this month, I noticed in passing that the mailing addresses of two catalogs, Totally Tomatoes and Shumway’s, were in the same city.  Then, when I compiled my “must order” seed list recently, I jotted down catalog abbreviations, page numbers, SKU numbers (product identifiers), and prices and realized the SKU numbers were the same in the two catalogs.  For example, the SKU for Amish Paste tomato seeds in both catalogs is #00029.

When I finished my list, I went to the Totally Tomatoes website and entered my selections.  Before final check out, however, I had an idea.  Why not add a SKU number for the last packet on my list—rutabaga seed, which is listed in Shumway’s but not Totally Tomatoes, and see what happens?  I did and bong! —the site wouldn’t accept it.

Still later, after I had checked out of the Totally Tomatoes site, I had another idea.  I sent an email to Customer Service at Totally Tomato and said I’d noticed that the addresses are the same and would they please add a packet of Shumway rutabaga seed to my order.

After we had exchanged several emails, Customer Service said for business and accounting reasons they could not mix orders from the two companies but that there is a website, egardenersplace, where you can order from “all our catalogs.”

I hastened to the website and found eight catalogs listed.  Four contain vegetable seeds: Totally Tomatoes, Shumway’s, Jung, and Vermont Bean.  Four sell flower seeds, roots, and/or plants: McClure & Zimmerman, Roots & Rhizomes, Edmund’s Roses, and Seymour’s.  I haven’t ordered from egardenersplace because I’ve already made my 2012 seed purchases, but I have checked the veggie-seed catalogs, and the SKU for Amish Paste tomato is the same in all.

The egardenersplace homepage shows the covers of the eight catalogs and says readers can order from all catalogs and just pay one shipping and handling fee, which appears to be $6.00 for orders under $60.00.  At the site, you click on a catalog, search or leaf through, select packets, and then go to another catalog, if you wish, to make more selections.  Check-out procedure is like that at most websites.

This Frugal Gardener likes the idea of buying from several catalogs and paying just one shipping and handling fee.  Now I wonder whether I should recommend that Vermont Bean change its name to Wisconsin Bean.

And a final finding that made Frugal Gardener smile: Though packets for the same seed variety have the same SKU numbers, prices occasionally differ.  In the two catalogs that I used to make my buy list, I found 5¢ and 10¢ differences in two packet prices.  Frugal Gardener, though, doesn’t see such massive savings reason sufficient to buy from one catalog and not the other.  If he did, though, perhaps he should start calling himself Pinchpenny Gardener.

If you’d like to take a look at the eight catalogs on the egardenersplace website, CLICK HERE.

Notes:  (1) You can order all eight print catalogs through the egardenersplace website.  (2) Mention of specific products, brands, or companies is not intended as an endorsement by the University of Maryland.  (3) I do not receive consideration of any kind for mentioning products, brands, or companies in my postings.  The seed catalogs I review are those from sellers from which I have previously bought seeds.

Sunday, January 22, 2012

Frugal Gardener: Free Coffee-Shop Garden Kits

Free garden kits begin at your favorite coffee shop


Hey, Frugal Gardeners, when you next shell out a buck or two for a morning coffee at your favorite coffee shop, drink your coffee but save the cup, the top, the cardboard insulator, and the wooden stirrer to help start your Garden 2012.

The coffee, of course, will cost you something.  But after you’ve enjoyed the hot java recycle make a coffee-shop garden kit out of your “trash.”  Here’s how this Frugal Gardener recycles these throwaways, but you may be even more creative:

Cup: Punch two holes in the bottom with a Phillips screwdriver and use as a starter cup for vegetable, herb, or flower seeds.  I prefer cardboard cups because they decompose over time—in a landfill after I’ve used them to start plants.  I prefer standard 12-ounce cups to the Starbucks “tall” cup—which is taller by comparison but narrower too—because I think the slightly shorter but wider cups accommodate multiple plants better.

Recycle your "trash"
Top:  I cut a pie-slice wedge out of a plastic top and use it as a divider to make two starter cells as I add sterile starting soil to a cup.  When it’s time to transplant into the garden, the plastic wedges make it easy for me to gently pull the two plants apart with minimal root damage.  Sometimes I make the wedges from plastic clamshell containers supermarket berries come in.

Stirrer:  I mark an abbreviation on a stirrer and use it in a cup to indicate the seed variety in the cup.  For example, CELE means Celebrity tomato and RS means Red Sails lettuce.  I could use stirrers to mark the ends of rows in the garden if I didn’t use branches cut from our forsythia bushes.

Insulator:  Most cardboard insulators have a row of perforations that make it easy to divide each insulator into two equal pieces.  I wrap each piece around the stem of a tomato transplant, with half the insulator above ground, half below, to keep cutworms from chainsawing the young plants just above soil level.

Those four “gardening kit” parts come with your order at most coffee shops, but one shop has a policy of doing more.  That shop is Starbucks, which requires its baristas to prepare bags of free coffee grounds for gardeners to use to amend their soil.

Look for the brown barrel
with the silver packages
The baristas at the Starbucks in our local Giant Foods store said bagging grounds is part of their job description—and they do it when their other work assignments permit.  If there’s a line of customers, for example, grounds don’t get bagged.  That Starbucks kiosk has a short, brown “barrel” near the pick-up counter where the baristas put the silver-colored bags labeled, “Grounds for Your Garden.”  The heavy-gauge plastic bags of grounds each originally held five pounds of beans.

I’d had gardeners mention they’ve never been able to get a bag of Starbucks grounds.  The baristas advised that a disappointed gardener should stop and ask about the best time to find bags available.  They also said sometimes a gardener takes every available bag.  Yes, sometimes I find the barrel empty.

One barista gave me a valuable tip: Take a bag that seems full but relatively light.  The grounds in that bag probably are from the espresso machine and are “dry” compared to the “wet” ones from the regular brewing machines, so the bag contains more grounds, less moisture.  And I’ve noticed that sometimes the bags are only a quarter full, which may indicate that perhaps some baristas aren’t exactly excited about bagging grounds.

Even though your local coffee shop doesn’t have a comprehensive recycling program like Starbuck’s, perhaps staffers there would save you a bucket of grounds.  Nothing ventured, nothing gained, so smile and inquire about possibilities.

Over the last couple of months I’ve been saving parts of  coffee shop “garden kits” for springtime use—and I’ve added a dozen bags or more of Starbucks “Grounds for Your Garden” to our garden soil—all for free—well, free if you don’t count the cost of the coffee you’ve enjoyed.

Please post a Comment telling how you recycle everyday throwaways by using them in your garden.

Tuesday, January 17, 2012

January Supermarket Surprise

Surpise!
Surprise!  Just beyond the stacks of bags of potatoes and onions and next to tropical houseplants and the “balloon center”—a Burpee seed rack—at our local Giant Foods store on January 6.

I don’t know what magician controls the timing of wintertime appearance of retail seed racks at our local stores, but last year seed racks appeared the first week of February.

Not quite in numbed shock, I hustled right over to the Burpee display to take a look.  Hmm—a panel of standard vegetable seeds—a panel of organic vegetable seeds.  I needed look no farther.

One packet caught my eye: Marketmore 76 cucumber seeds, $1.79, 3 g.  Just a few days earlier I had searched the Cornell University vegetable site in an effort to find a cuke variety that is resistant to various mildew diseases and other leaf diseases too and had zeroed in on Marketmore 76 as a likely candidate.  I picked a packet off the rack and turned it over: “Resistant to scab, cucumber mosaic and mildews.” 

Who can resist?
Two years ago, powdery mildew wiped out my whole cuke bed.  In 2011 I planted Diva, a mildew-resistant variety, but leaf-spot diseases wiped out that planting.  Will the third time, with Marketmore 76, be the charm?  I hope so, so I put the packet into my shopping cart.

As I walked toward the dairy section to pick up some provolone and a dozen eggs, I wondered whether Burpee or Giant has “inside information” that spring will come a month early this year.  Punxsutawney Phil, shadow or not, you’re fired!  Groundhogs get no respect here at Meadow Glenn, especially those that climb our hill and fence and chow down on springtime veggies.

Today (Jan. 17) I went to Home Depot in Columbia to pick up a 10-foot PVC pipe that I’ll cut into 3 1/2-foot lengths to make “underpasses” for hoses under our front and back sidewalks.  Those projects have been on my to-do list for 10 years, and, hold your breath, I installed the front one—the easier one—in less than an hour before lunch.

While at Home Depot I glanced into the garden-supply room and—yes, you guessed it—two staffers were setting up seed racks.  I temporarily abandoned my push-cart with the PVC pipe and took a look at the seed racks—Burpee, Ferry-Morse, and Martha.  I suppressed the question of whether there’s horticultural significance that the two seed companies established by men go by their surnames while the one established by a woman goes by her given name.

Not only veggies
Since I already had looked over the Burpee rack at Giant, I looked at the Burpee racks at Home Depot first.  At Home Depot, there must have been three or four times the number of vegetable and flower varieties and packets.  The packets looked the same, but there were differences.

The first difference I noticed was price.  Most of the veggie packets at Giant were $1.79.  At Home Depot, most were $1.00 or $1.49.  The second difference was that Burpee racks at Home Depot had more varieties of each vegetable—about a half dozen varieties of cuke seeds—but not Marketmore 76.  Don’t assume the Burpee seed rack at Store A contains the same varieties at the same price as the Burpee seed rack at Store B.

I went to Home Depot this morning to buy PVC pipe, but I added seven packets of seeds.  Herb and veggies: Lemon basil, $1.00, 200 mg.; Roma tomato, $1.00, 500 mg.; Detroit Dark Red, Medium Top beet, $1.00, 5.5 g.; Short ‘n Sweet carrot, $1.49, 2 g.; and Pic-N-Pic summer squash, $1.49, 2 g.  Annual flowers: Red Velvet celosia, $1.49, 160 mg. and Exquisite zinnia, $1.49, 500 mg.  This Frugal Gardener remembers that the price of most similar packets in the Burpee catalog is $3.95.

The seed racks I visited were good reminders that I’ve got to get out my seed catalogs, make selections, and order the rest of my 2012 vegetable seeds.

Monday, January 2, 2012

Frugal Gardener: Greenhouseperhaps Becomes Mini-Greenhouse

Frosted greenhouseperhaps after
December 29 flurries


We’ve had temperatures as low as 22°F and snow flurries in late October and December.  So how’s my $13.67 greenhouseperhaps doing?

My inexpensive—ok, cheap—greenhouseperhaps is a plastic storage container from which I cut the bottom.  I then installed the box in our garden as an experimental greenhouse.  As I wrote in a September blog, “Why not ‘build’ a very small greenhouse to see how long I can get lettuce to grow in our garden as winter approaches.  I’ll call it my greenhouseperhaps until I see if it really works.”

My experiment in frugality has lasted longer than I imagined because of our extra-warm fall and early winter.  Yes, we’ve had a few flurries and quite a few nights with sub-freezing temperatures.  The warm weather caused my September lettuce plantings to grow rapidly.  I harvested that planting and then moved the greenhouseperhaps to a more protected location and planted a second crop of three Red Sails lettuce plants that I had started in yoghurt cups inside our house.

So how are the three lettuce plants doing?  Fine, thank you.

Unprotected Simpsons Curled lettuce
after December 29 flurries
When I unlatched the two click handles today and lifted the top off the box, a sheet of thin ice slipped off the top and shattered on the garden soil.  Inside the box, the three Red Sails lettuce plants are growing slowly and showing no signs of freeze damage.  Outside the box just 40 feet away two Simpsons Curled lettuce plants stand as slushy evidence of what sub-freezing temperatures can do to lettuce.

Why has my greenhouseperhaps worked so far?  I think there are several reasons.

First, Red Sails lettuce seems slightly more cold-hardy than other lettuces, such as the Simpsons Curled.

Second, I’ve positioned the box about three feet from the south side of a brick wall, where it will benefit from winter sun and have some protection from cold north winds.

Third, the plastic container creates a slightly warmer microclimate for the three plants.  The soil there is dark brown because I’ve added plenty of compost over the years, so the dark soil absorbs warmth from the sun’s radiation.  The lidded box itself helps keep heat in and cold out and helps protects the plants from chilling winter breezes.  Even though a sheet of ice slid off the top of the lid this morning, the inside of the lid and the walls of the box were covered with drops of condensation.

How long will the greenhouseperhaps keep the Red Sails lettuce from freezing?

Red Sails lettuce January 2
inside greenhouseperhaps
I’m a realist.  I have no illusion that the lettuce will grow until spring.  At some point, an Arctic blast will burn the leaf edges and then turn the Red Sails into green mush.  That could be tomorrow night, when the local forecast calls for a low of 19°F.  I’ll keep you informed.

At this point I’m surrendering on one point, my use of “greenhouseperhaps” as the name for my winter lettuce box.  It works.  From now on it’s my “mini-greenhouse.”

What has my experiment taught me?

Creating a microclimate that lets cool-weather plants grow longer through the fall and into early winter doesn’t have to be expensive or complex.  A $13.64 plastic box in a semi-protected location works quite nicely, thank you.  The box works on the same temperature-moderating principle as do cold frames and row covers.

I think I’ll try my mini-greenhouse again as spring approaches—perhaps as soon as there are hints in February that spring is getting ready to, well, spring.  I’ll start two or three lettuce plants—perhaps Red Sail or an even shorter variety—inside our warm house and transplant them when they’re about two weeks young.

I’ve enjoyed this simple experiment.  Jeanine S. of Harford County (Maryland) read my original blog and experimented too—with an even simpler mini-greenhouse.  She didn’t cut out the bottom.  She just turned the lidless container upside down and positioned it over young lettuce plants.  In her Christmas Eve greetings, she wrote:  “I will be picking lettuce from under my plastic storage tub for tonight’s dinner with the boys and their families.  No, there will not be enough for a whole salad, but enough to add a touch of special flavor and color.  That was such a great idea!”

Perhaps the mini-greenhouse idea is somewhat less than “great,” but it works.

Shouldn’t you try it next spring or fall?
 
If you want to read details of how I created the mini-greenhouse, CLICK HERE.

Thursday, December 8, 2011

Cutting Lettuce in December

Simpsons Curled (left) and Red Sails lettuce
cut December 2


We’ve had many hard frosts during the last few weeks.  One morning the temperature was 27°F at dawn.  Many mornings our lawn is frosty white.  What am I harvesting from the outdoor freezer?

“Bob, we’re out of lettuce.  Do you still have some in the garden?”  Ellen recently asked.

I went to the garden and brought in the last of the lettuce I had planted in September in the experimental greenhouse or lettuce box—the one I called a “greenhouseperhaps” in an earlier posting—a bright-green Simpsons Curled plant and a Red Sails.  After I washed both lettuces, I stored them in a large plastic bag in our refrigerator between sandwiches and salads.

Red Sails seedlings in "greenhouseperhaps"
in early December
We’ve had such a warm fall that in early November I removed the box from around the lettuce and moved it to another location to protect three just-sprouted Red Sails plants, which continue to grow slowly.  This is a first-time experiment to see how long lettuce can continue growing as late-fall temperatures work their way down the thermometer.  Will some super-cold night soon kill the young plants?  Or will I pick lettuce at Christmas or New Year’s—or beyond?

What have I learned so far from this experiment?

First, with a little thought and care, I can pick lettuce—often called a “cool weather” vegetable—during most of the year if I plant small, successive crops every two to four weeks.  If I plant seeds in mid-March, I can begin picking small leaves as I thin the plants in April.  From May through November I can pick beautiful, mature plants.  Photo 1 shows the two beauties I picked even later, on December 2.

Second, my small greenhouse experiment quickly taught me that “short” lettuce will grow best in the box’s limited height.  Simpsons Curled and Red Sails top out at a foot or more, taller than the box.  When their leaves touch the top (lid) of the box, where moisture collects and freezes on frosty nights, ice crystals sometimes encase and damage the tallest lettuce leaves.  This winter I must buy a packet of seeds of some “short” head or leaf lettuce that will grow in the box without pressing against the icy top.

Third, the “greenhouseperhaps” is small, so the number of plants that can grow without overcrowding is limited.  For my first crop I transplanted 10 times too many plants and seeds in the box—a row of Simpsons Curled plants and a row of Red Sails seeds.  Within a few weeks the Simpsons Curled covered the Red Sails sprouts, which suffered in the deep shade.  My second attempt (Photo 2) has just three Red Sails seedlings, which I started in our sunroom in yoghurt cups and then transplanted.

Will I pick lettuce at year end—or even in early 2012?  I’ll let you know what happens as increasingly cold weather impacts on the three Red Sails lettuce plants growing in the mini-greenhouse.


Thursday, October 27, 2011

Experiment: Overwintering a Geranium

Geranium to be overwintered


We’re three-quarters of the way through October, and as I look out our kitchen window, I see a geranium blooming in the cool, fall weather.  In just a few days, I suppose, a hard frost will kill the geranium.  But what if I overwinter it—and replant it in the garden next spring?

Overwintering geraniums isn’t something most busy gardeners take the time to do these days, but in times past gardeners often took geraniums from their gardens and stored them overwinter.  I remember a neighbor, Mary Rau, moving potted geraniums into their garage to dry out and overwinter.

Why was that a fairly common fall routine?  Perhaps they were Frugal Gardeners who wanted to save money, and overwintering their geraniums meant they didn’t have to buy new plants the next spring.  Perhaps it was something just about everyone did before the dawn of the buy-use-discard era.

Soil shaken off, plant pruned
To find details about how to overwinter a geranium, I searched the Internet and found lots of postings.  The one I liked best was “Overwintering Geraniums” by Marie Iannotti at About.com.  Iannotti describes a broad view of possibilities in a paragraph or two, plus a photograph.  Her seven topics:  storing geraniums for the winter; growing geraniums as annuals; growing geraniums as winter houseplants; overwintering geraniums as cuttings; overwintering dormant, potted geraniums; overwintering dormant, bareroot geraniums; and reviving dormant geraniums in the spring.

I had planted our geranium in our springtime garden, so mine was not a case where I could just pick up a pot and move it into the garage.  I focused on the website page that showed how to store a bareroot plant.  I dug up the plant, shook off most of the soil, pruned the plant to about half its original size, and put it into a grocery bag to overwinter in our garage, where it will be in no danger of freezing this winter.  I’ve already put “Check geranium” twice on my schedule, once each in December and February.  If all goes well, I’ll pot it in March to start the reviving process, and plant it in the garden again in May.  Iannotti’s posting details each step.

Close bag, store in our garage
Will this experiment work?  Will my revived plant be vigorous and a great addition to Garden 2012?  Or will I decide to buy a replacement plant?  I’ll update you periodically about this experiment. 

If you’re tempted to try to overwinter a geranium and want to see how to do it, Iannotti’s article will give you the basics.  CLICK HERE.

And remember the obvious: You have to do this job before frost kills your geranium, and most of us are overdue for our first fall freeze.

Sunday, September 25, 2011

Which Has Lower Prices: Costco or BJ’s?

Where do we save more $$$?
The first week of September was gray with rain, rain, and more rain.  According to Weather Bureau statistics in the Washington Post, our area had 4.76 inches of precipitation that week.  Average is 0.84 inches.  We had so much rain for so many days in a row that I thought I should probably start calling the Tomato Patch our Watercress Patch.  I imagined that even the stink bugs were wearing Scuba gear.  So what to do?

Why not compare prices at the two big nearby membership “wholesale” stores, Costco and BJ’s Wholesale Club.  I’ve been wanting to do that for months.  We used to stock up once a month or so at BJ’s, but when Costco opened a few years ago, we switched to the new arrival for what we thought to be greater selection and slightly better prices.  Since then BJ’s has renovated and changed inventory significantly.  Should we consider changing allegiances again?

So exiled from lawn and garden on a rainy morning, I visited both stores and with a list of 17 items we often buy at the big boxes, I wandered the aisles and wrote down prices.  Which store do you think came out being the bigger money-saver?

Costco and BJ’s had identical prices on four items: Campari tomatoes (2 lbs), Ocean Spray Original Craisins (48 oz), Dove bath soap (14 bars), and HP #75XL printer cartridges (2 pack).

BJ’s had lower prices on three items: hummus singles (12), Diet Dr. Pepper (36 pack), and Multi Vitamins Mature or 50+.  If we purchased those three items at BJ’s, we would save $1.30.

Costco had lower prices on Morning Star Chipotle Black Bean Burgers (12); dried, chopped onion (large bottle); dried plums; nut clusters; multi-vitamins (500); Gillette Mach 3 razor blades; Charmin Supersoft toilet paper; HP #74 X printer cartridges (2); Cetaphil moisturizing cream(20 oz); and Loratadine tablets (300). If we purchased those 10 items at Costco, we would save $16.89.

I think both stores have their strong points.  BJ’s stocks some items we always buy but Costco doesn’t sell: Pepperidge Farm Cinnamon Raisin Bread, raisin medley, and select-a-size paper towels.  Many of BJ’s items come in smaller sizes that this two-person household appreciates, such as smaller clamshell boxes of fresh grapes.  BJ’s accepts manufacturers’ coupons, and Costco doesn’t.  I can use the credit card of my choice at BJ’s, not just those on Costco’s restricted list.  Costco, however, has a greater selection of fresh fruits and vegetables, prepared foods, and electronics, and it has a gas station that saves us at least 5 cents a gallon.  Our local BJ’s doesn’t sell gas.

Bottom line: Both local stores are good places to save money, but we’ll save more at Costco.  We’ll keep our membership there.  And we’ll shop for sale items at our local Giant Food store, where special prices often are just as attractive as those at the big box discounters.

Of course, if your shopping list is different, your savings at the two stores might be different too.

Monday, September 12, 2011

Frugal Gardener: My $13.67 Greenhouseperhaps

My $13.67 greenhouseperhaps


Finally one of my dreams has come true: I have a greenhouseperhaps.  I bought it for $13.67 at Wal-Mart Saturday night.  I prepared it for installation in less than an hour using one tool, a carpet knife.  Installation in our garden took five minutes.

I’ve oohed and aahed at greenhouses through the years as I’ve leafed through gardening catalogs.  Greenhouse kits for “serious home gardeners” range upward from about $700.  But, really, I’ve told myself, a greenhouse doesn’t fit well on our hillside lot.  And, Frugal Me, I’ve often thought that buying a greenhouse just isn’t too practical for someone who probably won’t be doing “a lot” of gardening 10 years from now.  But, yes, I still pause and fantasize when I see a greenhouse in a catalog. 

Recently I thought that maybe I should “think small.” Why not “build” a very small greenhouse to see how long I can get lettuce to grow in our garden as winter approaches.  I’d call it my greenhouseperhaps until I see if it really works.

I decided to buy a large, translucent, plastic storage container to serve as my greenhouseperhaps.  I’d cut out the bottom, and I could use the top to protect plants growing inside from downpours or even light frosts or snow flurries. 


I cut out the bottom
At Wal-Mart I surveyed available clear or translucent storage containers of varying sizes.  I paid particular attention to heights (so the plants have room to grow) and bottoms (to be cut out so I can plant directly into the garden soil).  I chose a Sterilite 105-quart box that is 13 ¾” high by 19 ¾” wide by 83 1/8” long.  Price: $13.67.

I bought the Sterilite box because I thought the bottom was more soft than rigid so would surrender quickly to my knife.  When I began to cut I discovered the going slow because the sides are molded thicker where they meet, though the center rectangle of the bottom is thinner than its edges.  I used the carpet knife to cut along the line where the thicker edges met the center of the bottom.  This “five-minute job” took nearly 45.  The bottom edges that remain will help anchor the greenhouseperhaps.

My new greenhouseperhaps is now installed in the garden.  I’ve planted three-week young Simpsons Curled and Red Sails lettuce seedlings in one row and Red Sails seeds in another.  About six hours after I planted the lettuce, dark clouds ushered in a 20-minute downpour and I rushed to put on the lid to protect the transplants.  I think the “click handles” will keep the lid in place during fairly strong wind gusts.

Ready for frosty weather?
Will my greenhouseperhaps work?  I’ll let you know in a month or two.  If it works this fall, I think it should work next spring to grow an extra-early crop of lettuce.

I hope my greenhouseperhaps turns into just a plain greenhouse.

And to think it cost only $13.67.

Thursday, April 21, 2011

Too Late to Prune Lavender?

Lavender crowds sidewalk before pruning


My four lavender plants have grown nearly a foot over the sidewalk, an indication that I have been negligent in pruning them. I’ve gone online to check on the best pruning time, and, alas, the consensus is August.

But this is April. Should I prune them? Hmm, I’ve pruned them in the spring at other times, and they didn’t seem to suffer. Yes, I’ll do it again.

Our plants are of the so-called English line of lavenders (Lavendula angustifolia), thanks to the ancient Roman invaders and colonists who brought it with them from sunnier climes to the British Isles. The specific variety is ‘Munstead,’ named after Munstead Wood, the home of the late Gertrude Jekyll, a famed British garden designer and writer.

Lavender after pruning
When ‘Munstead’ blooms, first come small pollinators—insects of all sorts, most of which I have not identified—but then come butterflies. And after the flowers fade, American goldfinches perch on the flower stalks and dine on seeds. Another great feature: deer have never browsed a leaf. I imagine the oils and fragrances of the lavender are offensive to deer noses and tongues.

But time it is to prune the lavender. “Put on your gardening gloves to protect your hands,” advises ehow.com, a good online source. “Get down close … so you can see small, green shoots on the lower stems.” Yes, I’ll leave new growth.

After pruning, new shoots predominate

So I clip away with my pruners, cutting out all branches that are crowding the sidewalk on one side of the bed and the lawn on the other side.

“Cut back old, straggly lavender plants in the spring to 6 inches. This may encourage it to form shoots close to the ground and it may save the plant,” says the ehow “Tips & Warnings.”

Save the plant? I just want to shape it, but when I think of my history of pruning plants, perhaps “save the plant” is a good thought.

I clip and shape, but decide not to cut it back to six inches—well, not all of it. Soon all of last year’s growth is gone, and this year’s bright-green shoots predominate. I top off the old mulch with some fresh pine-bark mulch, and the lavender pruning is done.

Buckeye butterfly on 'Munstead' lavender

The four ‘Munstead’ lavender plants have given us so much pleasure, added so much beauty, since I planted them in 2005. With just a little care, an annual pruning, they may continue to please for another 15 years, according to the website.

I smile a happy, Frugal Gardener smile. Twenty years of pleasure—and to think I bought the plants at a half-price, November close-out sale.

Friday, April 8, 2011

How Large a Rake Do You Need?

My heirloom rake gets the job done


Do I need a Tacoma pickup truck or an 18-wheeler to cart bags of pine-bark mulch from Sun Nurseries to our house?


Easy answer: My little Tacoma is just the right size, thank you, to haul about a dozen large bags. An 18-wheeler would be overkill—and the 90° bend in our narrow driveway would give fits to even a skilled big-rig driver.


And out in my garden, what size rake do I need for our flower and veggie gardens?


In her “A Cook’s Garden” column in the Washington Post, Barbara Damrosch shows a 29”-wide rake available from Johnny’s Selected Seeds, one of my favorite catalog and online sites. I looked up the rake in the catalog, and wow, the rake must be the Lexus of rakes.


Called the Bed Preparation Rake, its Swiss-made aluminum head is 29” wide. The head, which has 20 four-inch teeth, is adjustable, to suit your height or the job at hand. There’s even one optional accessory: a pack of six plastic tubes that slip onto the teeth of the rake to mark rows or make a grid. Total: $76.00 for the rake and $4.95 for the tubes, plus $11.95 shipping.


If you have a huge garden, hire hands to care for your garden, or grow neurotic carrots or beets that require straight planting rows for their seed, then this $90 rake is probably just what you need. But do Susie Smith and John Doe gardeners, with their 15x15 veggie beds, need such a large and expensive tool?


This gardener doesn’t. Like most gardeners, I have an old garden rake in the garage. It was my dad’s. The head is standard width, 14”, plenty wide for raking jobs in my small, terraced veggie beds. No, its 14 teeth are not adjustable, but I simply raise or lower the handle to change the angle of the teeth whenever I wish. It works fine the two or three times a year I need a rake.


Low-priced row marker
Can I get along without having plastic tubes to put on my rake teeth to mark rows for crop planting? Well, yes, in ancient times my dad showed me how the rounded handle end of the rake makes a dandy tool to make a row in garden soil. A corner of a hoe blade works just as well. My veggies grow well even if their rows zig a little or zag a little.


This frugal gardener will make do with his heirloom rake, which has served two generations well even though it doesn’t have adjustable teeth.


To read Damrosch’s article and see her photo of the big rake, CLICK HERE.

Thursday, February 10, 2011

Veggie, Flower, Herb Seeds Have Arrived!


Who could be happier on a gray, 33°F February day than a gardener standing before just-assembled Burpee seed racks at a local store? Forget Pauxatauny Phil and his shadow. Burpee seeds are here—ready for you to buy! Spring is coming to a garden near you soon!


Yes, seed racks for 2011 are ready for your perusal in many local stores. The snow crust on your lawn may encourage you to stay close to the glowing embers in your fireplace, but don’t linger too long. If you wait until April or May to buy, you may be disappointed at the selection remaining. I’ve been there, done that.


I was pleasantly surprised at the size of the new Burpee display when I stopped by Wal-Mart this morning. I did a rough estimate: more than 400 pockets of seed packets; 60% veggies, about half organic; 25% flowers, both annual and perennial; 15% herbs, both annual and perennial.


Being a tomato fanatic, I usually rate seed racks by the number of tomato varieties offered. The Burpee racks at this store offer: Baxter’s Bush Cherry, Beefsteak and Super Beefsteak, pink and red Brandywine, Cherokee Purple, Delicious, Lunch Mate, Polish Linguisa, Red Lightning, Roma, Snack Attack, Summer Salsa, Super Sweet 100, Yellow Pear, and two mixes—Best of Show and Rainbow Heirlooms. That’s nearly double the varieties offered last year.


Price: about half the packets are $1.00 each, the other half $1.50, including most of the organic selections.


What did I buy?


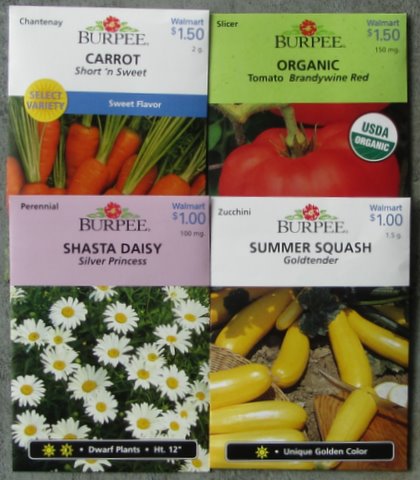
Brandywine red tomato (organic), $1.50; Goldtender summer squash ($1.00); Short ‘n Sweet carrot, $1.50; Cylindra beet, $1.00; Detroit Dark Red beet (organic), $1.50; and Silver Princess Shasta daisy (perennial), $1.00, a short “pretty” that the deer won’t eat.


That’s all? Well, yes, that’s all I bought at Wal-Mart. The section was excellent for a big-box store but didn’t have all that I’m looking for. Within the next day or two I’ll finalize my online order from Johnny’s Selected Seeds, and I’ll be pretty much set for seeds for Garden Year 2011.


Is there a difference between a packet of veggie seeds bought from the Burpee catalog and a packet bought from a Burpee rack at a local store?


Yes, an obvious difference is price. A packet of Detroit Dark Red beet seeds in the Burpee catalog (and online) costs $3.25, while the packet from the Burpee rack at Wal-Mart costs $1.50. Burpee prices seem to vary from store to store.


Surprise: 469!
I’ve always suspected another difference is the amount of seeds in the packets. The number of seeds in the Burpee catalog beet packet is 350. The Burpee packet at Wal-Mart says 5g, with no number of seeds indicated. Frugal Bob opened and counted each seed, expecting the number to be significantly less than 350. The number: 469. I admit that I was surprised, pleasantly surprised. I had always assumed there were fewer seeds in the lower-priced packet.


Not totally convinced, I went to Burpee online and priced a packet of red Brandywine tomato seeds (organic): $3.95 for 50 seeds. I opened and counted the packet I bought at Wal-Mart, which indicated 150mg. The count: 66 seeds.

 
Ok, I surrender. The lower-priced Burpee packets at Wal-Mart contain just as many seeds, if not more, than their more expensive catalog counterparts. Could Burpee be using inferior seed in the lower-priced packets? Burpee’s name is both famous and trusted in the world of gardeners, so it would be business suicide, it seems to me, for the company to sell seeds of lesser quality in a packet labeled Burpee.


There is another difference I’ve noticed between seed varieties on the racks and those in the catalog. The varieties on the racks seem to be older, better known varieties. The catalog lists many of them too but often features the newest and latest varieties, which may—or may not—be better in some ways than older varieties.


I’ll mention one risk in buying all your Burpee seeds at a neighborhood store. You may eventually be dropped from the Burpee catalog mailing list, though I suspect the trend for most seed companies is to wean their buyers from print to Internet catalogs to help keep down costs.


Now I’ve got to finalize my order for Johnny’s.