Wednesday, June 29, 2011
Deer Country: Fencing Alternatives
Are deer making your gardening life miserable—eating all your veggies and flowers? Maybe it’s time you consider fencing them out. Here’s a new video by the University of Maryland Extension, “Fencing for Your Garden,” that includes several alternatives that should keep the deer out and make you a happy gardener. CLICK HERE.
Tuesday, June 28, 2011
Who-dun-it: Case of the Toppling Potato Plant
 |
| Who-dun-it? Photo: Susan Levi-Goerlich |
Susan Levi-Goerlich wasn’t a happy gardener. Something was eating her snap peas about three inches above the ground—and then chard leaves began to go missing.
Hmm, she thought, mice. Then—both on the same day—a beet and a potato plant fell over. Susan, who gardens at the West Side Community Garden of the Columbia Gardeners, Inc., checked the potato plant that had fallen over and discovered that the young potatoes had been eaten underground.
Voles, also known as meadow or field mice, she concluded. They’re cute, stocky, short-tailed mice-like creatures that have a sweet tooth—especially for sweet potatoes—and, as Susan found out, for potatoes and other root vegetables and some above-ground veggies too.
 |
| Voles love potatoes Photo: Susan Levi-Goerlich |
Susan confirmed her suspicion about voles by emailing a query and a photograph of damaged potatoes to the University of Maryland Extension’s Home and Garden Information Center, which recommended baited snap traps as a remedy.
Susan put out some humane traps—live traps—because she doesn’t want to endanger birds that might be attracted to baited snap traps.
“I’ve already caught two voles,” Susan explained when I met her at her plot early Monday morning. “One expired in the trap before I found it. The other I took for a long ride in the country and released it in a meadow far from any house, farm, or garden.”
Susan likes the larger traps because she thinks voles are more likely to enter them. She showed me how she baits them with a peanut-butter and rolled oats mix and then set them into her garden near her beets.
 |
| Susan baits a trap |
Susan probably has a grand battle on her hands. If she’s caught four voles in her plot and seen more, how many more live in the many plots at West Side Community Garden, which the voles probably call West Side Five-Star Restaurant, with plenty of hiding places and a couple of acres of soft gardening soil in which to burrow.
Baited humane traps? Snap traps? Where are all the hawks, foxes, and blacksnakes when you really need them to eat voles for lunch?
For small areas, some gardeners give up on traps and surround vole-vulnerable crops with hardware cloth sunk six-inches into the ground. At their demonstration garden at the Agricultural Farm History Park in Derwood, Montgomery County Master Gardeners show how it’s done by digging a trench around a sweet potato bed and installing a barrier of 24-inch hardware cloth.
 |
| Traps near Susan's beets |
To access a blog posting about the demo garden that includes a photo of the trench around a sweet potato bed, CLICK HERE. To see a posting that includes a photo of the completed barrier, CLICK HERE. To access information about the demonstration garden, including hours and a map, CLICK HERE.
To learn more about voles and what they look like, CLICK HERE to access the University of Maryland Extension’s Fact Sheet 654, “Reducing Vole Damage to Plants in Landscapes, Orchards, and Nurseries.”
Sunday, June 26, 2011
Hungry, Redheaded Pests
 |
| Redheaded pine sawfly larvae dining on our mugo pine |
If you have a mugo pine, it’s time to give it a look-over to see if it’s being eaten by groups of redheaded pine sawfly larvae.
We have one mugo pine that anchors a corner where two perennial beds meet in our back yard. A couple of weeks ago I checked it for the signs of the redheaded pine sawfly larvae and found nothing. When I was weeding and mulching on Thursday morning, I found three groups of the larvae busy eating the needles of our mugo.
What do I look for? First, I look for branches where needles seem to have been eaten. Then I look for—surprise here—the red heads of the sawfly larvae. A third sign comes after I shake the pine where I find the larvae and hundreds or thousands of bright-green fecal pellets, called frass, shower to the ground, sort of like a green snowfall in miniature.
 |
| Larvae in soapy water |
Some of the larvae didn’t appreciate my picking and went into their defensive mode, vomiting a pine-smelling resinous substance that they store to teach predators a lesson. I knew when my tweezers and my fingers suddenly were sticky and smelly.
 |
| Larvae frass, locally called 'green snow' |
If you want additional information about this native pest and to see a short video of them in action, I recommend you visit Mike Raupp’s “Bug of the Week” website. At the Home page, click on “Archive” in the left column and then look for his posting of July 16, 2007. To access “Bug of the Week,” CLICK HERE.
And if you have a mugo pine—or other pines under 12-feet tall—better check now for this pest.
Thursday, June 23, 2011
Stink Bug Update
 |
| 'Ha! They haven't found a silver bullet yet!' |
The latest news about the brown marmorated stink bug is that there is no news.
The Maryland Department of Agriculture today (June 22) updated its information about the bugs with a news release that includes these sentences of interest to gardeners:
“While many research institutions are working to find ways to eradicate the pest, there is currently no quick or certain way for homeowners or farmers to control this pest, and there are no chemical recommendations currently available for homeowners or farmers to follow. Results from lab insecticide tests, showed that the stink bug only appeared to be dead after being exposed to an insecticide. After living in a coma-like state (or ‘moribund state’) for a week, the bugs appeared to come back to life, their bodies having broken down the insecticide.”
What’s a gardener to do then when stink bugs invade?
A simple option is to inspect your veggies and fruit and drop any stink bugs you find into a jar of soapy water. You’ll find another option in the University of Maryland Extension’s Home and Garden Information Center’s fact sheet and its video showing how floating row covers may be used to keep stink bugs off your garden plants. To access the fact sheet, CLICK HERE. To access the video, CLICK HERE.
To access the Maryland Agriculture Department’s complete June 22 news release, CLICK HERE.
Wednesday, June 22, 2011
Tomato Patch: Lemon or Lemonade?
 |
| Curled & blistered Virginia Sweets leaf |
“When life gives you a lemon,” the optimist says, “make lemonade.”
In a previous Tomato Patch posting, I described how super-hot weather in early June, new transplants with poorly developed root systems, and fumes from petroleum-based driveway sealant combined to damage many of my young tomato plants. Older leaves curled and blistered under metallic-looking shine. Newer leaves and yellow blossoms shriveled.
I coddled the damaged plants for two weeks, hoping they would show signs of recovery. I sent updates and photos to the University of Maryland Extension. Three Super Marzano plants showed definite signs of new growth. Several Juliet and Sungold plants showed positive signs, but several didn’t. Two Defiant and a Virginia Sweets looked, well, terminal.
On Friday morning Jon Traunfeld, a specialist at the Extension, came to check out my mini-disaster. He examined plants, took photographs, and measured distances. “I’ve never seen anything quite like this,” he said.
 |
| Shriveled Defiant leaf |
Jon later sent a note of thanks and commented, “You made a contribution to our knowledge of tomato growing in this modern world—although unwittingly.” Ah, isn’t that sweet lemonade?
After Jon left, I looked at the empty cages in my Tomato Patch and hopped into my pickup truck and went to nearby retailers that I thought might still have a tomato plant or two left. I didn’t find anything I wanted at the veggie-plant sections of a fine, local nursery and the neighborhood hardware store. A local farm that grows tens of thousands of veggie transplants every spring closed its greenhouses two weeks earlier.
But at Sun Nurseries in nearby Woodbine I found a table of overgrown, tangled, but basically healthy-looking tomato plants on close-out special--99¢ each. “I’ll help you find what you want and untangle them,” a helpful clerk said.
 |
| As pathetic as Charlie Brown's Christmas tree? |
As another customer exclaimed as I was checking out, “What are they—tomato plants?” Yes, they were a remarkable sight, the tomato equivalent of Charlie Brown’s pathetic Christmas tree.
Friday evening I did something I’d never done before—planted four tomatoes in my Tomato Patch in cages and through mulch to replace damaged plants that I’d pulled.
But maybe that’s one of the great attractions of gardening—that we gardeners always are meeting new challenges and learning about something we’ve never encountered before. That gives meaning to the old saying, “As the Garden Grows, So Shall the Gardener.”

Tuesday, June 21, 2011
Kite in a Tree: Looking for a Killer
 |
| Trap near our house |
When I first saw purple in a tree two years ago, I thought it was a kite that had crash landed. I soon learned the purple wasn’t a kite but a three-sided trap for emerald ash borers (Agrilus planipennis), an insect invader that has killed millions of ash trees in our country.
The State of Maryland has aggressively battled the bug with quarantines of ash wood and nursery stock and removal of ash in affected areas—but the insect continues to spread.
Thursday we received a “Dear Property Owner” letter from the Maryland Department of Agriculture: “On June 8, EAB was confirmed by the USDA from a site in Howard County. This is the first detection in that county and outside the currently quarantined Prince George’s and Charles counties. Our survey crews will be evaluating the situation so that we can determine the course of action in your area.”
The emerald ash borer is not only in our county but also in our area. “The emerald ash borer is a serious, exotic, invasive insect that feeds on and kills ash, an important neighborhood and landscaping tree, in one to three years after infestation,” the notice says. The “pest is responsible for the death or decline of tens of millions of ash trees in fifteen states.”
How many ash trees are at risk here in Maryland? Estimates for Baltimore City, Annapolis, and nearby counties are approximately 600,000 trees.
The borers extend their territories quickly with the assistance of us humans, which is what quarantines attempt to minimize: “Residents and businesses in Howard County must not move any regulated ash wood (e.g., logs, stumps, roots, branches) of any hardwood firewood out of the county. The Maryland and federal quarantines are being revised to include Howard County.”
If you want additional details about the fight against the borer and to see photographs of the insect and the damage it causes, CLICK HERE.
Monday, June 20, 2011
Tomato Patch: Pinch That Sucker?
 |
| Sucker is a point of arrow Leaf stem is to left of sucker Main stem is to right of sucker |
I am a sometimes sucker pincher. Sometimes I pinch them. Sometimes I don’t. Every year I vow to pinch them, but usually I pinch them early in the season and forget about weekly followup.
You’re reading something that indicates Tomato Patch in the headline, so you know suckers must have something to do with tomato plants. But just what are they?
Here’s how the chapter on vegetables in the University of Maryland Master Gardener Handbook defines them and why you may want to pinch them: “Suckers are shoots that arise from axils (the angle where a plant stem and leaf branch meet). These shoots will eventually produce flowers and fruit. However, moderate pruning will increase fruit size, hasten ripening, and keep your plants more manageable. Prune staked tomatoes to one to three main stems (plant spacing can be reduced in these situations). Remove all other suckers weekly. It is especially important to remove suckers that emerge from the plant base. Pinch shoots off with your fingers.”
 |
| Brandywine Red plant before pruning |
If you read 10 articles on suckers, you probably will get basically similar information but differing details. Here are several differences and my take:
Suckering is important on indeterminate tomato varieties—the “tall” plants that continue growing until frost kills them. By definition, determinate, or “short,” varieties are limited in their growth, have few suckers, and will not leave you groping for sunlight in an overgrown jungle of tomato leaves.
 |
| Brandywine Red plant after pruning |
Some sources emphasize pinching of lower suckers because they usually are shaded by higher leaves and usually produce little fruit. Another reason is that leaves closer to the ground are at higher risk of diseases that are endemic in local soils that can splash onto lower stems during rain or watering if plants aren’t well mulched.
How many suckers should you pinch from each plant? Intensive growing systems, such as Mel Bartholomew’s “Square Foot Gardening,” recommend that you remove all suckers. For general gardening situations, the consensus seems to be to let one or two suckers grow, so each becomes a leader with leaves, flowers, and fruit of its own.
This year I’ve vowed once again to pinch suckers weekly. I started Friday, perhaps two weeks behind schedule. Some of the suckers already were a foot long, and when I pinched them, sometimes they pulled small strips of tissue from the main stems. That’s a good reason and also a reminder to pinch suckers when they are young and tender.
Photo 1 shows a sucker growing in the axil where tomato stem and leaf join. Photo 2 shows one of my Brandywine Red plants before I pinched suckers. Photo 3 shows the same Brandywine Red after I removed all the extra growth. The difference is remarkable—sort of like when I get a haircut after four or five weeks.
Since I was doing “catch-up pinching,” it took nearly an hour and I carried an armload of pinched suckers from my Tomato Patch. But if I pinch regularly, future maintenance will be both quick and minimal.
Should you pinch your suckers? I like the way John Page puts it in the little booklet “Grow the Best Tomatoes” (Storey Publishing): “Prune them if you are a sucker-pruner. Pinch them if you are a sucker-pincher. Let them go and things will get pretty dense and green, often requiring some topping.”
Here are two short videos that will show you how to pinch suckers. To watch Jon Traunfeld of the University of Maryland Extension in “Pruning Tomato Suckers” (3:17 minutes), CLICK HERE.
To watch Johnny’s Selected Seed video, “How to Prune Tomatoes (2:52 minutes), CLICK HERE.
Sunday, June 19, 2011
Deer Country: Views from Two Windows
 |
| View from dining room |
Flowers are blooming in Deer Country in mid-June, but views from our dining room and kitchen windows are significantly different. Flowers we see from the dining room windows are those that are deer resistant, and those we see from the kitchen window are those that deer love to eat.
Photo 1 shows what we see this week from our dining room—flowers that are unprotected from browsing bambits. They are not fenced or covered with netting. I haven’t sprayed them with a deer-resistant spray. They are not surrounded by landmines.
Flowers in bloom, from top left, include white Shasta daisy (Leucanthemum x superbum) and orange-red redhot poker or torch lily (Kniphofia uvaria). Just in front of them are red-yellow blanket flowers (Gaillardia aristata ‘Sunburst Scarlet Halo’ and ‘Goblin’). Redhot poker continues into the middle pane, followed by orange butterfly milkweed (Aesclepias tuberosa).
 |
| View from kitchen |
Photo 2 shows what we see this week from our kitchen window—flowers that are protected from deer by a fence—and, I think, by the slope of our hill and raised beds inside the fence. Most of the blooms in the mass of color are Asiatic and Oriental lilies and, to the left, false sunflower (Heliopsis helianthoides ‘Summer Sun’). In front is a pink garden phlox (Phlox paniculata) that is just beginning to flower.
 |
| Lily blossoms--past tense |
Yes, you can have beautiful views from your windows in Deer Country. The secret is to have a good fence—or to choose perennials that are “deer-resistant.” You’ll have to experiment, but over time you’ll find the plants that your deer will pass by and when you look out of your windows, you’ll say to yourself, “Wow, what a view—definitely worth all the time and effort.”
Thursday, June 16, 2011
They’re back: Popillia japonica!
 |
| First of the season |
It must be mid-June in central Maryland. I was weeding Wednesday afternoon morning and there, sunning itself on a Shasta daisy bloom, was Popillia japonica—the Japanese beetle.
This is the month adults emerge from the ground, look for some tender fast food, and then head off to a single’s bar to find a mate.
Food, did you say? Yes, Japanese beetles dine on 200, 300, or 400 different plants—depending on the source you consult.
For veggie and fruit gardeners, common beetle foods are the leaves of green beans, brambles (especially blackberries), and stone fruits such as peach, cherry, and plum. Flower gardeners often find them dining on their roses and zinnias.
What to do?
Solutions abound. Hand pick them or flick them into soapy water is a traditional favorite. Floating row covers may keep them away from your favorite plants. Registered insecticides will do the trick—and you will follow directions, won’t you?
And then there are the yellow traps that lure the beetles with sex pheromone. But do you really want to entice all the Japanese beetles in your neighborhood to come to your garden? But you could buy a trap and give it as a gift to a neighbor. No, no—you wouldn’t do such a nasty thing, would you?
The list of remedies is a long one. You may not have heard of some of the newer approaches—such as imported parasitic wasps that prey on the beetles. If you want to be the expert on your block about Japanese beetles, I suggest you read “Managing the Japanese Beetle: A Homeowner’ Handbook,” by the Animal and plant Health Inspection Service of the U.S. Department of Agriculture (Program Aid 1599). To access the booklet, CLICK HERE.
Tuesday, June 14, 2011
Tomato Patch: Setback or Disaster?
 |
| Typical curled leaf |
Sickly—that's the word. Thirteen of my 23 tomato plants look sick, very sick. Is this a disaster—or just a setback?
I set out my plants on May 30, and they seemed to flourish. I mulched and caged them and watered them regularly. Within a week of when I transplanted, our paving guy came to repair several cracks in our driveway and to apply a petroleum-based sealant. Fumes from the sealant were strong, so strong I opened the garage doors for two or three days to air it out. And then came those record-breaking days—99° and 100° F., or were they higher? Leaves of my 13 plants nearest the driveway began to curl, stems to twist, young leaves to shrivel, blossoms to droop.
Most affected were plants near the asphalt—Super San Marzano, Big Mama, Defiant, Virginia Sweets, Juliet, Sungold, and Wow! But two adjacent rows grew normally—three Brandywine (Sudduth’s) and three Brandywine Red, and just 25 feet downhill in another patch, a Virginia Sweets and three Yellow Plum plants flourished.
What’s going on here? I can’t recall reading an article in a gardening magazine about such trauma.
Did the plants wilt in the fumes of the petroleum asphalt sealant? Did the horrendous heat wilt the plants before they became well rooted in the garden soil? Did the heat and fumes combine to injure the plants? Or something else?
I researched on online. I used the index and found relevant information in the University of Maryland Master Gardener Handbook. I went online and submitted a question to the consultants at the University of Maryland Extension’s Home & Garden Information Center.
The consensus is that there are multiple possible causes, so it’s difficult to pinpoint the cause with certainty. Because the leaves curl up, rather than down, herbicide (such as drifting 2,4-D) is not the answer. The most likely suspect is the effect the extreme heat we had last week had on the newly set-out plants. The sealant fumes are hard to factor in because they’re not a common cause of such problems, but in my case, plants between the asphalt and the tomatoes were not affected—peonies, daylily, spotted mint, allium, crape myrtle, butterfly weed, and Shasta daisy.
What am I going to do? I’m going to monitor my sick plants closely. HGIC asked that I report if the situation gets worse.
While I was mulling over possible causes of my sickly tomato plants, I had another troubling thought. Tomatoes—peppers too—have maximum fruit set between 65° and 80° F. They have reduced fruit set at temperatures greater than 95°. Temperatures last week were above 95° several days.
 |
| Did high temperatures damages the blossoms? |
How much drama can we stand, tomato growers?
I knew I should have done a Ph.D. in botany. “Dr. Nixon, Dr. Nixon. Please report to the Tomato Patch. Code Wilt. Code Wilt.”
Ah, fantasies—always good for a smile—as would be an enclosed Tomato Patch—perhaps a greenhouse with central heating and air-conditioning—so I could keep the temperature at exactly 78° F.—for maximum fruit set.
Monday, June 13, 2011
Tomato Patch: How to Water Your Plants
 |
| How—and how much? |
Should you water your tomato plants? When? How--and how much?
Books and articles often advise to water when the soil feels dry—so plants get at least an inch of water a week—and when you water, water deeply and try to avoid splashing soil onto tomato leaves because soil may contains disease organisms that will attack your plants.
But what does that mean when you step into your Tomato Patch? Just what does “dry” feel like—if your soil is basically sand, clay, or loam? How do you measure “one inch” of water a week—by setting an empty Campbell’s soup can in the middle of your patch so you can measure rainfall? Should you use a watering can, a hose, a soaker hose, or a drip-irrigation system?
Relax. There is no one answer. There are many variables that might affect the answer. But to find out how real-life tomato growers water their plants, I sent an email to Howard County Master Gardeners and asked them for “short answers” about how they do it. Here are their answers:
Michelle B.: I use a soaker hose in my bed of 20 plants. If we don't get enough rain, I let the hose run for about 30 minutes every two to three days, depending on the weather. I measured the output of the hose to calculate how long to run them to get about an inch a week.
 |
| Ed B. waters his raised beds from a rain barrel |
Kathy R.: I use a watering can and apply the water around the root system until my plants have become established or there is a "rain deficit." I plan to put in drip irrigation next year.
Natalie B.: I just use a watering can or hose. I try to be careful not to splash any soil up and also careful not to wet the foliage. No special watering arrangements here!
Pat F.: I put the hose in my raised bed about once a week and soak the soil. I try not to wet the foliage at all.
Leslie G.: I plant my tomatoes very deep, and they root along the stem. The deep planting means that they're less susceptible to water stress and consequently less susceptible to blossom-end rot. I lay leaky hose under them when I plant and then mulch, usually with straw, or leaves if I have leftovers. I water deeply once a week unless we have rain. This works for me.
Holly M.: I'm a lazy gardener with limited time. I have raised veggie beds outside my kitchen door because I’m trying to hide my plants from four-legged critters. Whenever I have time, I either pull a hose to the individual plant's base and slowly soak water in and move the hose around or I stand there and water with my water wand from the topside. It's a great way to enjoy a morning cup of coffee! But the truth is that I water whenever I am here and the beds seem dry, so my watering is not always in the morning. Raised beds have advantages, but they dry out more quickly. I top mine with lots of compost, so splashing contaminants from soil onto plants hasn’t been a problem.
Barbara W.: I mostly let nature do my watering. However if we are hot and dry, I water with a hose at the base of the plant. By the way I am expecting to pick my first Early Girl in about a week.
 |
| Jane H. stores well water in a barrel |
Gayle H.: I use a drip irrigation system. I have 1/2" main line with a timer and a 1/4" Raindrip Drip-A-Long and a 1/4" soaker hose. I bought parts at Lowe’s and Sun Nurseries and from catalogs and online sources. I put landscape cloth over the drip-irrigation system to help prevent evaporation. My 1/4" Drip-A-Long type puts out 1/2 gallon per hour. However, since I also have a soaker hose and don't know how much it puts out per hour, I just water first for 30 minutes, and if I feel that’s not enough, I use the timer’s manual function and give my plants what I think they need. I usually water every three days. You can get kits that have all that is needed.
Bob N.: I hose water into each of my drip-irrigation buckets for two minutes when I think my plants need water. To help determine that, I keep an eye on a nearby bird bath. When it contains rain water, I don’t water my plants. When it’s dry, I water my plants every morning—nine buckets for 23 plants in about 20 minutes. The buckets and straw mulch minimize splashing soil that can cause diseases and help conserve water in the soil.
There you have it: Ten gardeners with ten different ways to water their tomato plants. They have developed a “feel” about how much watering they need to do to reach the “ideal” one-inch of water per week. There are so many variables that they don’t have a one-way-fits-all watering rule.
Should you water your tomato plants? Keep an eye on them and give them a drink when you think they need it.
Friday, June 10, 2011
Solving the Case of the Clement Urn
 |
| Old urn, new use |
I’ve always thought of the huge garden urn as a family heirloom that my maternal grandmother brought to Penton, New Jersey, when she married and moved from her hometown of Philadelphia at the end of World War I. My mother always said it was the “Clement Urn.”
This family treasure looks like it’s made of marble, but I see tool gouges on the inside that indicate it probably is made of softer stone. What it’s made of, however, is not the problem. The center of the urn is not much over a foot deep and hardly that in diameter, so the urn has a long history of being an urn that doesn’t overflowing with summertime flowers as you think it should.
My dad tried to grow flowers in it—geraniums, usually, but they didn’t grow well. Usually the urn at the end of summer was just a soil-filled urn. My dad, however, did add a third part to the two-part urn. When he learned a salesman was going to discard a gravestone because of an engraving error, dad volunteered to take it off his hands. The urn has since rested on a tombstone that never was.
When my dad and mom moved here in 1997, the urn came with them. We put it together in our back yard, and dad once again added geraniums. Once again they withered and died in the sizzling summer sun.
Next we moved the urn to the east side of our house, where it’s in the shade from about 1 p.m. Still geraniums didn’t grow. Perhaps their human caretakers didn’t water them enough. Over the next few years, the urn somehow became mine. Whatever I planted didn’t grow either. My last attempt at plants for the urn was Hens-and-chicks, which I thought thrived in droughts and rotted if too wet, the perfect plant for the perennially parched Clement Urn.
Alas, the Hen-and-chicks, though I would dowse them from time to time with the hose, didn’t grow either. They just sat there, not growing, not dying, just “hanging on.” I wasn’t happy because the urn sits outside my study window, and it was, well, boring, unattractive, even ugly.
One day last year I said to myself, “Enough of this. I’m not buying one more plant for the urn. One hundred years of nothing is 100 years too many.”
Eventually I had an idea that might work. I decided to remove all the soil and turn the urn into an heirloom gazing ball pedestal. When we were visited friends in Harrisonburg, Virginia, our friend Don and I window shopped at Harper’s Lawn Ornaments, where they make all kinds of things out of concrete, and sell just about everything you might want for your landscape except pink flamingoes.
And near the office I spied what I had been thinking about—two kinds of gazing globes—10-inch silver globes glistening in the springtime sun. Should I buy a glass one—or one of stainless steel? The first was half the price, but I imagined what would happen if I dropped it or somehow it rolled off the pedestal.
I bought a stainless steel gazing globe—and a Harper-made concrete base that I thought would fit into the heirloom urn. Back home, on Monday I used crushed stone, the concrete base, the gazing ball, and river rocks to put everything together.
I didn’t like the result. The gazing ball sat much too high, like the huge head of a white chicken at the end of a goose’s long neck. Without saying what I thought, I asked Ellen if she’d take a look. She looked at the globe and then at me and said, “Well, I don’t think it looks quite right.”
 |
| It looks great from my study window |
It looks “right” now, Ellen and I both agree. And from my study window it looks great.
I think I’ve solved the problem of the family heirloom. What do you think?
Thursday, June 9, 2011
Composting: Critters in the Pile?
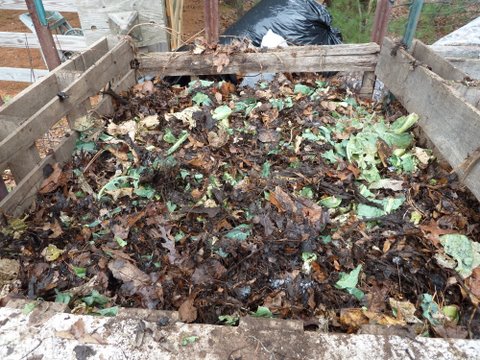 |
| Critters in the pile? Photo by Kent Phillips |
Cities and counties sometimes outlawed backyard composting because it might attract unsavory critters. Today’s composting articles don’t often focus on such potential problems but tell composters to take care about what they add to their piles.
Who else would take focus on the unfocusable than Barbara Damrosch in her “A Cook’s Garden” column in today’s Washington Post.
Clearly Post editors enjoyed writing the headlines. Headline of the print-edition column: “Smelling a rat in the compost.” Of the online search result: “Oh rot, critters in the compost.” Of the online column: “Vanishing vermin in the compost pile.”
Don’t let the Post editors have all the fun. To enjoy Damrosch’s column, CLICK HERE.
How to Kill a Weed Tree without Digging
 |
| The problem seedling |
How did a squirrel do that—bury a black walnut so close to our prized weigela that when the nut spouted, it grew up through the shrub in a way that digging it out would seriously damage the shrub?
Only a squirrel can answer that question. But I know that when I find a problem seedling here at Meadow Glenn, I put away my digging tools and go “nuke.”
This spring a large black walnut seedling grew rapidly through the edges of our ‘Wine & Roses’ weigela. I thought I had pulled out the seedling last year, but obviously I had left the roots intact. The two-year old walnut seedling would have a tap root a foot or more long. Trying to dig it out could do serious damage to our weigela.
So I adapted a trick I learned several years ago when invasive oriental bittersweet vine intertwined with our sweet autumn clematis.
 |
| Ready to paint |
The job took about 15 minutes. Within hours, the seedling shows signs that it was dying as it absorbed the glyphosate. The photos tell the story. Photo 1 shows the walnut seedling growing up and through the weigela. Photo 2 shows the trimmed and “stoned” seedling. The stone, by the way, prevents the seedling from springing back into the weigela and perhaps seriously damaging the shrub with glyphosate. Four days later, Photo 3 shows the dead and dehydrating plant ready for me to cut to ground level and discard in the trash.
 |
| Four days later, the dead seedling |
Got a weed tree seedling that you don’t want to dig out? Paint it—carefully—with glyphosate.
Wednesday, June 8, 2011
Especially for Okra Lovers
Chef Michael Kiss, the cooking coach at Whole Foods in Rockville, Md., claims “Stewed Okra” made him an okra lover. He serves it as a side dish or over rice.
The ingredients are simple: fresh okra and cherry tomatoes. Extra jazz comes from onion and herbs—rosemary and thyme. The online photo almost makes my mouth water—almost.
Don’t think “stirring and stirring over a simmering pot” when you see the word “stewed.” This stew is slowly simmered in your oven.
To check this Washington Post recipe's potential to begin your love affair with okra, CLICK HERE.
Does Your Tree Have a Story to Tell?
 |
| If trees could tell stories... |
Does that old tree in your yard or woods have a story to tell—a story beyond the number of annual growth rings that science students count to determine its age?
In his Urban Jungle feature, “Rings with stories,” in the Washington Post, Patterson Clark gives insights on how trees grow 24/7/365 and includes two unusual photos showing how trees have reacted within their trunks to damage, stress, and pathogens.
You might be surprised to learn that your favorite tree grows non-woody roots during the fall and winter. That’s one reason why you can give a tree or shrub a head start in your landscape by planting it in fall.
To read Patterson Clark’s Urban Jungle feature, CLICK HERE.
Tuesday, June 7, 2011
Hornets: Buzz Off, Bob
 |
| The nest I didn't see |
Seasonal temperature, low humidity, slight breeze—what a delightful gardening day last Wednesday was. One of my goals: uproot the oak seedlings growing up through an azalea where a squirrel had buried acorns.
I grasped one of the seedlings and pulled it straight up, and it came out easily, roots and all. The second seedling uprooted just as easily.
The third seedling, however, was two years old. In fact, I had cut it to the ground with my hand pruners last year, and it had sent up three 18-inch sprouts this spring. I could see that I couldn’t get a good grasp on the base of the seedling from where I was, so I got up and walked around the azalea and went to work again.
My pulling revealed the oak seedling was well rooted. One of its shoots came off at the plant base. I started pulling up harder and my effort was shaking the adjacent azalea branches. I was concentrating on pulling up the stubborn oak seedling and not paying attention to what was happening around me.
Suddenly I heard buzzing as dive bombers attacked the enemy—me. One stung me on my right forearm—I was wearing only a tee-shirt on the perfect spring day. Another stung me on the top of my left hand and another on one of my fingers. Ouch—they hurt!
In an instant, I retreated, swinging my arms to defend myself from the attackers. What were they? Yellow jackets? Hornets? Wasps?
I returned just before dark to reconnoiter. I discovered that when I tugged on the oak seedling, it shook an azalea branch on which a baseball-size paper nest was attached—a hornet nest. The defenders were on guard when I peeked at their nest—resting on the sides and bottom of the nest, like fighter jets lined up on a carrier deck.
It took little time to identify them in my National Audubon Society Field Guide to Insects & Spiders: bald-faced hornets (Vespula maculata). “Black and white patterns on face, thorax, and abdomen…. Adult drinks nectar, fruit juices…. Larva feeds on insects”—or hapless gardener—“pre-chewed by adults. In spring, female chews wood to build small, pendant nests out of gray pulp, with doorway at the bottom…. Adults are extremely protective of the nest and will sting repeatedly if disturbed.”
Yes, “extremely protective … and will sting repeatedly if disturbed.”
What to do?
Leave the nest alone wasn’t an option—as I weed in that area—and it’s just three feet from where visitors walk on our front sidewalk?
Should I counter-attack at night—cutting off the azalea limb and letting the nest drop into a bucket of soapy water? No, branches criss-cross, and my cutting might cause a counter-counter-attack—and what if the nest bounced onto the ground and landed at my feet?
When I queried the Home & Garden Information center by email, they suggested I hire a certified beekeeper to remove the nest—a great, safe option, if I couldn’t really do it myself. The responder was quite adamant that I shouldn’t use a flashlight if I tried to do the job myself.
When I asked my brother, Jay, an entomologist, for his counsel, he too said to forget the flashlight and the bucket of soapy water. He suggested that I cover as much of my skin as possible and at twilight—when there was just enough natural light to see what I was doing—puff some insecticide into the entrance of the nest, and within a day or two, all the hornets would die as they came into contact with the dust. I had an old bag of Sevin dust. That should do the job.
 |
| Dressed & armed to kill |
As the sun was setting in the west, I took my puffer and advanced toward the east. The nest was about 15 inches from the ground, so I had to kneel in order to have any chance of inserting the end of the puffer into the nest opening. As I carefully moved an azalea stem to get a better view, buzzing started, so I let go a puff of insecticide directly toward the nest.
And I ran about 10 feet. The hornets were on full alert, ready to fend off any intruder.
Courage, Bob, courage. I reloaded and replanned. I was going to puff above and toward the nest to try to preempt counter-attacks by the guards. Already there was less buzzing. After my second attack, I didn’t run as far. I reloaded and approached and peered in through the branches.
 |
| Small target: the entrance |
For the next two days I took antihistamine tablets to help reduce the swelling around my wounds—and rubbed cortisone cream into the red, itching, swollen areas. About 48 hours after my attack on the nest, I returned to see if any of the hornets had survived. There were no hornets. I clipped the branch on which the nest was hanging—a souvenir of sorts.
Final score: Bob 1, Hornets 0.
And, Bob, please pay more attention to your surroundings while you’re enjoying your gardening chores on beautiful spring days.
Monday, June 6, 2011
Tomato Patch: Caging While the Job Is Easy
 |
| My tomato-caging system |
Tomato growers could almost hear their plants growing during those hot, humid days early last week, but cooler, springlike Thursday brought a stiff breeze as a reminder that we’d better think seriously about getting our rapidly-growing plants staked, caged, or otherwise secured before they are tall enough that a gusty storm can knock them over and make the job much more difficult.
I spent two hours or so Thursday caging my 23 tomato plants. I have a simple system that uses iron stakes, wire cages, PVC pipe, nylon string, scissors, and a level and a small sledge hammer. Let me tell you how I do it.
 |
| PVC pipe lashed to stake |
Step 1: I lay the PVC pipe along the tomato rows. Originally the pipes were 10-feet long, but over time I’ve cut them to fit tomato rows in the plots of various sizes on our hillside. I have two longer rows with four plants each and five rows of three plants each, so I place the longer pieces of pipe along the longer rows.
Step 2: I install the iron stakes near each end of each row, using the hammer and the level to make sure the stakes are reasonably vertical. I place the stakes so at least six inches of pipe extends beyond each of the stakes and three or four inches from the plants.
Step 3: I install a wire cage over each plant.
Step 4: I put the PVC pipe through the cages, letting it rest on the top or second horizontal rings of the cages in that row, and then use nylon string to last the pipe to the stakes. I thread the string through one of the holes in the stake and secure the pipe to the stake before knotting the string and cutting off any extra. I cut these strings about 36 inches.
 |
| Cage lashed to PVC pipe |
This simple system works—usually. The only time a storm has toppled a tomato cage was last year, when I failed to lash one of the cages to the pipe. That was “operator error,” not “system error.”
Here are some tips about staking:
Tip 1: Most gardeners stake (I’ll use that term to cover all support systems) their “indeterminate” tomato plants, sometimes now called “tall” tomato plants. Indeterminates continue growing, flowering, and setting fruit until something stops them—usually frost here in Maryland. An indeterminate Sungold plant may grow 10 feet or more and will need substantial support. It still will be growing in mid-October when frost blackens its leaves. “Determinate” or “short” plants, by contrast, need little, sometimes no, staking. They grow to a pre-determined height and stop. Determinate varieties are often recommended for container gardens, and sometimes have names suggesting they are short plants, such as “patio,” “dwarf,” “pixie,” or “tumbler.” A Tiny Tim plant may grow to only 15” and need no staking, and a Celebrity may grow to 3 or 4 feet and need only a simple stake.
Tip 2: I cage. Other tomato growers stake. Still others attach the growing plants to strings hanging from a pipe or other structure. Search the Internet, and you’ll find lots of possibilities. Two reasons for staking: It keeps your plants off garden soil that probably contains pathogens that will attack the plant or the fruit, and it makes caring for the plants and picking fruit easier.
Tip 3: If you’re growing tall plants and want to use wire cages, buy the tallest available. You may have to pay an extra dollar or two, but you need the extra height. However, shorter cages will work well if you’re growing short plants.
Tip 4: I use nylon string because I’ve learned that biodegradable string, such as cotton or sisal, often will weaken and break in summertime rain and wind and let cages topple. Nylon doesn’t degrade, though the downside is that I have to put it in the trash when I cut it off the pipes in late October.
Intensive work in the Tomato Patch is about done for this season. I’ve planted, mulched, and caged our plants. I’ve expended most of the sweat and enjoyed most of the aches and pains that our patch demands for this year. In future blogs I’ll show you the “maintenance” work that I do while waiting for the plants to produce those beautiful red and yellow tomatoes later this summer.
Sunday, June 5, 2011
Our Bluebird Quintuplets
 |
| Mark gets ready to band the Nixon quints |
There is lots of action at Meadow Glenn these days. Our quintuplets are doing well—eating regularly and rapidly growing both in size and feathers.
Our quints are baby bluebirds. A bluebird pair chose our front-yard bluebird box as their nesting site this spring. Four weeks ago, Mark Wallace, whom we call “Our Bluebird Guy,” announced that the box contained five light-blue eggs. Then for about two weeks, the parent bluebirds brought insects to their brood of five every few minutes from sunrise to sunset—and occasionally carrying away the bird equivalent of dirty Huggies.
We think Mark is a neighborhood hero. He monitors nesting boxes in Howard County and a few neighborhoods in nearby counties—more than 600 boxes. He visits some of the boxes as many as six to eight times over the nesting season, and he’s been doing it for 40 years.
Why? “It’s just my contribution,” he answered.
Mark checks the condition of the boxes in early spring. When nesting begins, he monitors more closely. His years of experience give him a pretty good idea of when the eggs will hatch and when the young birds will fledge—leave the box on their first flights.
That’s why Mark came on a recent Friday afternoon. He wanted to band the young bluebirds before they fledged, and he was concerned that he might have waited a day or two too long and they might have left.
Mark removed the screw that holds the top on the box, and mounted the five-gallon bucket he carries as his ladder, and looked in.
“I’ll have to be careful. I don’t want to have to chase and catch one that decides to take off now.”
Mark reached in, and brought out a nestling, which he held gently in his left hand. The bird was calm.
“Female,” Mark said, and he attached a numbered band on the bird’s right leg. He put the baby back into the box, to one side, to help him keep track of which birds had been banded.
How does he know females from males? Baby females have much less blue in their feathers.
“Female,” Mark said, as he repeated the process.
 |
| One of the three males |
“Male,” he said again.
“Male,” he said for the last time. Three males, two females—the Nixon Bluebird Quints.
“When do you think they’ll leave?” I queried.
“They could leave today if they wanted,” Mark replied.
Saturday evening the parent bluebirds still were taking food into the box. On Sunday all was quiet. The flights had ended. The nest was empty. But now I hear a delightful sound, the “Cheer, cheer” songs of seven bluebirds. I hope they’re saying, “Let stay here at Meadow Glenn and search the gardens for our favorite insects to eat.”
One day soon Mark will drive his gray Ford pickup down our driveway, park, and walk over to the bluebird box. He’ll open it and clean out the old nest, so the box will be ready for the bluebirds—or another pair—to start building a new nest. Some pairs will nest three times in one year.
Most of the boxes he monitors and the birds he bands are bluebirds, but his nesting list is much longer: tree swallows, chickadees, titmice, nuthatches, even great crested flycatchers and wood ducks.
When Mark finished banding the Nixon Bluebird Quints, he looked at this watch, said he had to leave to go to work in 15 minutes, and walked across the lawn to the box on the fence by the Gabels’ swimming pool.
“Three females, two males—about two days younger than yours,” he said, when he returned to his truck. “Not bad—five females, five males in the two boxes.”
Mark looked at his watch again. “I’ve got to get going.”
Thank you, Mark, Our Bluebird Guy.
Friday, June 3, 2011
Buckhorn Plantain: Kill It or Eat It?
 |
| Buckhorn plantain aka ribwort |
To most Americans, buckhorn plantain is just another lawn weed to kill with the next application of Weed-n-Feed, but others stir-fry or boil its leaves for supper.
Since I don’t use 2,4-D on the vast expanses of our lawn, I have thousands of thriving specimens of buckhorn plantain (Plantago lanceolata), also called English plantain, narrowleaf plantain, ribgrass, ribwort, and blackjacks.
Perhaps when you were a kid you picked this plant’s long-stemmed flowerheads, bent the stem around itself, and tried to “shoot” the flowerheads at your buddies. I did. This green weapon always left much to be desired, and I can’t remember our battles lasting more than a few moments. I cannot recall anyone eating plantain leaves.
When you see the artwork of this plant in this week’s “Urban Jungle” column in the Washington Post, you’ll say, “Oh, that!” But do take a minute and read the information Patterson Clark has gathered about this common weed that probably arrived in North American with early colonists who brought it as an herbal remedy.
To read Patterson Clark’s feature, CLICK HERE.
Thursday, June 2, 2011
From Garden Plot to Pizza Pan
 |
| Susan cuts a garlic scape |
If you had asked me 10 years ago what a “scape” was, I probably would have ventured a guess that it was some geological feature—perhaps something like land-scape.
Wrong.
Gardening friends in recent years have clued me in. A scape is a flowering stem, usually leafless, of a plant. Veggie gardeners for years have been enjoying scapes that super-market buyers probably haven’t encountered—garlic scapes.
Susan Levi-Goerlich invited me to her plot at Westside Community Gardens, a part of Columbia Gardeners, Inc., to inspect the rapidly growing scapes on the hardneck garlic she planted last October.
As she cut a handful of scapes with her Swiss army knife, I asked whether the garlic flower would be lavender, like the chives flower.
“I don’t know,” Susan said. “I cut all the scapes so that the plant's energy goes to filling out the bulb, so I’ve never seen a bloom.”
 |
| These scapes will get a 3-mile bicycle ride in 95-degree weather to Susan's refrigerator |
“What does it taste like?”
“Garlicky.” She handed me the scape she had just cut and I bit off a piece.
“Wow!” I said. “Yes, garlicky, really strong.” My sinuses instantly were the clearest they have been in years.
“Our family loves potato and scape pizzas,” Susan said. “I’ll send you the recipe for both the topping and dough I use.”
I searched for information about scapes on the internet and discovered that they’ve become available at some farmers’ markets in recent years, and lots of garlic scape recipes are available online. I’ll add a typical link below, after Susan’s recipes.
 |
| Susan's Garlic Scape & Potato Pizza Photo by Susan Levi-Goerlich |
Garlic Scape and Potato Pizza
Adapted from recipe by Janet Fletcher, San Francisco Chronicle
1/3 pound Yukon Gold potatoes, peeled and sliced 1/8 inch thick
2 tablespoons olive oil, plus extra for brushing dough
Salt and freshly ground pepper to taste
Garlic scapes (about 8, cut into ½” lengths)
Coarse cornmeal (polenta), for dusting baking sheet
8 ounces whole-milk mozzarella, coarsely grated
3 ounces goat cheese, crumbled
2 teaspoons minced fresh thyme or rosemary
Pizza dough for one pizza
To make the topping, preheat oven to 400 degrees. Brush sliced potatoes with 1/2 tablespoon of the olive oil, and then season with salt and pepper. Arrange on a baking sheet in a single layer. Bake until the potatoes are done but not brown, about 10 minutes. Watch carefully as they burn easily. Use a spatula to transfer them to a plate.
Increase the oven temperature to 475 degrees and preheat a baking stone for at least 20 minutes.
Heat 1½ tablespoons olive oil in a skillet over moderately low heat. Add the garlic scapes. Season with salt and pepper and sauté until softened, 5 to 8 minutes. Let cool.
Dust a rimless baking sheet with cornmeal. Punch down pizza dough. On a lightly floured surface, roll the dough into a 13- to 14-inch round. Transfer to the baking sheet.
Working quickly so the dough doesn't stick, top first with mozzarella, then with sliced potatoes, garlic scapes, crumbled goat cheese, thyme (or rosemary).
Carefully slide the pizza onto the hot baking stone. Bake until the crust is browned and the topping is bubbling, about 8 minutes.
Pizza Dough
Mix together and knead:
1 cup water
3 tablespoons olive oil
3 cups flour
1 ½ teaspoons salt
1 ½ tablespoons sugar
2 teaspoons yeast
If using a stand mixer to knead, knead about 4 minutes. If kneading by hand, knead about 10 minutes or until smooth and elastic.
After kneading, set aside in an oiled bowl in a warm place to rise until doubled (about an hour). After it’s risen, gently stretch and flatten by hand on round pizza pan sprinkled with corn meal. If the dough is sticking to your hands, oil your hands lightly with olive oil.
Top with desired sauce and toppings and cheese and bake 8-10 minutes in a 450 degree oven.
Additional recipes: To link to a website, 2 Sisters Garlic, featuring scape recipes, CLICK HERE.
Subscribe to:
Posts (Atom)